Setup steps for DKIM signatures
What are DKIM signatures and who are they for?
DKIM (Domain Keys Identified Mail) is a type of digital signature that can be added to emails in order to ensure that they are not forged. It works as an anti-spam protection mechanism both for senders and recipients. You can find out more about it here.
How to add a DKIM signature to email notifications, sent through 123FormBuilder?
First things first, for DKIM (Domain Keys Identified Mail) to work:
- you need to have an Enterprise account and purchase the DKIM add-on, if you are interested in this get in touch with our sales team;
- custom email domains used as sender or from emails need to have properly configured SPF records;
- a new TXT record needs to be created in your organization’s DNS;
- the setup needs to be validated on our side after the DNS is updated;
When editing your forms, you need to navigate to the “Emails” section. In the left side panel, you directly have the orange banner with “DKIM. Interested? Get in touch ->”.
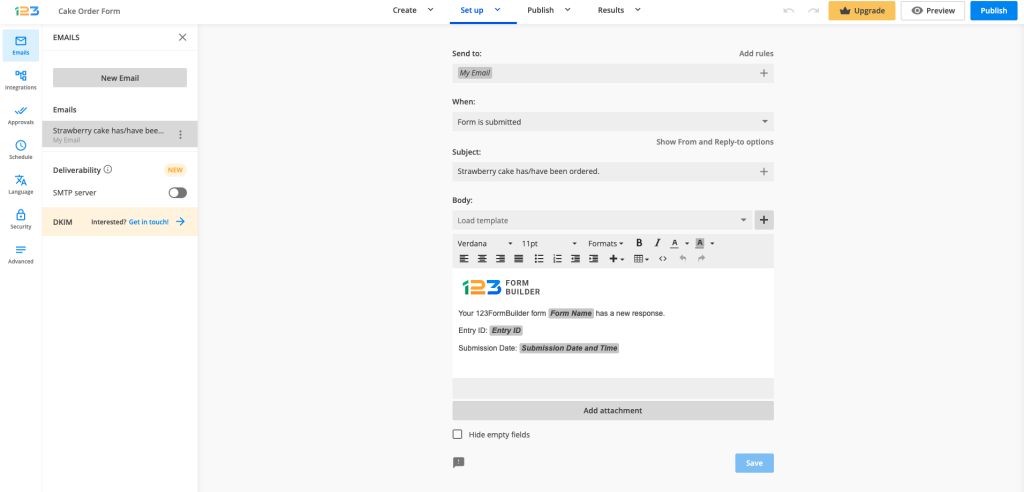
Another option would be to click on “Show From and Reply-to options”. Then you will see: and click on “Show From and Reply-to options”. Then you will see:
- a dropdown that allows you to select a “From email” – which will appear as the sender of the email notification;
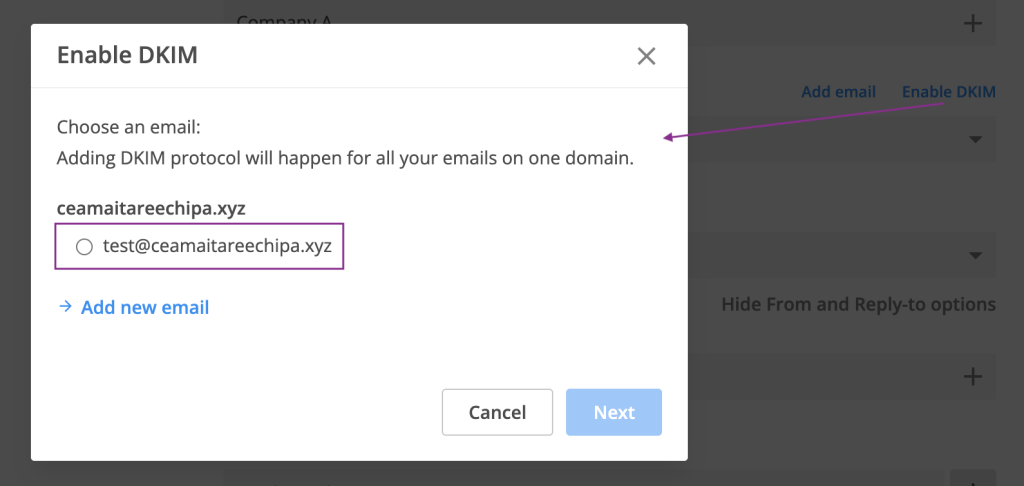
- and two options displayed above this dropdown – Add email & Enable DKIM.
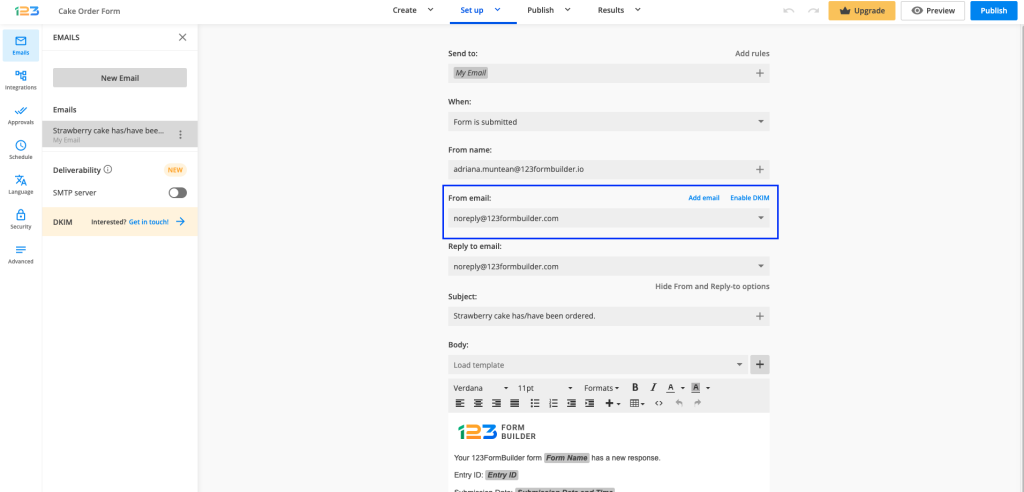
If you don’t want the sender of your email notifications to be noreply@123formbuilder.com or noreply@myfor.ms, but want to use an email from your own domain instead, based on the desired level of security you can either:
- Click on Add email and configure SPF records for your organization’s domain;
- Or click on Enable DKIM and include a DKIM signature to your email notifications, as an addition to the SPF records (which are mandatory for all custom senders).
If you already paid for the DKIM add-on, clicking on Enable DKIM will allow you to choose from two options:
- Add the DKIM signature to a custom domain for which you already configured the SPF records;
- Or, add a new email and configure SPF & DKIM in the same step.
DKIM setup
If you want to add a DKIM signature to an email domain that already has SPF records configured, you just need to select the desired email & click on next.
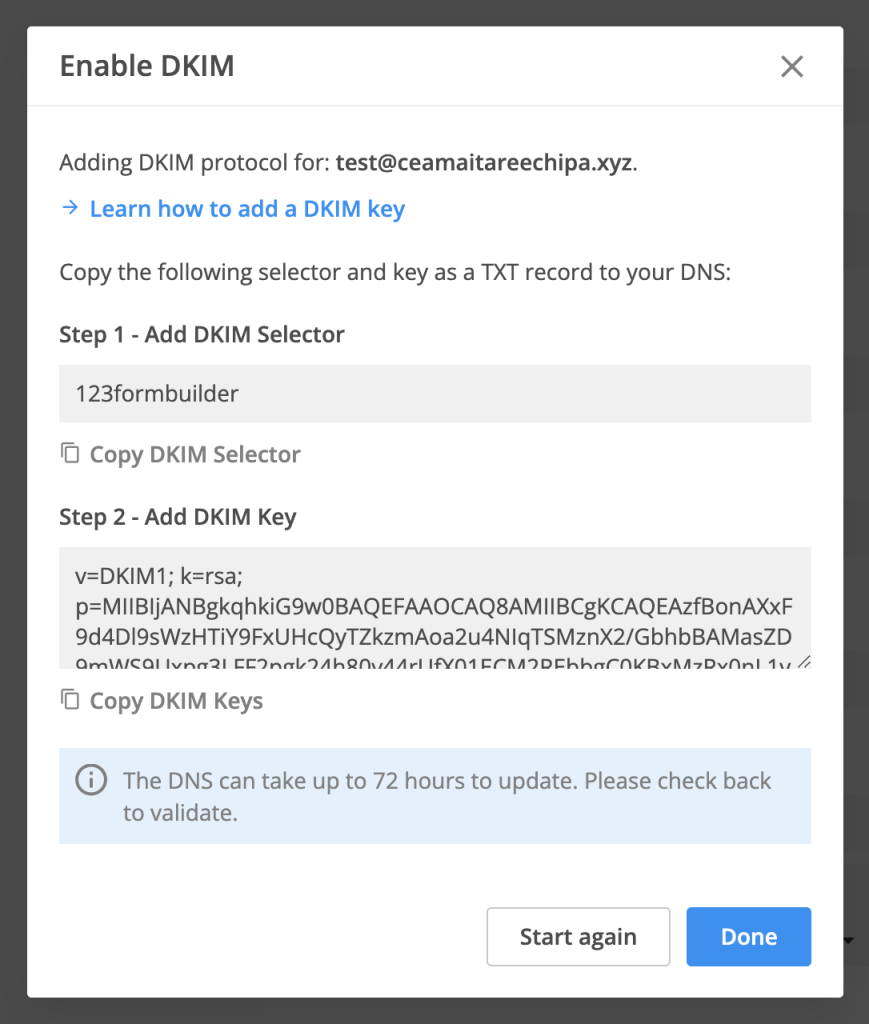
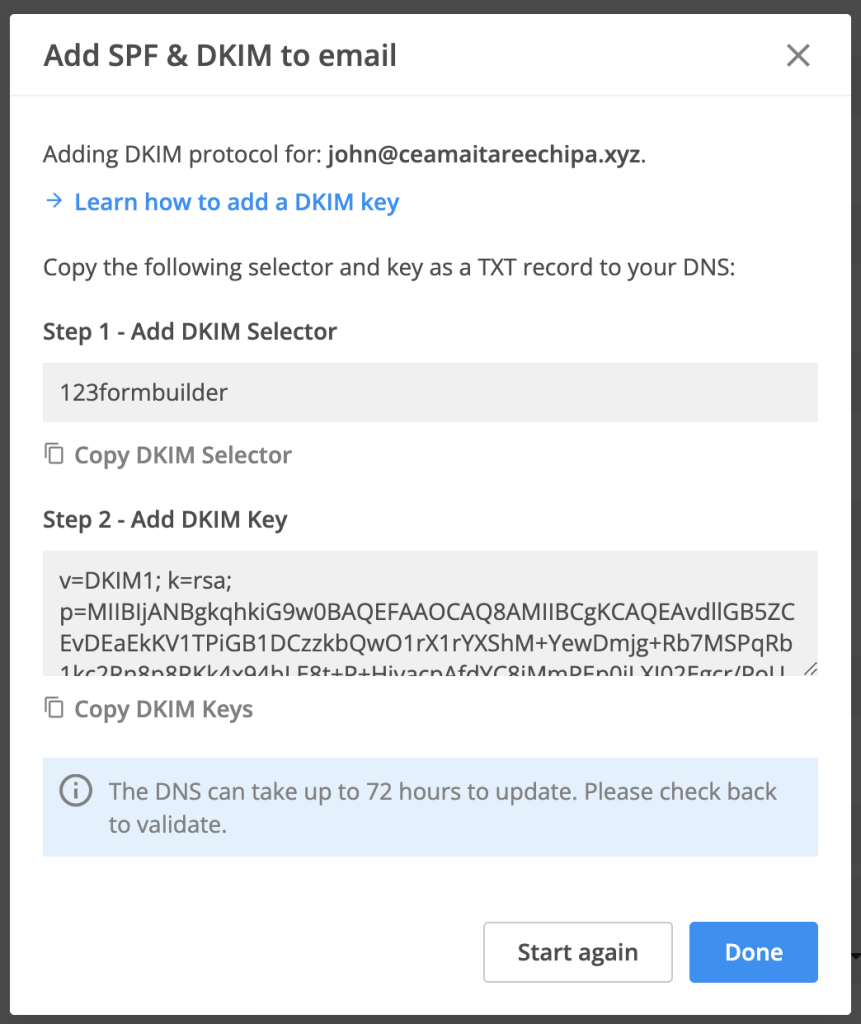
Then you will see a pop-up with DKIM setup details:
- copy the DKIM selector & key, and create a new TXT record with these details in your DNS;
- close the pop-up and wait for the DNS to update;
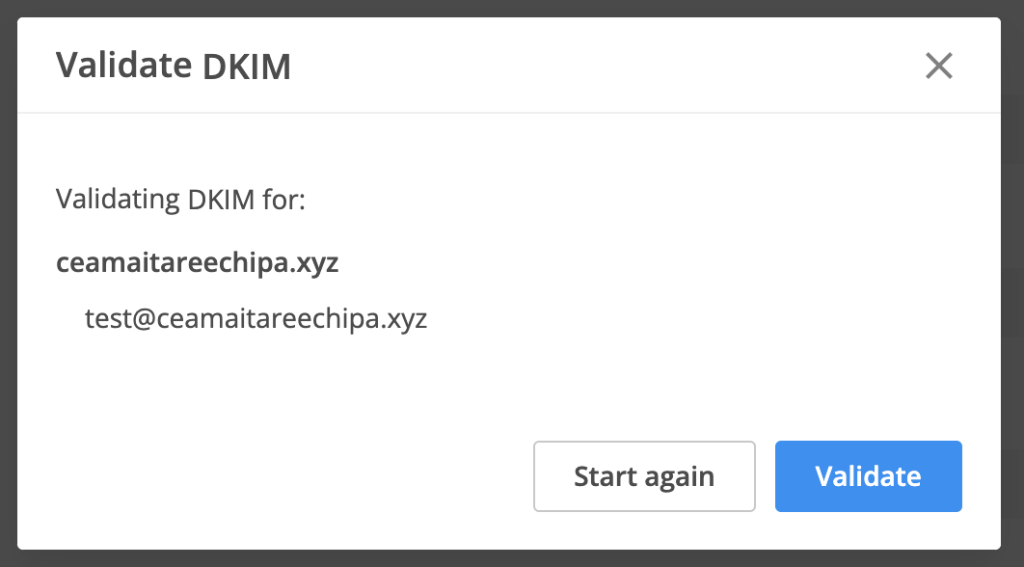
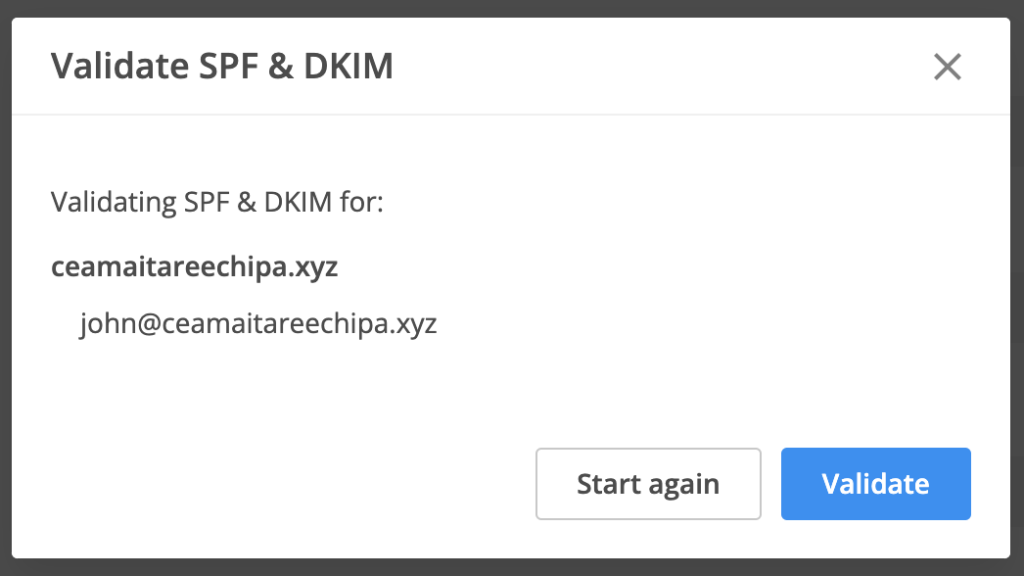
After the DNS is updated, come back to the form, click on Enable DKIM button again and validate the setup. If the setup is valid you will see a success message and will be able to use this email address as the sender for upcoming email notifications. Don’t forget to save the setup once you are done customizing the email.
SPF & DKIM setup
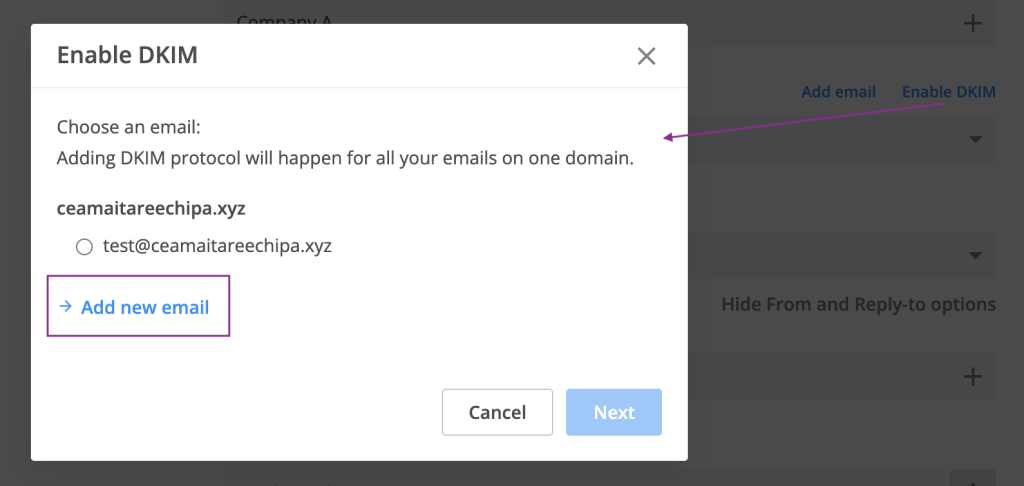
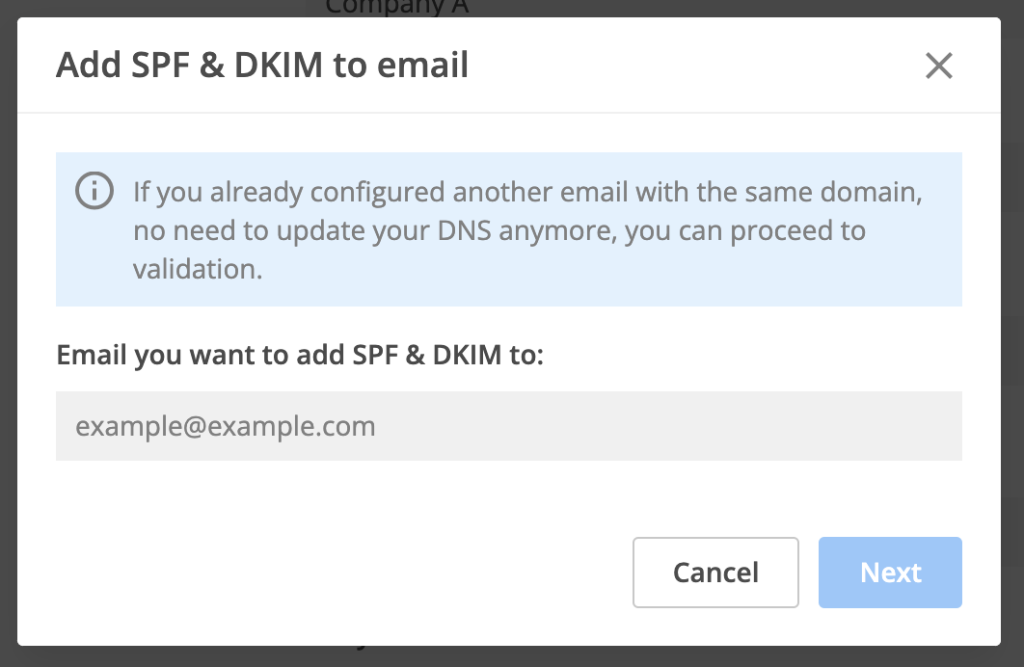
If you want to add a DKIM signature to an email domain that doesn’t have SPF records configured yet, click on Enable DKIM, and instead of selecting an email from the list, click on add new email.
Then you will see a pop-up where you can type the desired email.
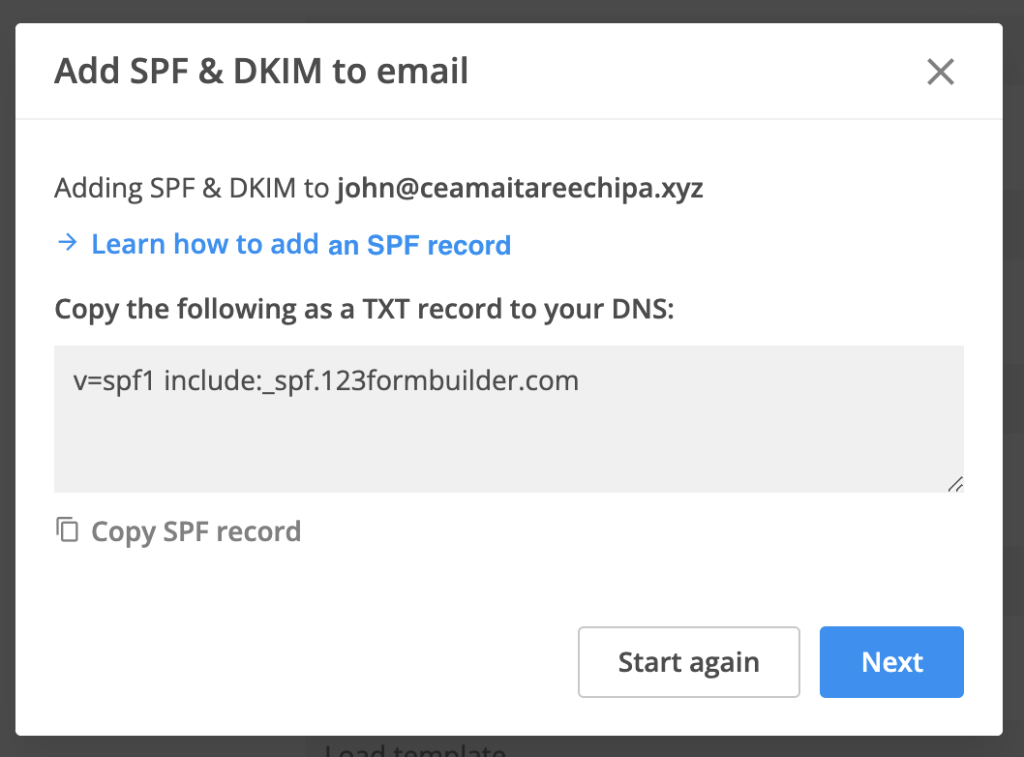
After that, you will be redirected to a pop-up with the setup details for the SPF record. You need to create a new TXT record with these details in your DNS, and click on next.
Then click on next, to see the setup details for DKIM, and:
- copy the DKIM selector & key, and create a new TXT record with these details in your DNS;
- close the pop-up and wait for the DNS to update;
After the DNS is updated, come back to the form, click on Enable DKIM button again and validate the setup. If the setup is valid you will see a success message and will be able to use this email address as the sender for upcoming email notifications. Don’t forget to save the setup once you are done customizing the email.
Tips
- If the validation fails and you receive an error message it means that either:
- the DNS wasn’t updated yet → please wait & validate again after the DNS is updated. In some cases, it can take up to 72h.
- the setup isn’t correct → copy the SPF records, the DKIM selector & DKIM key again and check if they match with the TXT records added to your DNS. If they don’t, edit the TXT records, and validate the setup once more after the DNS was updated.
- If at any point you want to enable DKIM (Domain Keys Identified Mail) for another email from the same domain or form a completely different domain, just click on “Start again” and restart the setup from scratch.
- If you already configured SPF & DKIM records for a domain, you can use any email address from this domain without needing to update the DNS. You just need to add the new email & validate it, before you can use it as sender.
- You do not need to set this up if you are using the default 123FormBuilder addresses (noreply@123formbuilder.com or noreply@myfor.ms), or if you have connected your SMTP server to your forms.
How to make sure the setup works?
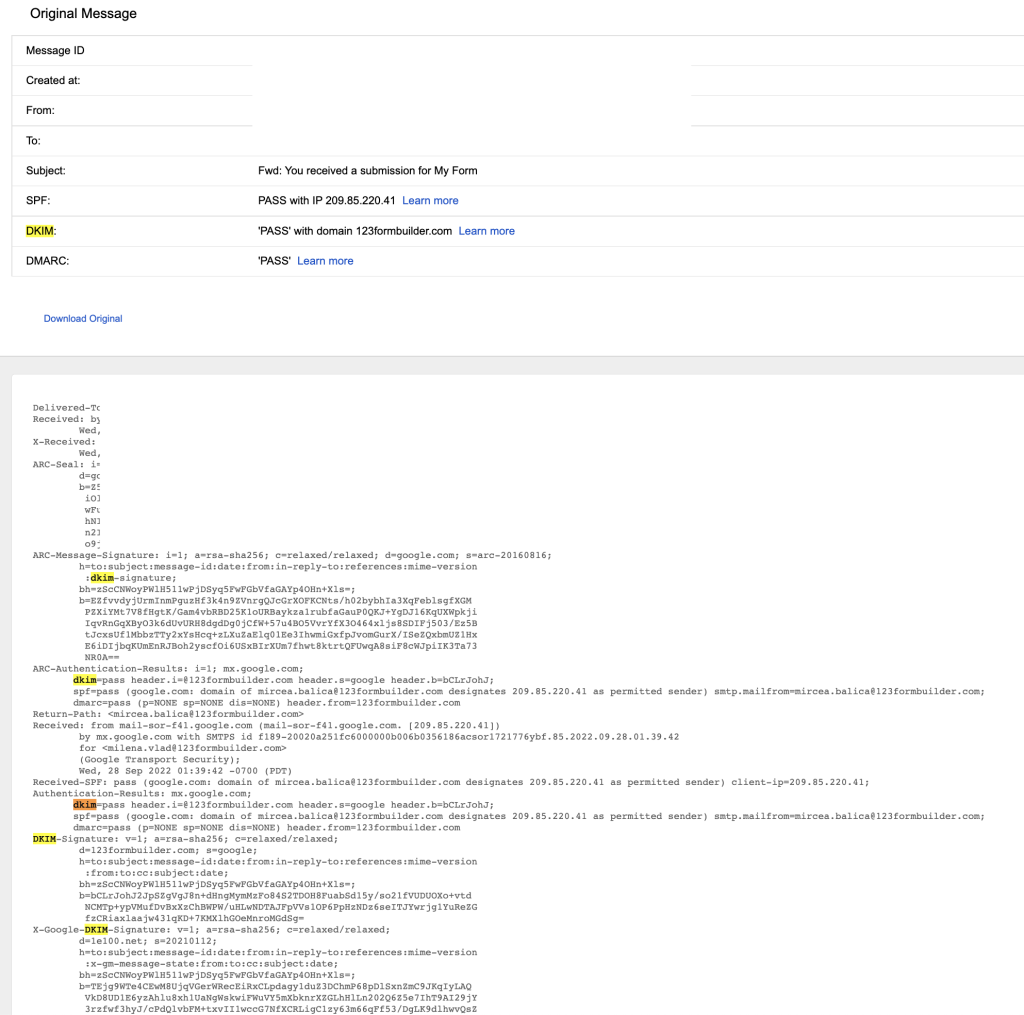
After saving the email notification setup, preview the form and make a test submission. Go to your inbox, open the email notification and click on settings – show original message.
Related articles
Similar Articles
Frequently Asked Questions
Here is a list of the most frequently asked questions. For more FAQs, please browse through the FAQs page.
