[AppExchange – 123FormBuilder] Lookup fields
You can use a lookup to search for specific information within a Salesforce record or object and return the content to the form for further use. This can be done in two ways:
- To map the information to another Salesforce record (use it in the Object Mapping);
- To prefill form fields (use it in Prefill Section).
How to Set Up a Lookup in 123FormBuilder
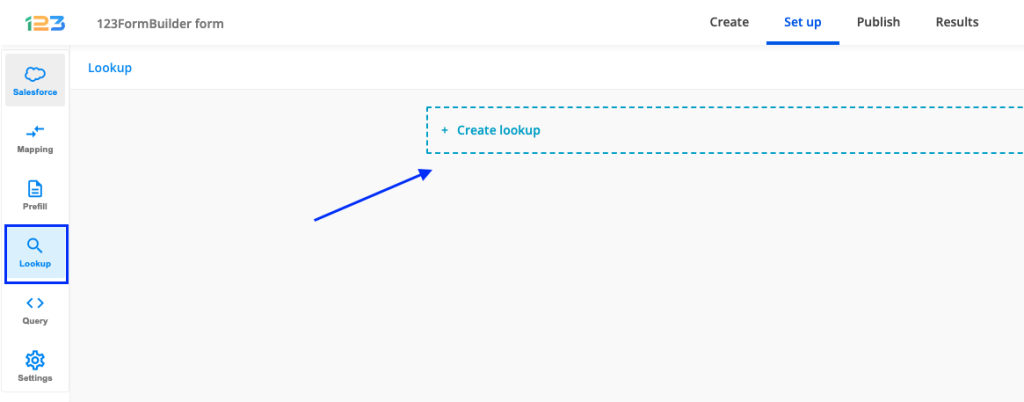
1. First, go to the Lookup section on the left menu and click Create lookup.
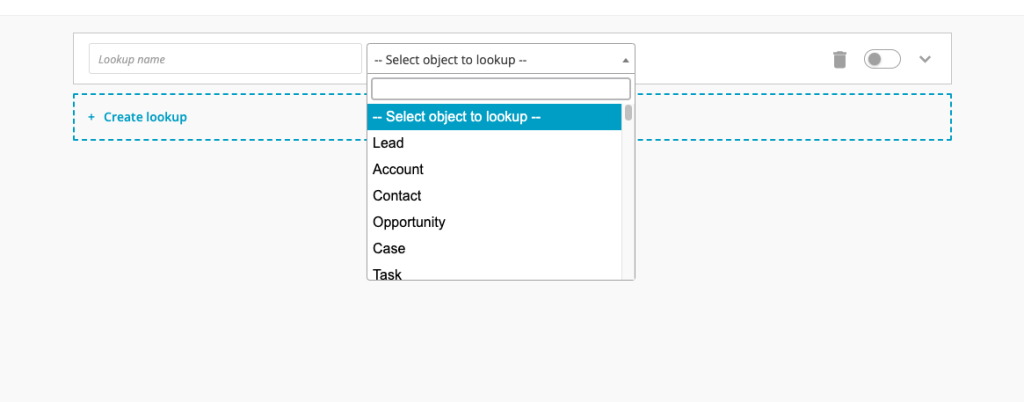
2. Afterward, select the Salesforce object where the search should be made to find a record.
In this case, the object will be Lead.
3. Give a name to your lookup. You might create more than one.
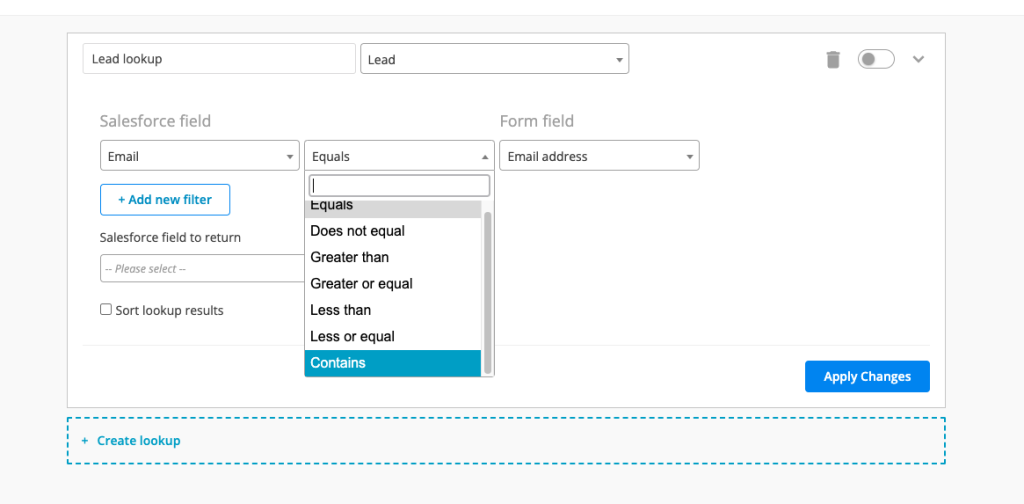
4. The lookup can be based on an entry (or multiple entries) made on the form. You need to add a filter and select the form field(s) that will be used to search in the Lead object.
Note: If you want to return information from all records in a specific object, there’s no need to add a filter. For example, if you want to display a list of all company names from Salesforce on the form, simply create a Lookup in the Account object without applying a filter, and select the Company Name field to return.
5. You can add multiple filters by clicking on Add new filter. By default, between the two filters, the AND logic operator is chosen, but you can change it to OR.
6. If multiple records match the filters, you can select which one should be returned from your object. This option is helpful if there are duplicate records in your ORG:
7. Once you’ve set up the filters and defined what happens if multiple records match, proceed to the Salesforce fields to return section. Here, you can choose the Salesforce fields you want to retrieve from the record. These fields can then be used to prefill form fields or sent back to Salesforce as information for another object
7. Lastly, save the settings by selecting the Apply Changes button.
How to use the lookup results in the Object Mapping:
1. Go to the Object Mapping section and select the object where the field from Leads will be returned, in this case, Account.
2. Select the Salesforce field where the data should be returned and match it with the lookup object you created.
How to use the Lookup results for Prefilling form fields
The lookup data can also be used to populate form fields with information from Salesforce.
1. Navigate to the Prefill Connector.
2. Click Add prefill connector.
3. Go to the Prefill Connector section and select your Lookup:
4. Define Prefill Triggers (if any).
5. Map your Salesforce returned fields to your Form Fields:
Form fields will now be prefilled with the existing Salesforce data retrieved through your lookups.
Note: Ensure that the field types in your form match the corresponding field types in Salesforce. This includes aspects like input types, date formats, and character or value limitations.
There are different types of prefill, each with its own setup process. To learn more, read the articles on this topic:
- URL prefill setup (when the form is shared/used from the Salesforce side – eg: form link is sent in an email).
- Dynamic Prefill (used when you need input from the form visitor to trigger the lookup & prefill).
- Experience Prefill (the form is published on an Experience page).
4 comments
Leave a Reply
Your email address will not be published.
Similar Articles
Frequently Asked Questions
Here is a list of the most frequently asked questions. For more FAQs, please browse through the FAQs page.


I have same issue. Is it solved somehow?
Hi there! Please reach out to us at customercare@123formbuilder.com with more details about the issue you’re experiencing. Once we have that information, we’ll ensure it’s addressed as quickly as possible.
When you add two different conditions, this stops working. For example, I want to prefill my form with a list of accounts that are either of the type “A” OR type “B”. As soon as you add in the second value, it stops working as a prefill and the field just shows as a blue color. How do you add two conditions and have the prefill still work?
Hi Angela, please contact us at customercare@123formbuilder.com and share with us the email address of your 123FormBuilder account as well as the name of the form so we can also check out this setup. Thank you and we look forward to hearing from you!