Payment Processors
With 123FormBuilder, you can connect your online form with various payment processors, such as PayPal, Authorize.net, Sisow, PayPal Pro, PayPal PayFlow, Stripe, PayU, Braintree, FreshBooks, and PayFast.
You can add a payment processor by navigating to the Payments section. Depending on your needs, select your desired processor from the list and add your account credentials (username, password, API key, as requested).
Examples of setup
In order to have a payment processor working correctly, you have to assign prices to fields in your form.
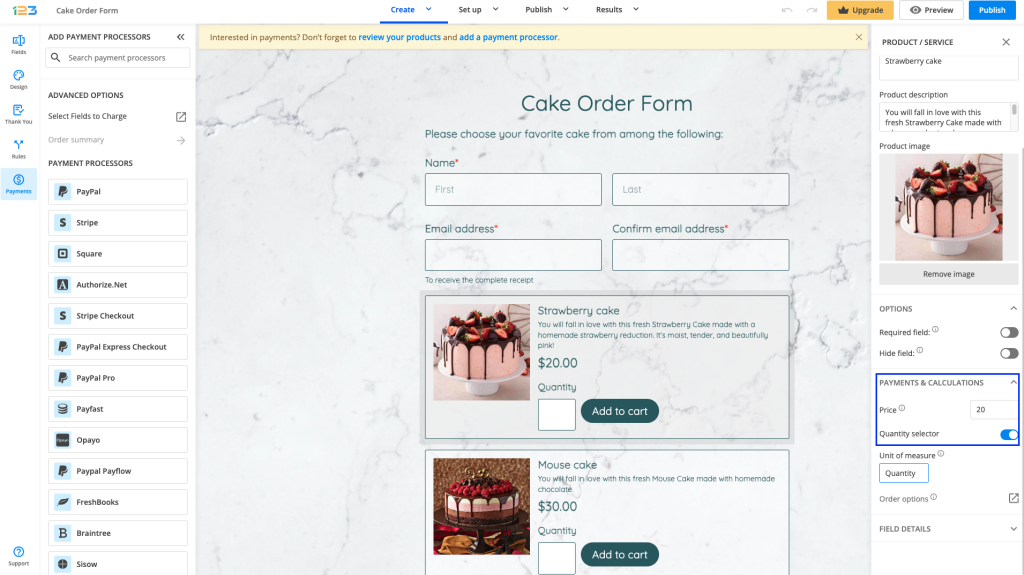
Let’s take an example. We’ve created a form with 2 Product fields. All you have to do is assign a price to each of the product fields by going to the Payments & Calculations section and adding a Price.

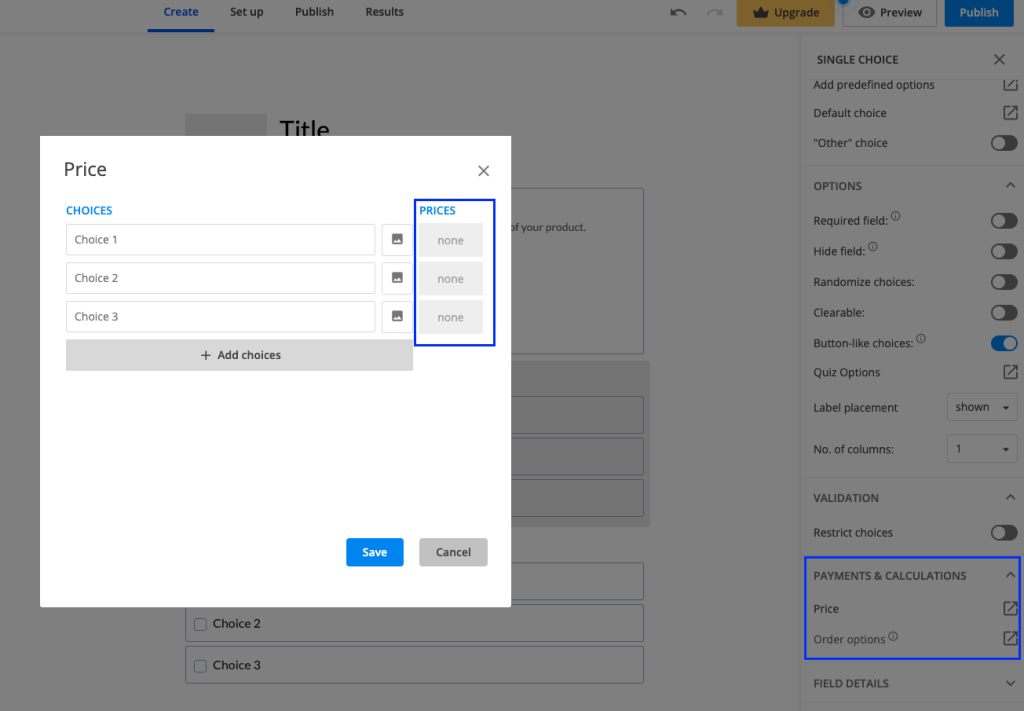
For Single/Multiple choice fields, you can follow the same actions: go to the Payments & Calculations section and open up the Price modal. For each choice, you can now add its price and click on Save.
After adding prices to your fields/options, you can see an informative banner above your form. All you need to do now is to add a payment processor to your form.

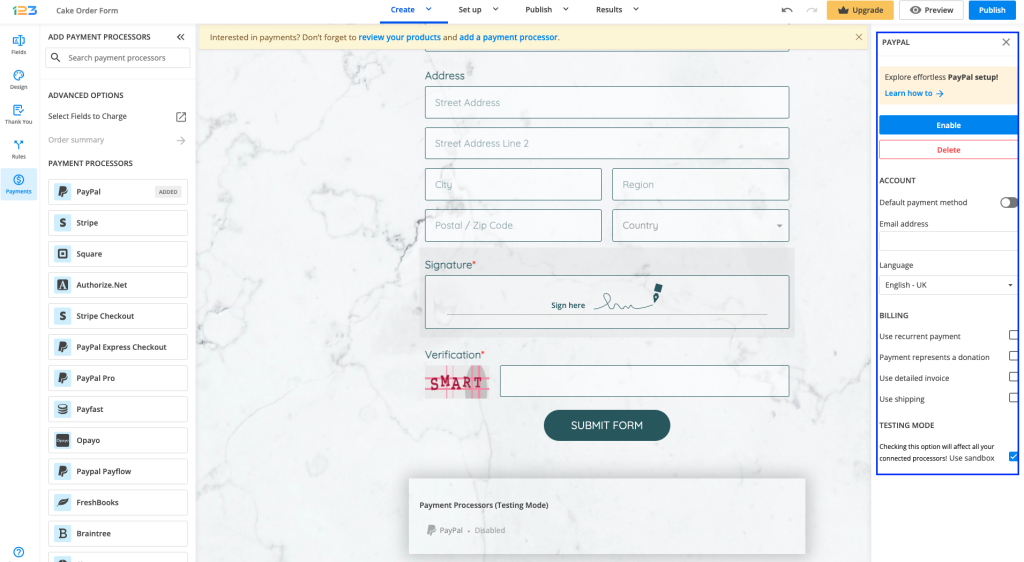
To accept payments via PayPal, you will need to enter your PayPal email address and your preferred language.

For the Authorize.net integration, you will need your API Login ID and your Transaction Key. All this information is provided when you create your Authorize.net account.
Further, you can choose your desired currency and specify, if needed, the payment recurrence (daily, weekly, monthly, yearly). However, it is important to mention that not all payment processors offer a recurrent payment system. Visit our Payment Gateways Comparison Chart for more details.
Sandbox testing
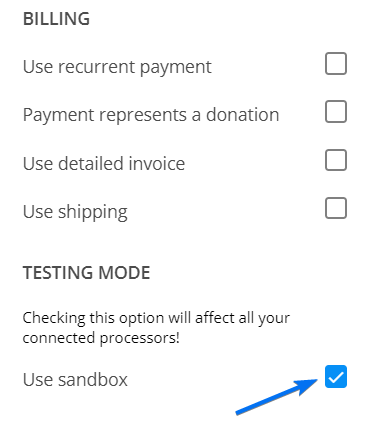
If you want to test the way your payment processes work, enable the Use sandbox option. Don’t forget to disable this option before sharing your online form with your customers.
Respondent’s experience
Once you have added and enabled your payment processor on the form, you will notice some changes.
An Order summary is displayed on the form. Here will be displayed all the products/choices that your respondents choose and have a price assigned.
The Submit button is changed to Continue to payment – this is to help respondents understand that a payment will be performed. Thus, you are increasing your chances of having a complete submission with a successful payment.
Below the Continue to payment button, respondents can see what payment processor is used for making the payment. In our example, we have PayPal – and below the disclaimer that is meant to give respondents confidence in your form, they can see the accepted cards for making the payment.
Video tutorial
For more details, you can check out our short step-by-step tutorial on how to add payments to your forms:
Related articles
6 comments
Leave a Reply
Your email address will not be published.
Similar Articles
Frequently Asked Questions
Here is a list of the most frequently asked questions. For more FAQs, please browse through the FAQs page.


Hi there,
I am in Australia. Can I use eWAY as my eCommerce merchant ?
thank you
Hello, at the moment we integrate only with the payment processors listed in the article. When we will expand our payment processors integration list we will take into consideration looking at the one suggested by you. Have a great day!
Hey, can i put coinbase payment gateway api or any other crypto payment gateway to accept bitcoin and ethereum in 123formbuilder?
Unfortunately, the only way to accept payments through our forms is by enabling a payment processor. Check out our Payment Gateways Comparison Page here. Thank you!
Do you accept payment from the Heartland Payment Processor?? I know it’s not on list but I figured I’d ask.
Hi Richard,
At this time we do not provide integration with Heartland Payment Processor.
You can view all Payment gateways we provide integration with on our features matrix here: https://www.123formbuilder.com/features-matrix.html