123FormBuilder Knowledge Base
Search our documentation platform for answers, service specifications and 3rd-party integrations.
Online and Offline Payments with forms created in 123FormBuilder tool
Collecting money via forms is an easy and fast way to grow your business. Our form builder provides a very simple way to receive payments with your forms through multiple payment processors. You will be able to accept donations, orders, and subscription fees easy as 1-2-3. Offline payment suggests that money is transferred at a later date. With an offline payment as a method, form users can pay by check, invoice, on-site or other options.
Both online and offline payments are important to consider when creating an order or registration form.
When you enable the payment integration, the form automatically redirects to the payment page. Form rules can redirect users to another webpage based on the user’s input. Form rules will have priority over the redirect to the payment summary page.
First, you need to establish the condition when to redirect to that webpage URL.
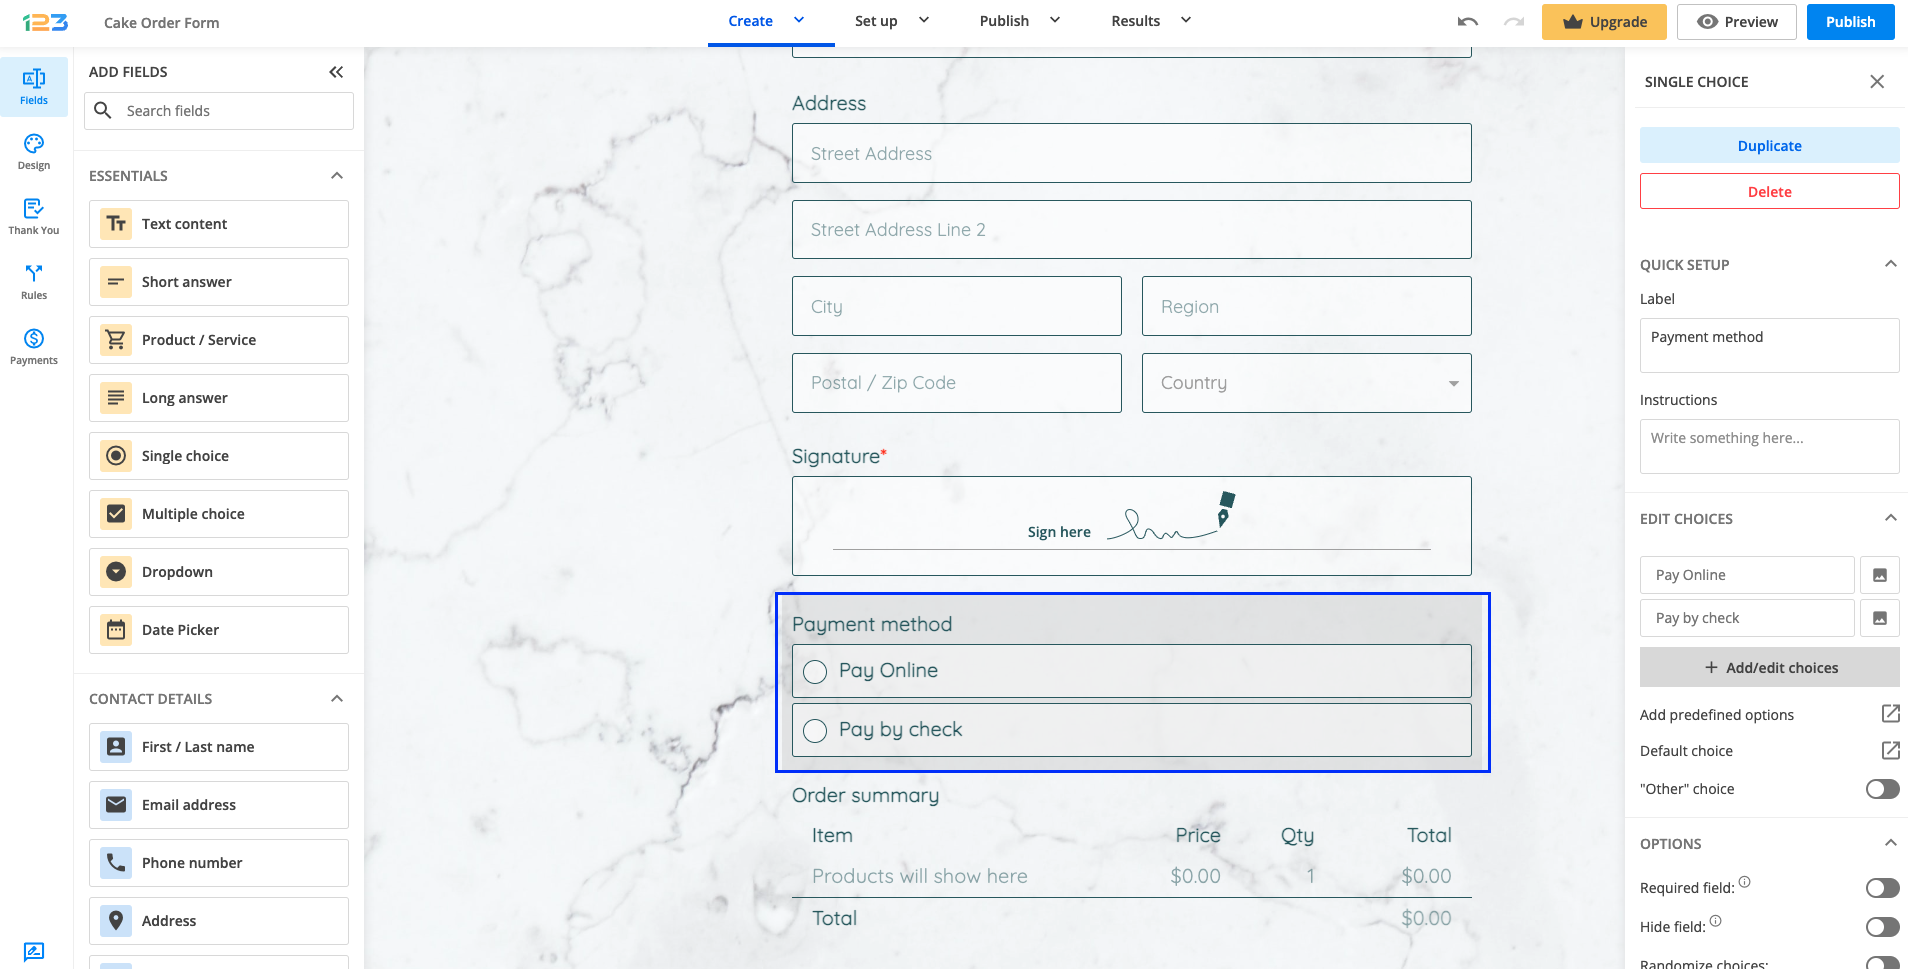
Open your Form Editor and add a choice field. In our example, we labeled it Payment Method and listed two options: Pay Online and Pay by Check. To ensure that the user checks one of them we mark the field as required.
At this point, even if a user chooses either of those options, the redirect will still be made to the payment page.
Navigate to Rules and switch to the Form Rules tab.
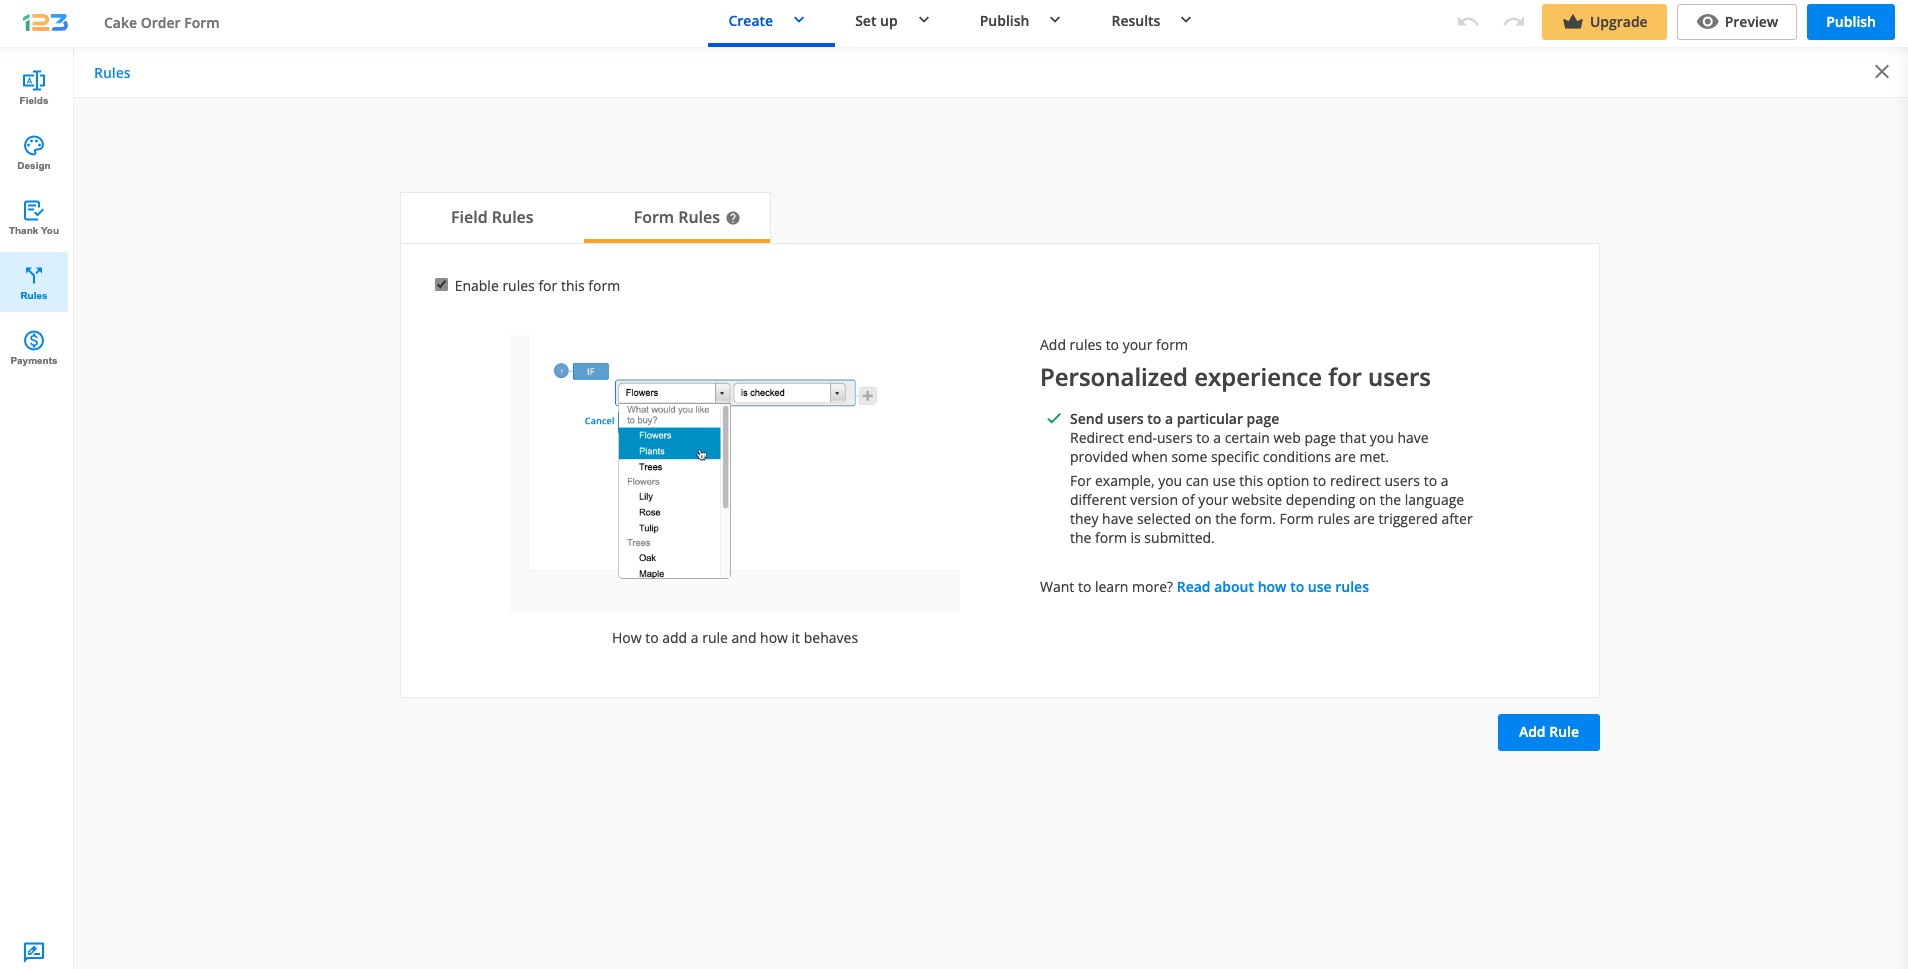
Create a new rule, like the following:
If Pay by Check is checked
Then redirect to ______ (paste your webpage URL)
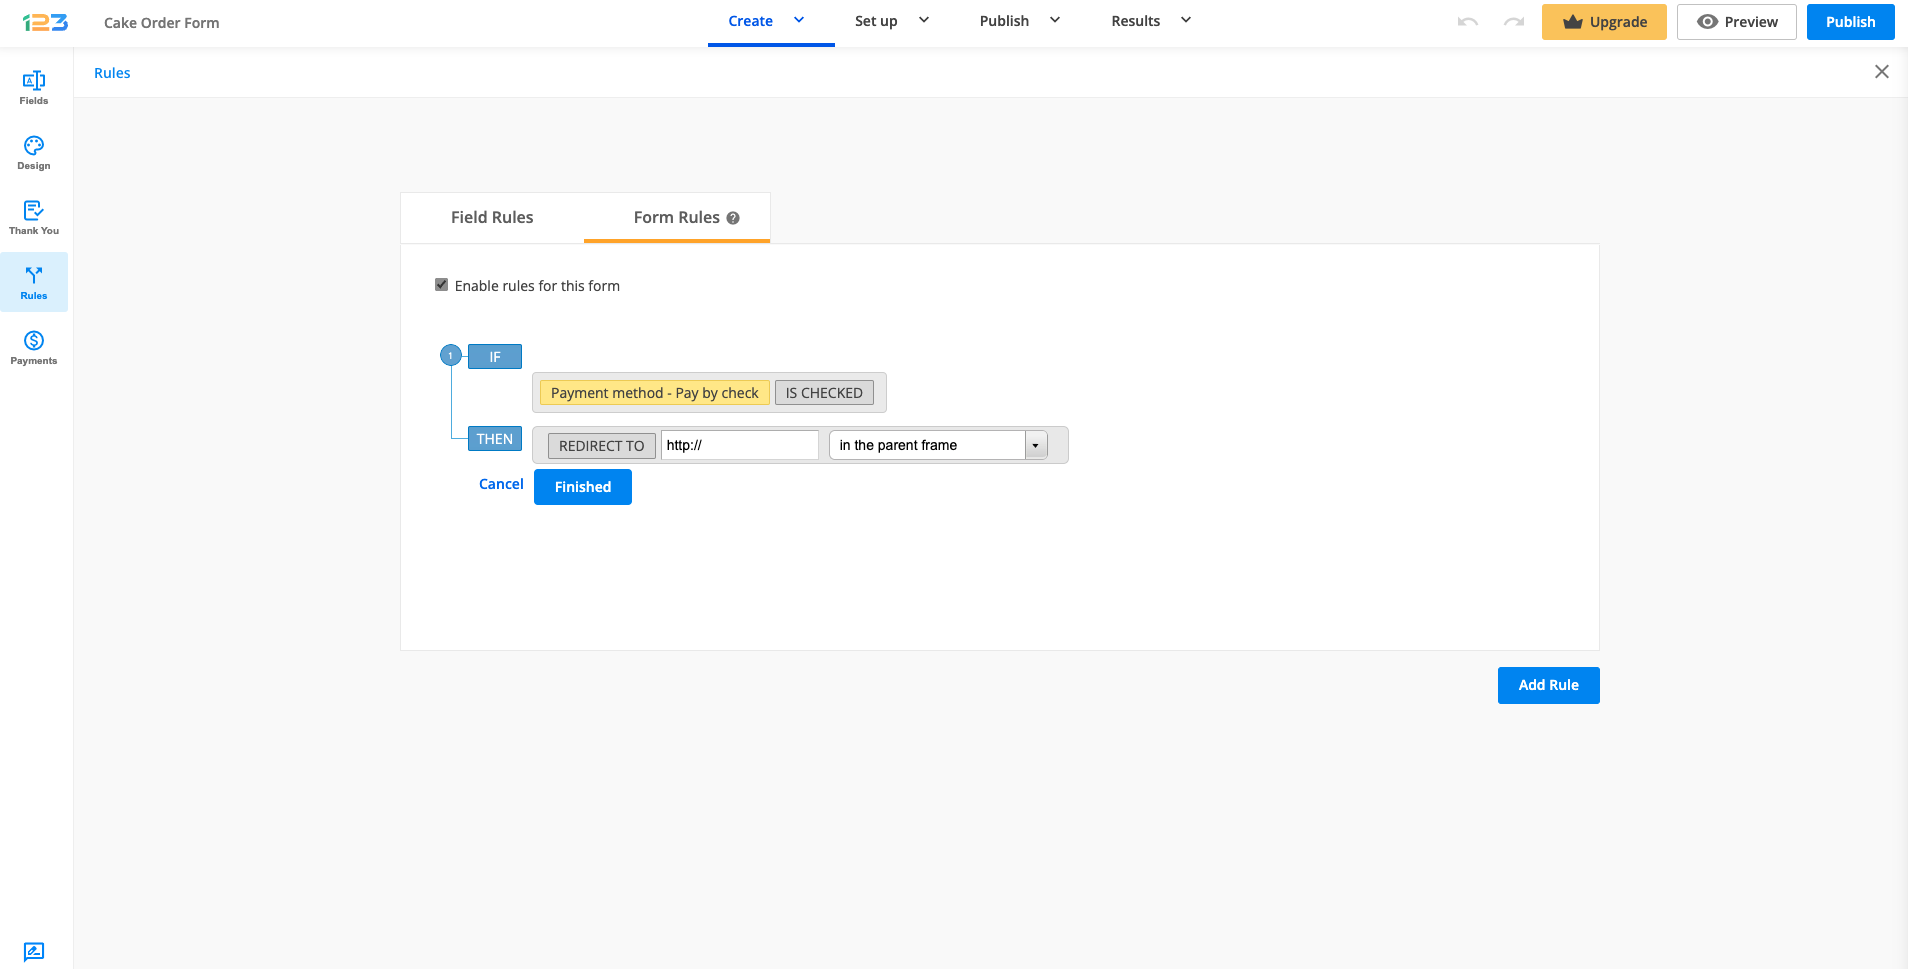
Each time Pay by Check is selected, the redirect to your webpage is made. When Pay Online is checked, the redirect will be made to the payment summary page.
That’s it! Now you have a form with both online and offline payment options.
4 comments
Leave a Reply
Similar Articles
Frequently Asked Questions
Here is a list of the most frequently asked questions. For more FAQs, please browse through the FAQs page.
Is there a way to only submit the form if payment is taken? We have found many people submit the form (which we use for event RSVPs, and then don’t go through with payment and we have a manual process to try and follow up with them to get the funds.
Hi there,
Thank you for your question.
At the moment, it’s not possible to delay the form submission until after a payment is completed. The redirect to the payment page is triggered by the form submission itself, so the form data is saved regardless of whether the user finalizes the payment.
We understand how this can impact event workflows, and while a built-in solution isn’t available right now, we’ve shared similar feedback with our product team for consideration in future updates.
As a workaround, you can set the confirmation email to be sent only when the payment is successfully completed. This way, users will only receive the confirmation (and any related event details) after they’ve finalized their payment.
If you’d like help setting this up, feel free to contact us via email or live chat.
Best regards,
Does the form get automatically submitted when it goes through a redirect?
Hi there! Yes, the form is automatically submitted when it goes through a redirect. Once the submission process is triggered, the form data is captured and the user is redirected to the specified URL without the need for additional actions. This ensures a seamless transition after form submission.