123FormBuilder Knowledge Base
Search our documentation platform for answers, service specifications and 3rd-party integrations.
Knowledge Base
The Reset button clears user input and allows users to start over.
To add this option to your form, access the Editor and click on the Submit button area. From the right-side panel, enable the Additional buttons toggle and tick the checkbox Clear all answers.

Once you have enabled the Clear all answers option, a new section will appear in the right-side panel, Reset button, where you can edit the text shown on the button.
When you preview your form, you’ll see that the new button has been added next to the Submit button. Respondents simply need to click it in order to clear all the input they have provided and start from scratch.
Related articles
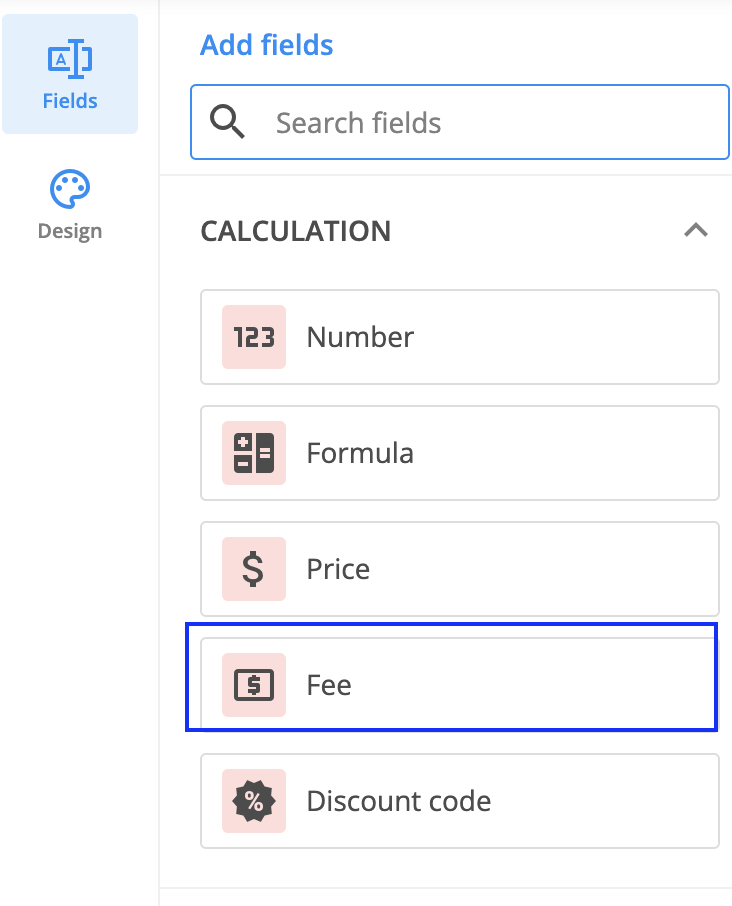
We want to make your order forms easy and efficient. Since our order form creator is complex with a lot of discounts, taxes, and different calculations, we developed a new feature called the Fee field.
Open the Form Editor within the form builder and from the Calculation section, select the Fee field. This adds a static cost to the total.
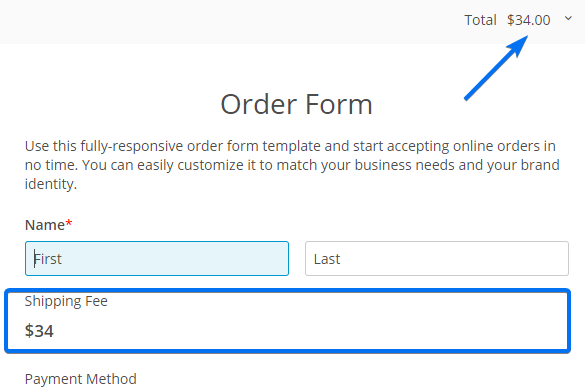
In the field’s left-side panel you can establish the base price. It will be automatically incorporated into the payment summary.
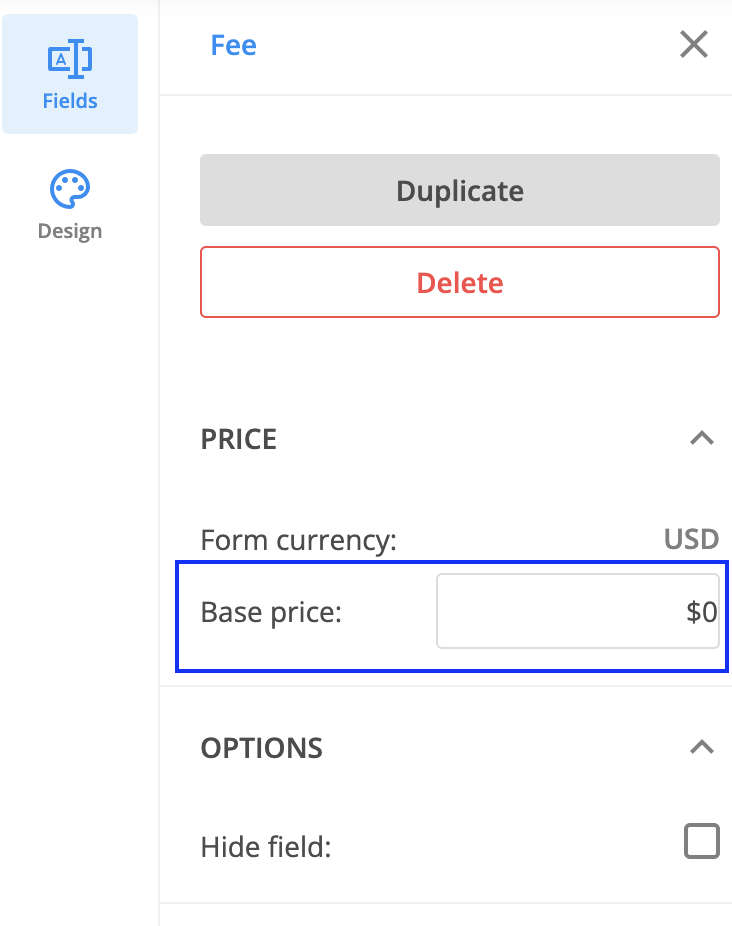
If you do not want the field to be displayed on the form, make the field hidden.
If you were wondering how to add Google fonts to your online forms, here is how to do it with our CSS form generator:
1. In your 123FormBuilder account, select the desired form and open the Form Editor.
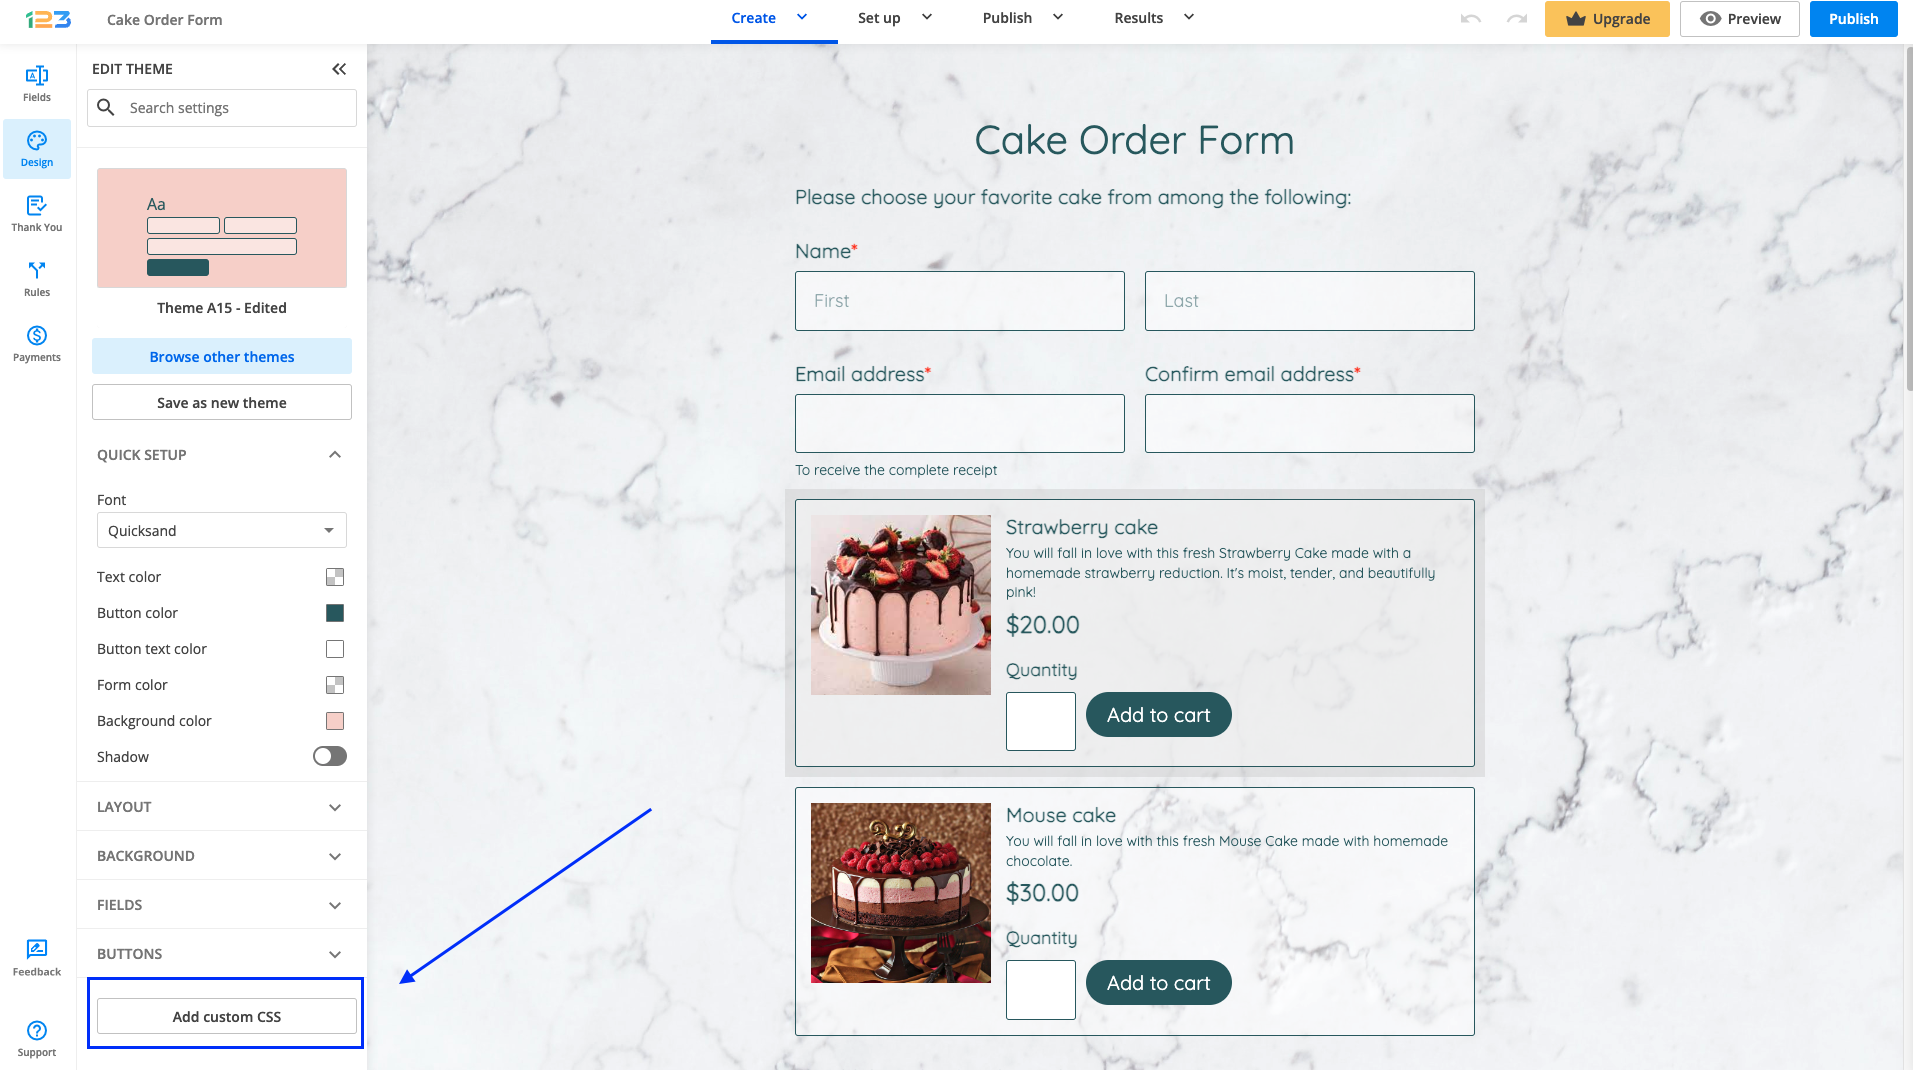
2. Afterwards, go to the Design section of your form and click on Add custom CSS.
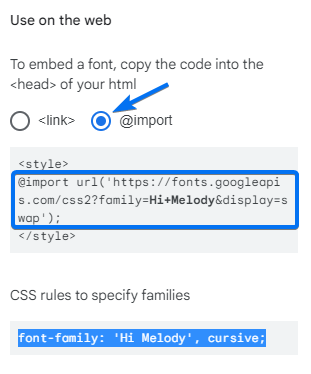
3. In the custom CSS box, paste the Import URL from Google Fonts:
@import url(//fonts.googleapis.com/css?family=Lobster);
#form * {font-family: 'Lobster', cursive;}
Replace Lobster with the Google font you want to use and cursive with the type of font used (e.g sans-serif, serif, monospace). All the information regarding your font is listed under the CSS rules section.
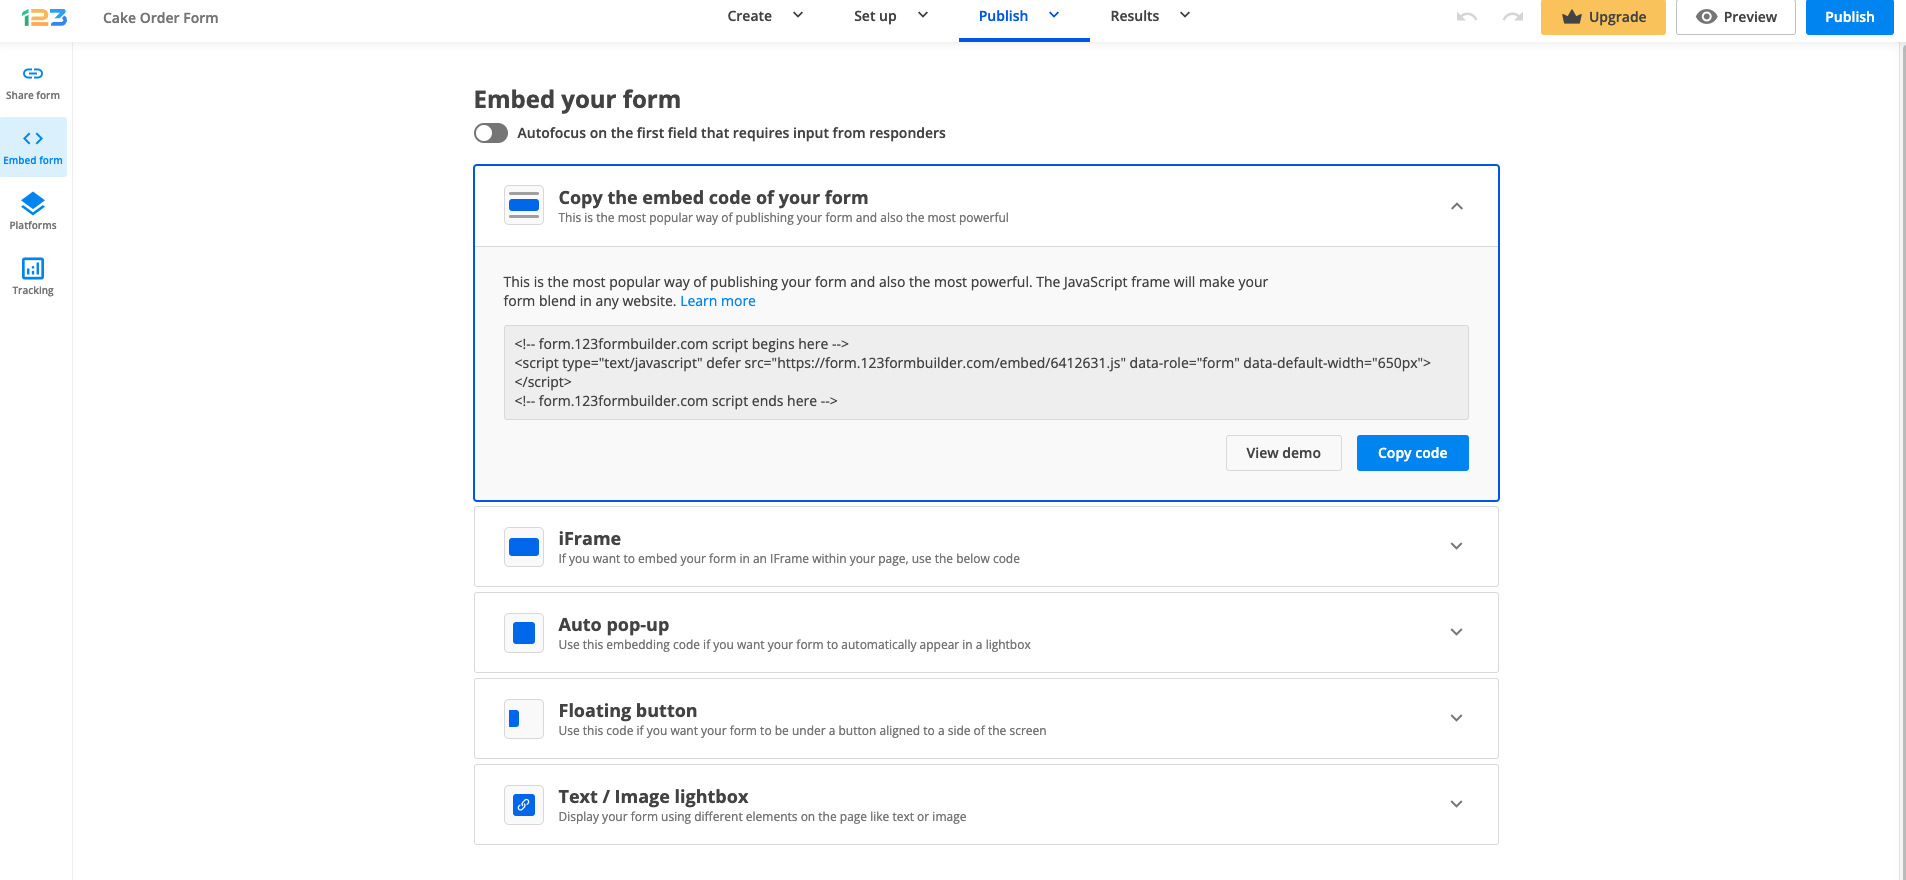
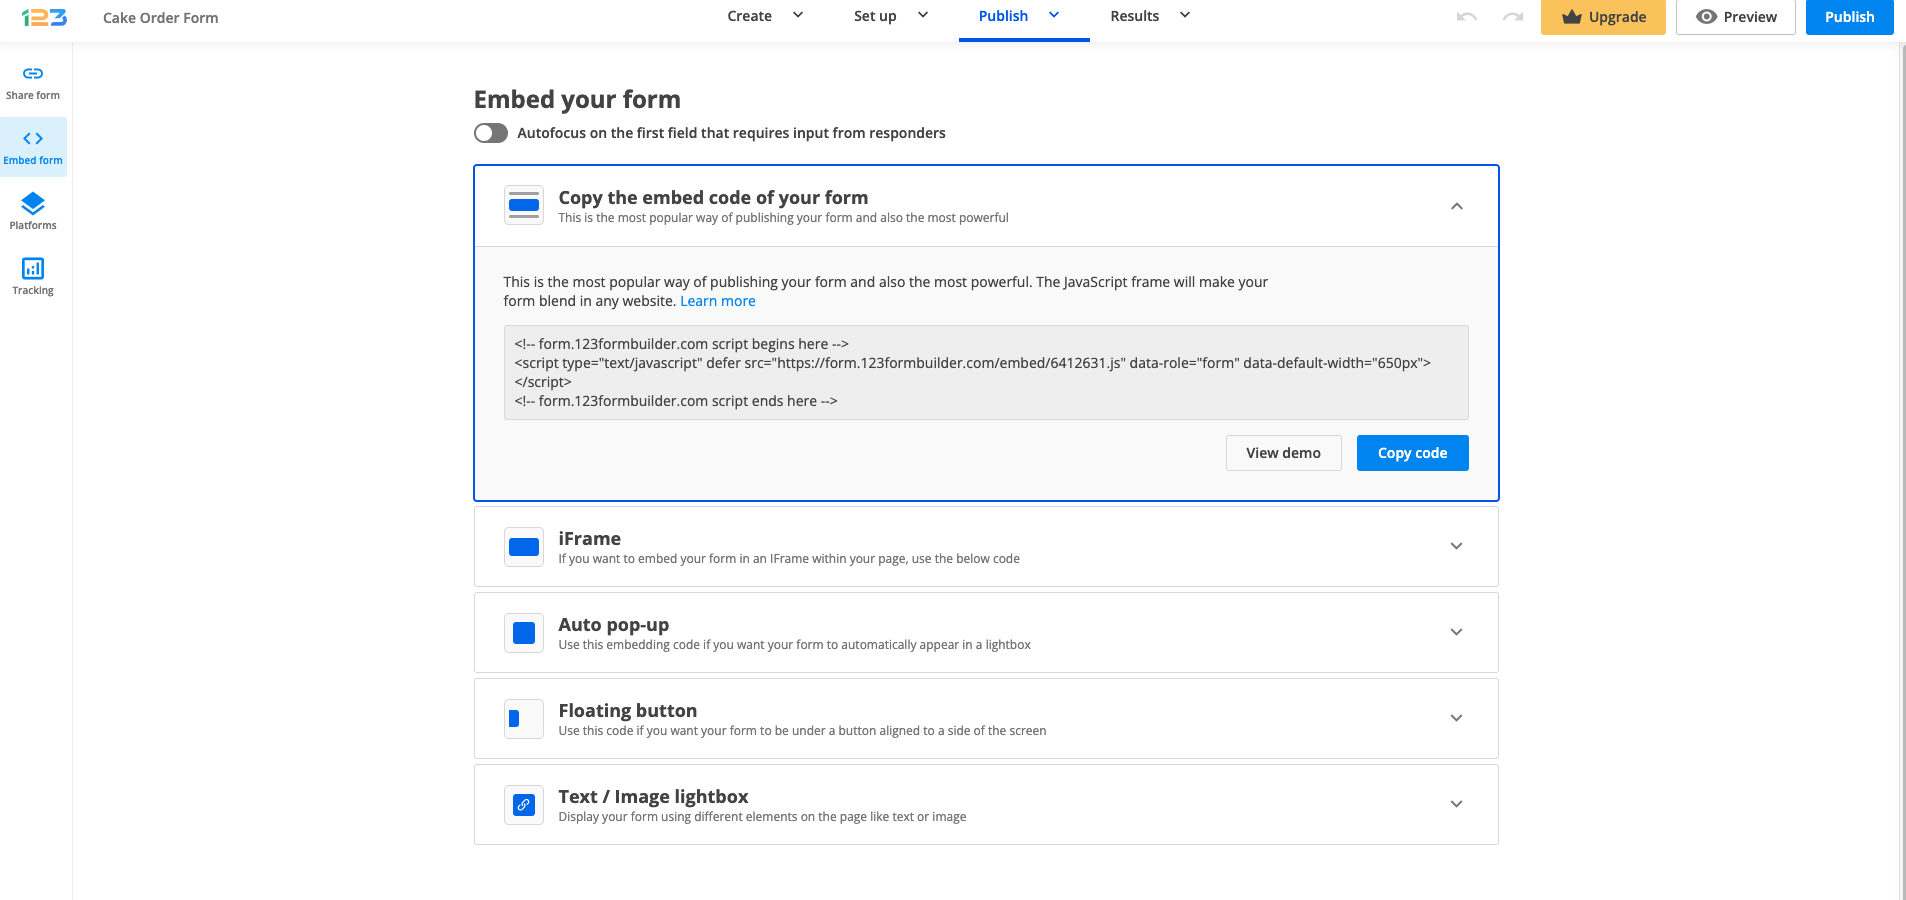
In order to add a 123FormBuilder online form to your Strikingly webpage, you have to head over to Publish section, under Embed form options. Here you have five embed options to choose from: JavaScript, Iframe, Auto pop-up, Floating button and Text/Image lightbox. We recommend that you copy the JavaScript code and use it in the HTML widget of your Strikingly page. This way, whenever you edit your web form in 123FormBuilder, the changes will automatically apply to your Strikingly webpage.
To add a web form from your 123FormBuilder account to a Strikingly webpage, go to the Publish → Embed form section of your web form and copy the JavaScript code located on top.
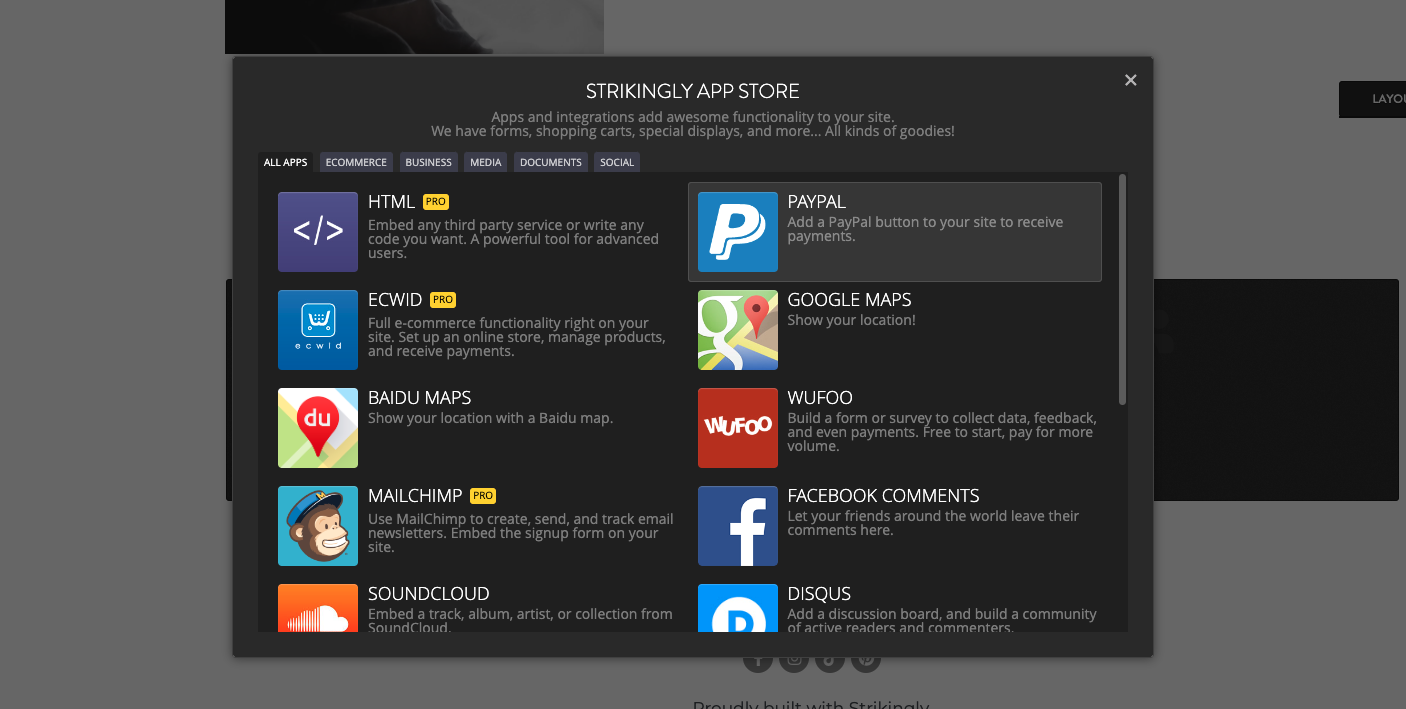
In your Strikingly account, access the editor of the webpage where you want to add your online form. In the Editor Panel, click on Add New Section, Advanced and then on App Store & HTML.
Once the section has been added to your page, click on Edit and select the HTML app from Strikingly (in the All Apps or Pro tab).
Finally, paste the JavaScript code of your web form in the Custom HTML Code box and hit Save.
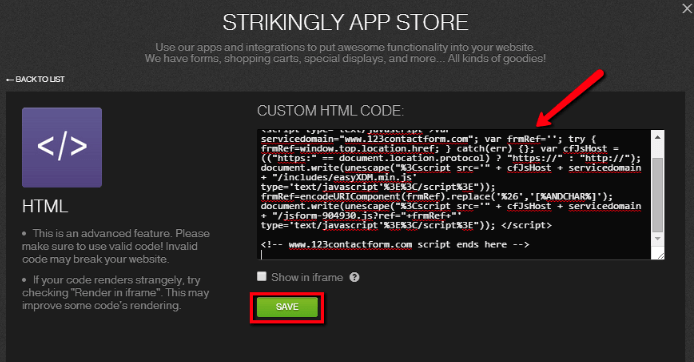
You’ll notice that the web form is displayed on your web page, although its canvas might not expand to its original size. However, that does not mean the same will appear for your page visitors. Hit Preview in the Editor Panel and you’ll see the web form is smoothly displayed.
From now on, your page visitors can submit the web form directly from your Strikingly webpage. Don’t forget to save changes to your webpage before leaving, of course. All form data will be sent to your 123FormBuilder account, in the Submissions section of your web form.
Embedding calendars from your Google Calendar account on web forms can raise the aspect of your business, making your forms look both professional and interactive. To add a Google Calendar to any of your web forms using our form builder, you’ll need to get its iframe code from your Google Calendar account and add it to an HTML Block of your form. Follow these three easy steps to have your Google Calendar embedded on a web form in 123FormBuilder:
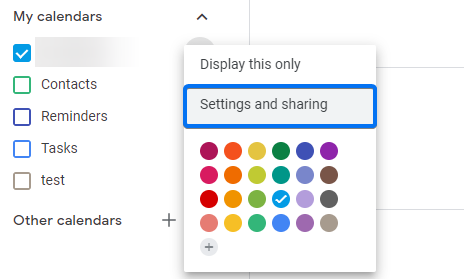
1. In your Google Calendar account, go to My calendars → your calendar → Settings and sharing.
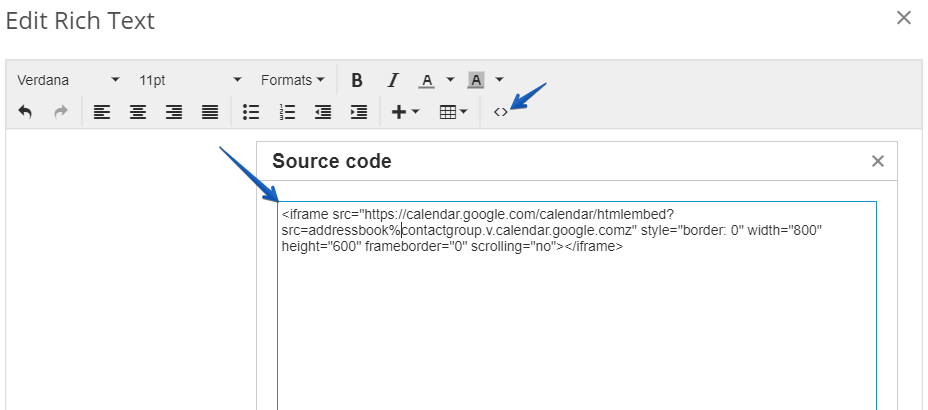
2. In Calendar Settings, copy the iframe code from the Embed code section.

3. In 123FormBuilder, add an HTML Block to your web form, edit it and in Source code paste the iframe code.
Don’t forget to hit Ok and afterward Save to finish. If the calendar isn’t embedded accordingly on your form (e.g. it’s stretched outside the form frame), return to Source code and change the values of the parameters width and height. The calendar will resize on your form as soon as you have saved your changes.
Important Note
Your calendar has to be made public in order to see it on your web form. To add an iframe to your forms please contact us. An additional option needs to be enabled from our end.Combine this trick with our Google Calendar integration app for your web form. The calendar embedded on your form will show all events in real-time. Therefore, it will be much easier for your form visitors to choose which event they want to attend.
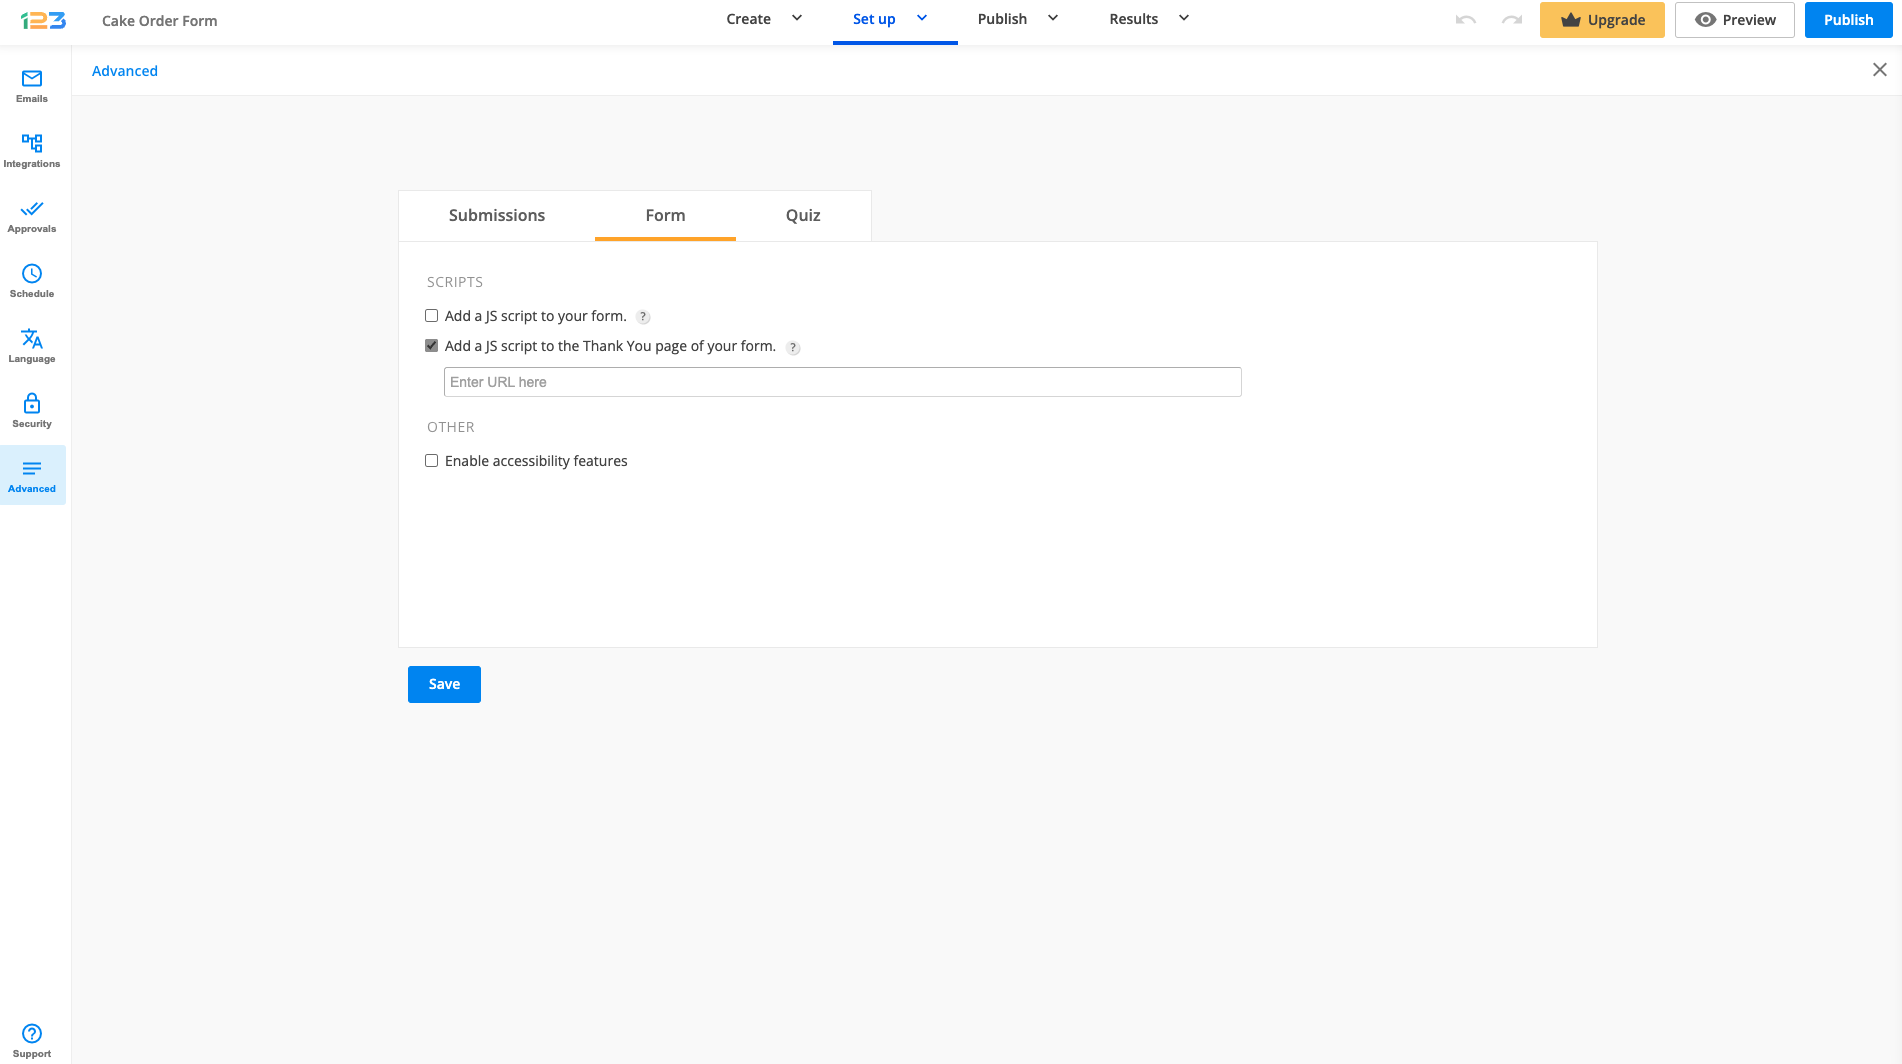
If you want to add Javascript code to the Thank You page of your form, you can do that in the Advanced → Form section within the form builder. Tick the box Add a JS script to the Thank You page of your form. Paste the script URL and click Save.
Upload the JS file on a trusted web server or your own and use the URL where the file is located (e.g. https://mydomain.com/my-javascript.js). There are web services that host JavaScript files for you, but they represent certain risks, such as data corruption or service retirement. That’s the reason why it is best to host them on a web service where you have administrative access.
Related articles
When using quiz form on your 123FormBuilder account, you can opt to add the quiz score of each submission to any custom email templates. To include the quiz score in an email template, firstly you will have to select the template you are interested in.
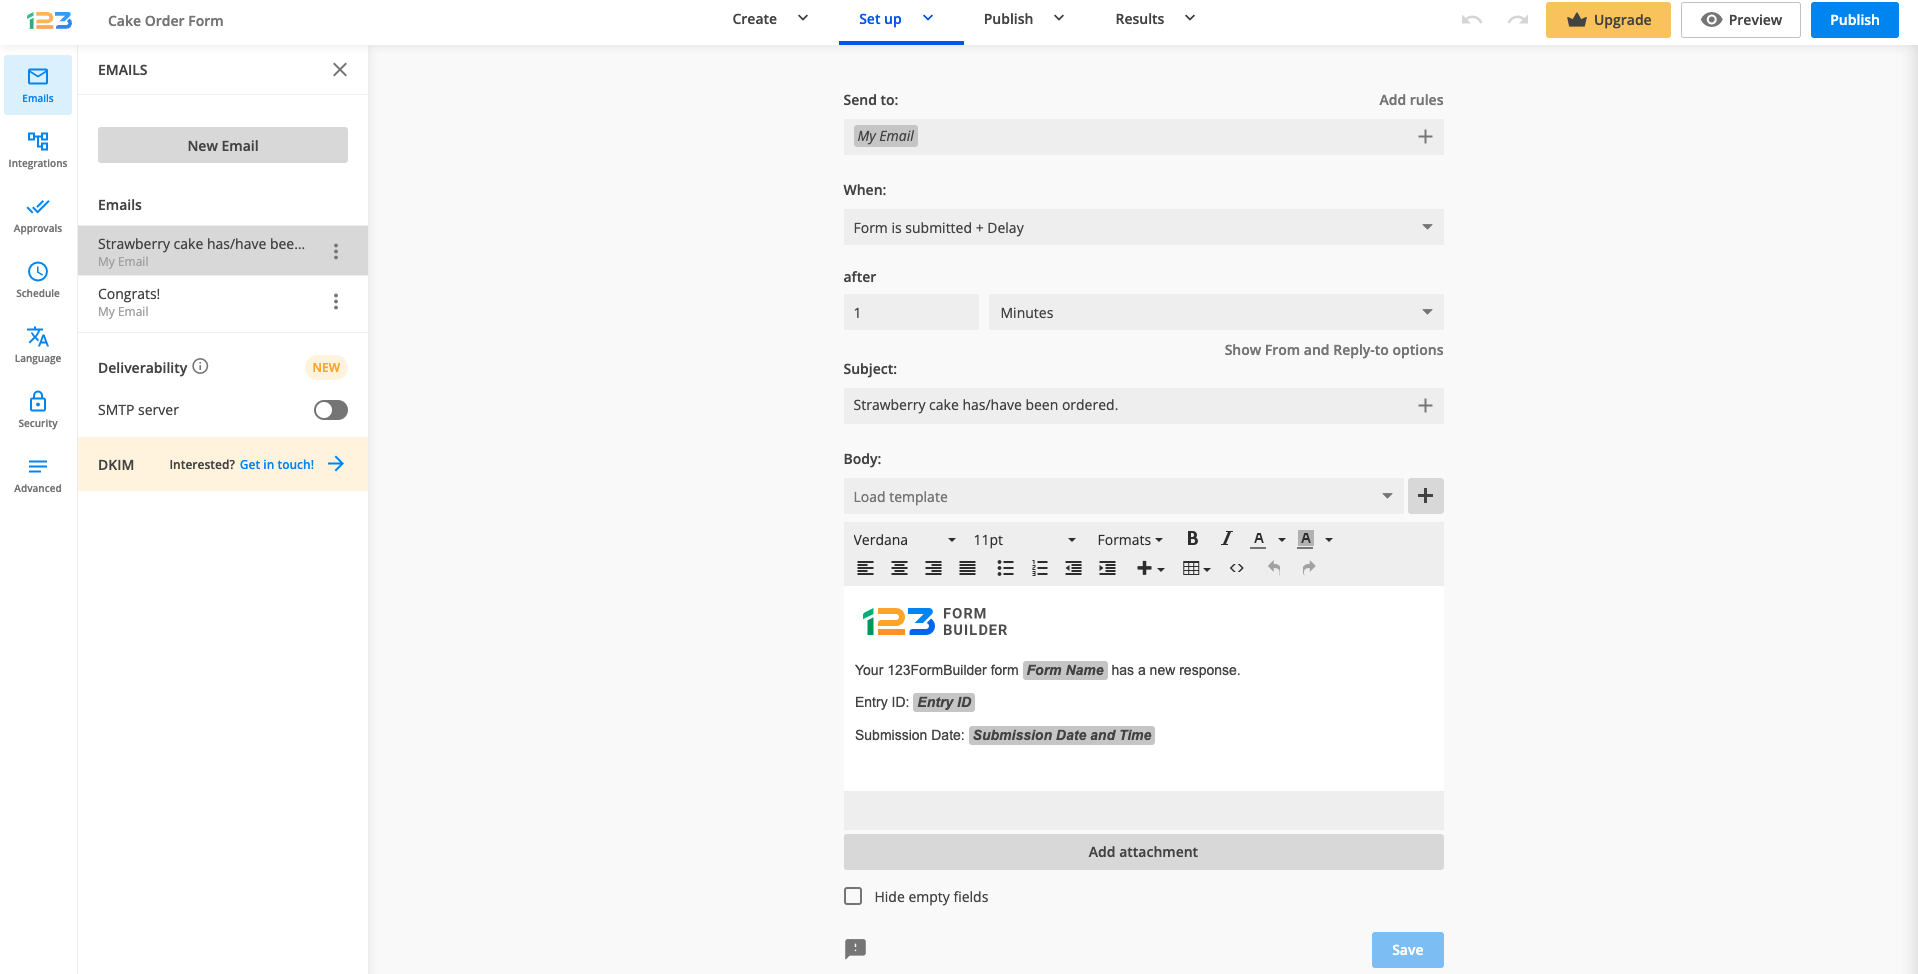
The quiz score variable can be added the same way as the submission input. Click on the plus sign where all your form fields are located and you’ll find the Quiz score variable. Select Quiz score, save your template, and you are done.
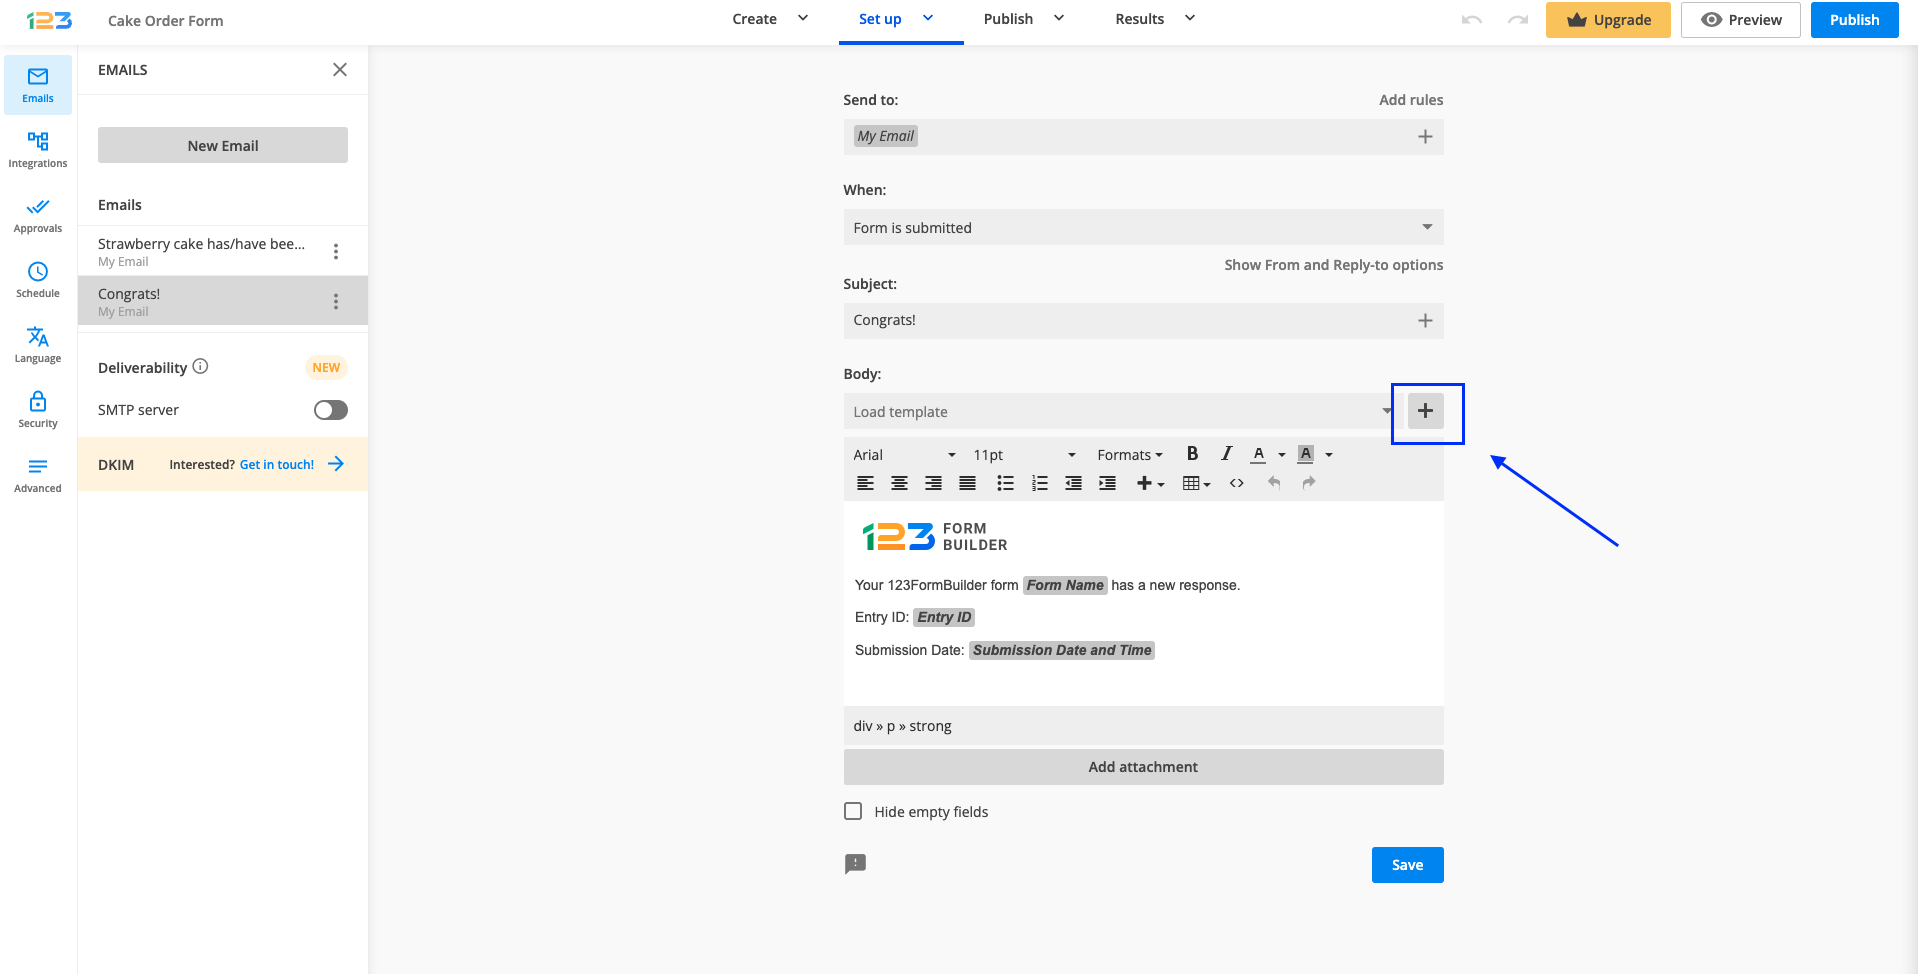
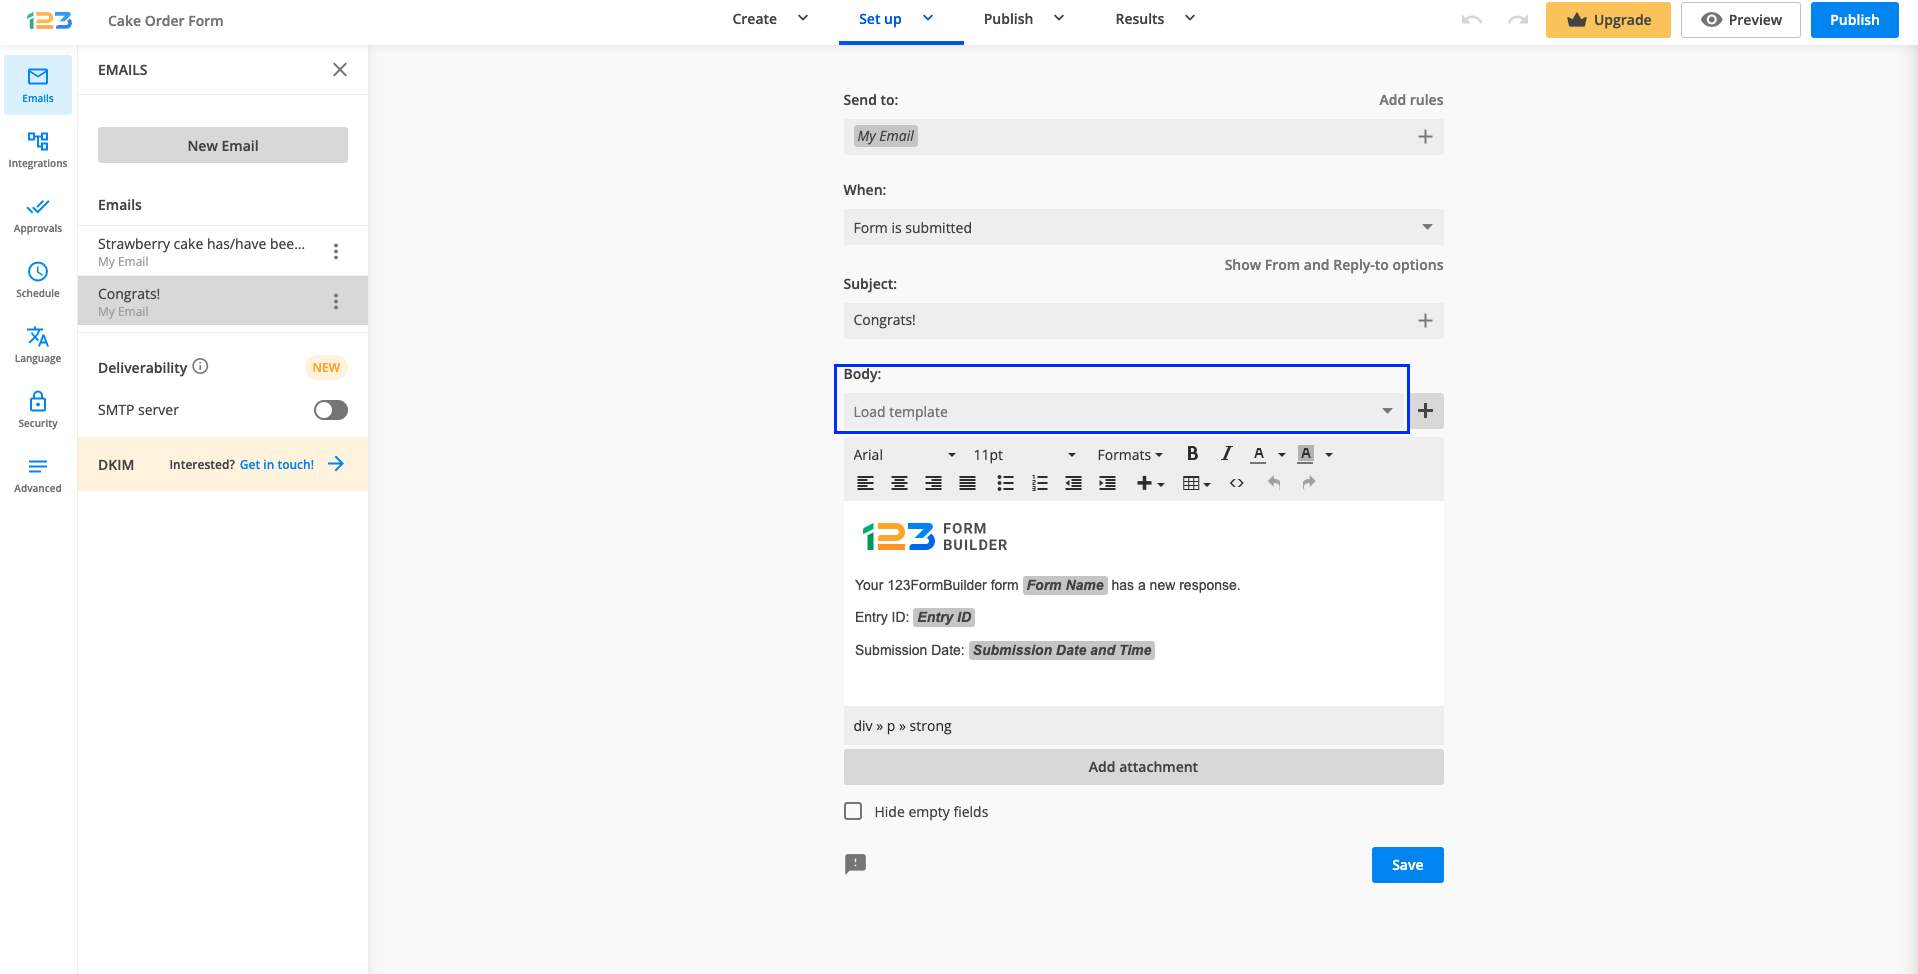
If you want to make things even easier, you have the option of choosing from different email body templates. By clicking on the Body dropdown, you will find different email body templates available, Quiz template being one of them.
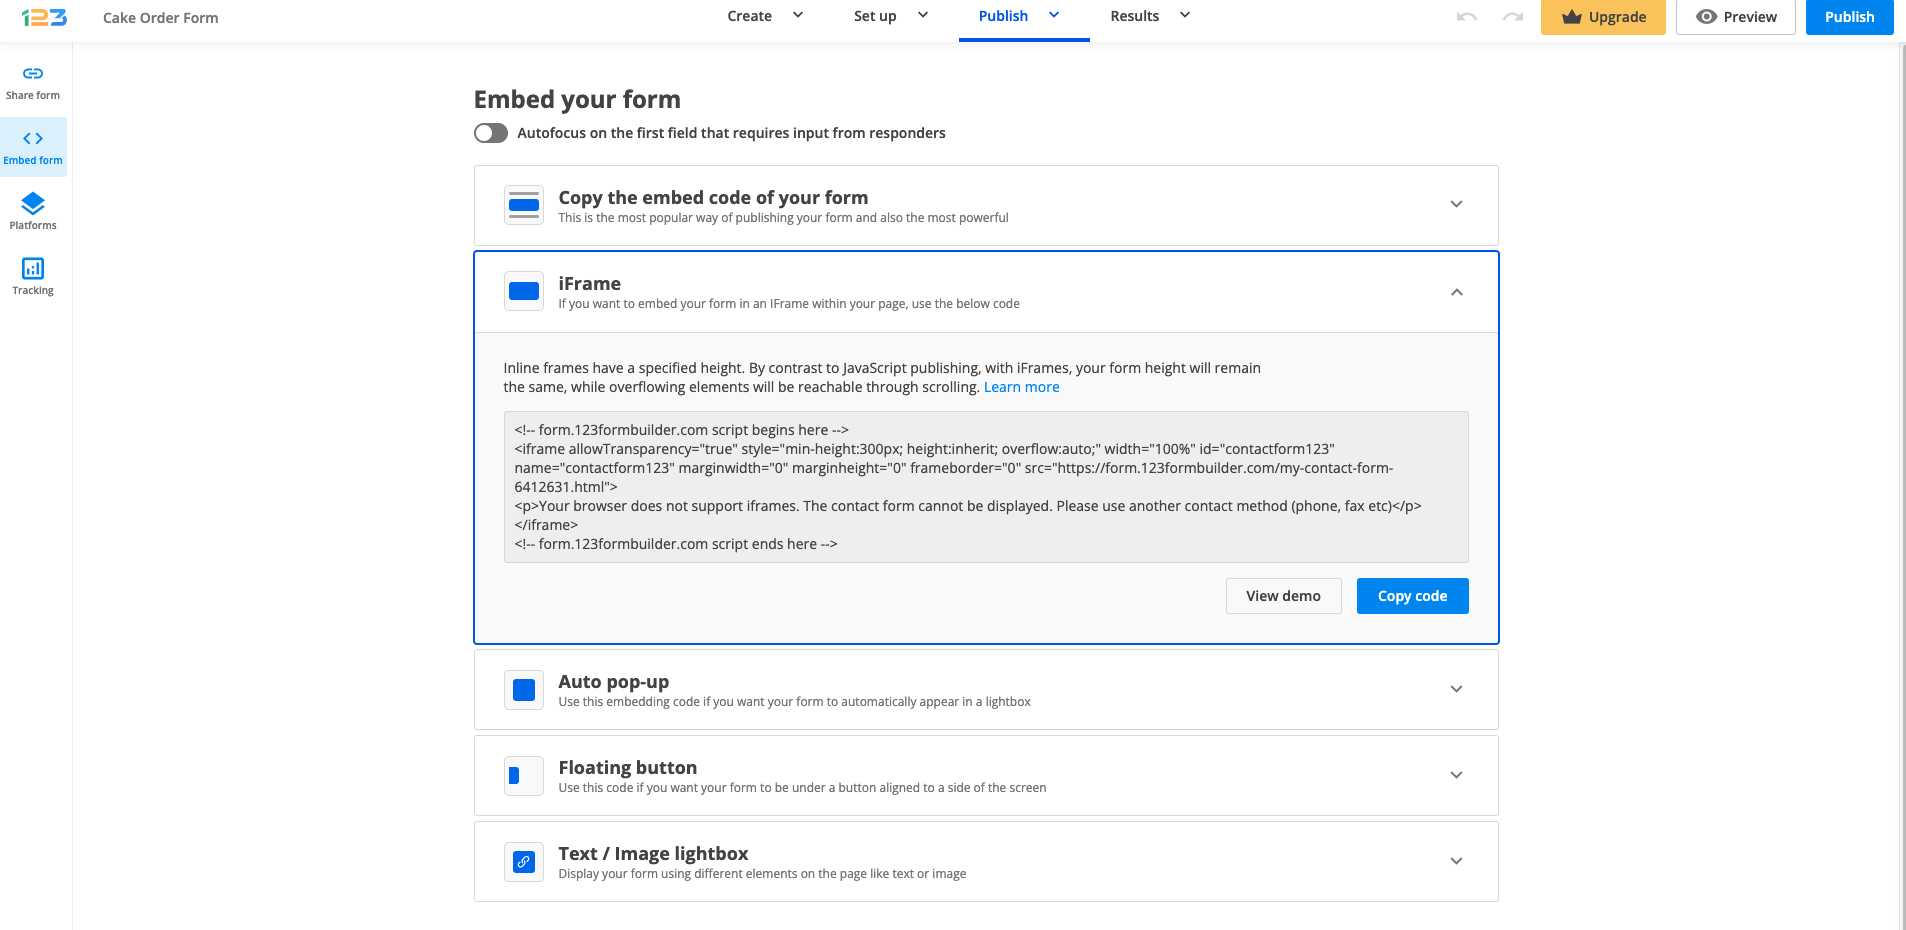
You can easily add online forms to your Canvas course. From your form builder account, create your desired form or select one of the existing forms in your account. Afterward, go to the Publish → Embed form section and copy the IFrame code. Now it’s time to log in to your Canvas Instructure teacher account.
After that, go to Courses → Pages and edit one of your pages or create a new one.

Click on the HTML Editor icon from the bottom right side of the content area.
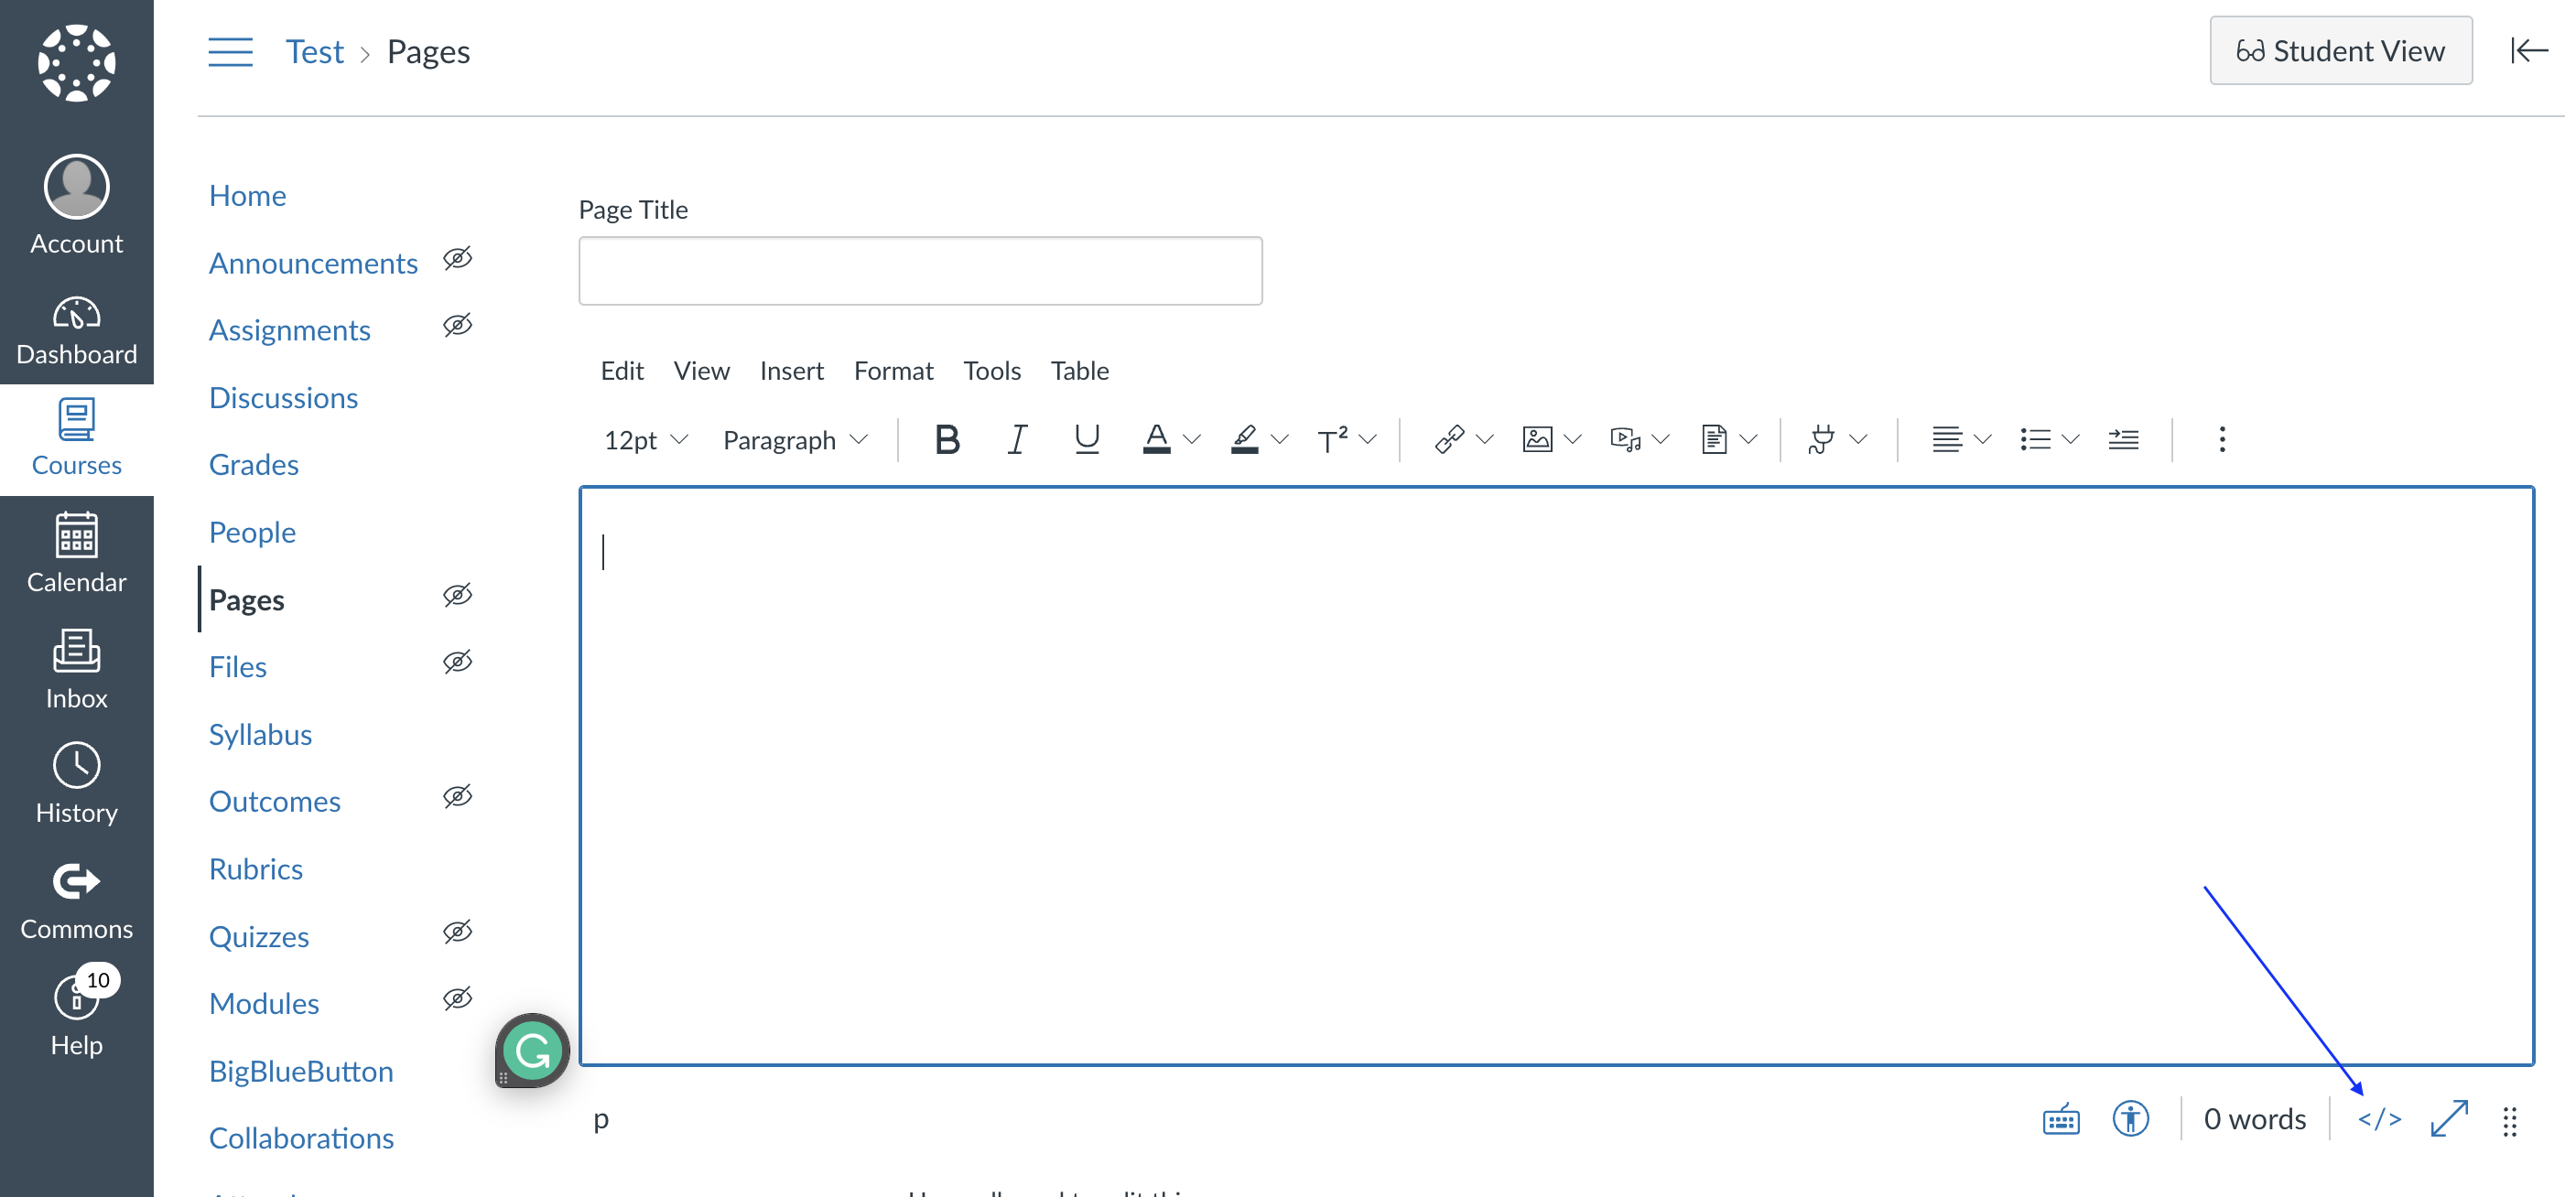
Paste the IFrame code where you want your form to be displayed. To preview the changes, click again on the HTML Editor icon. Then, select Save and you’re all set! You can now start collecting data through your Canvas course.
It’s worth mentioning that the IFrame embed method has a default height of 300px, allowing users to navigate through the form by scrolling it. You can remove the scrollbar specific to this publishing method by increasing the min-height value from the IFrame code.
You can add web forms on any part of your BigCommerce store where their system allows it. For example, you can create a contact web page and include a 123FormBuilder web form which will collect the form data directly from your BigCommerce online store.
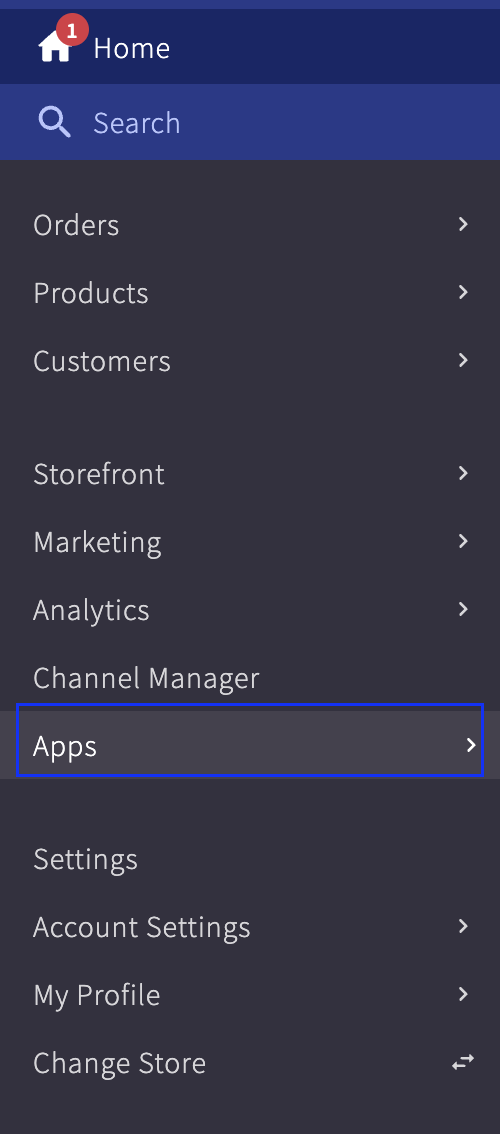
To add web forms to your web page you will need to install our 123FormBuilder app. In order to do that, from your home page, access Apps and then Marketplace.
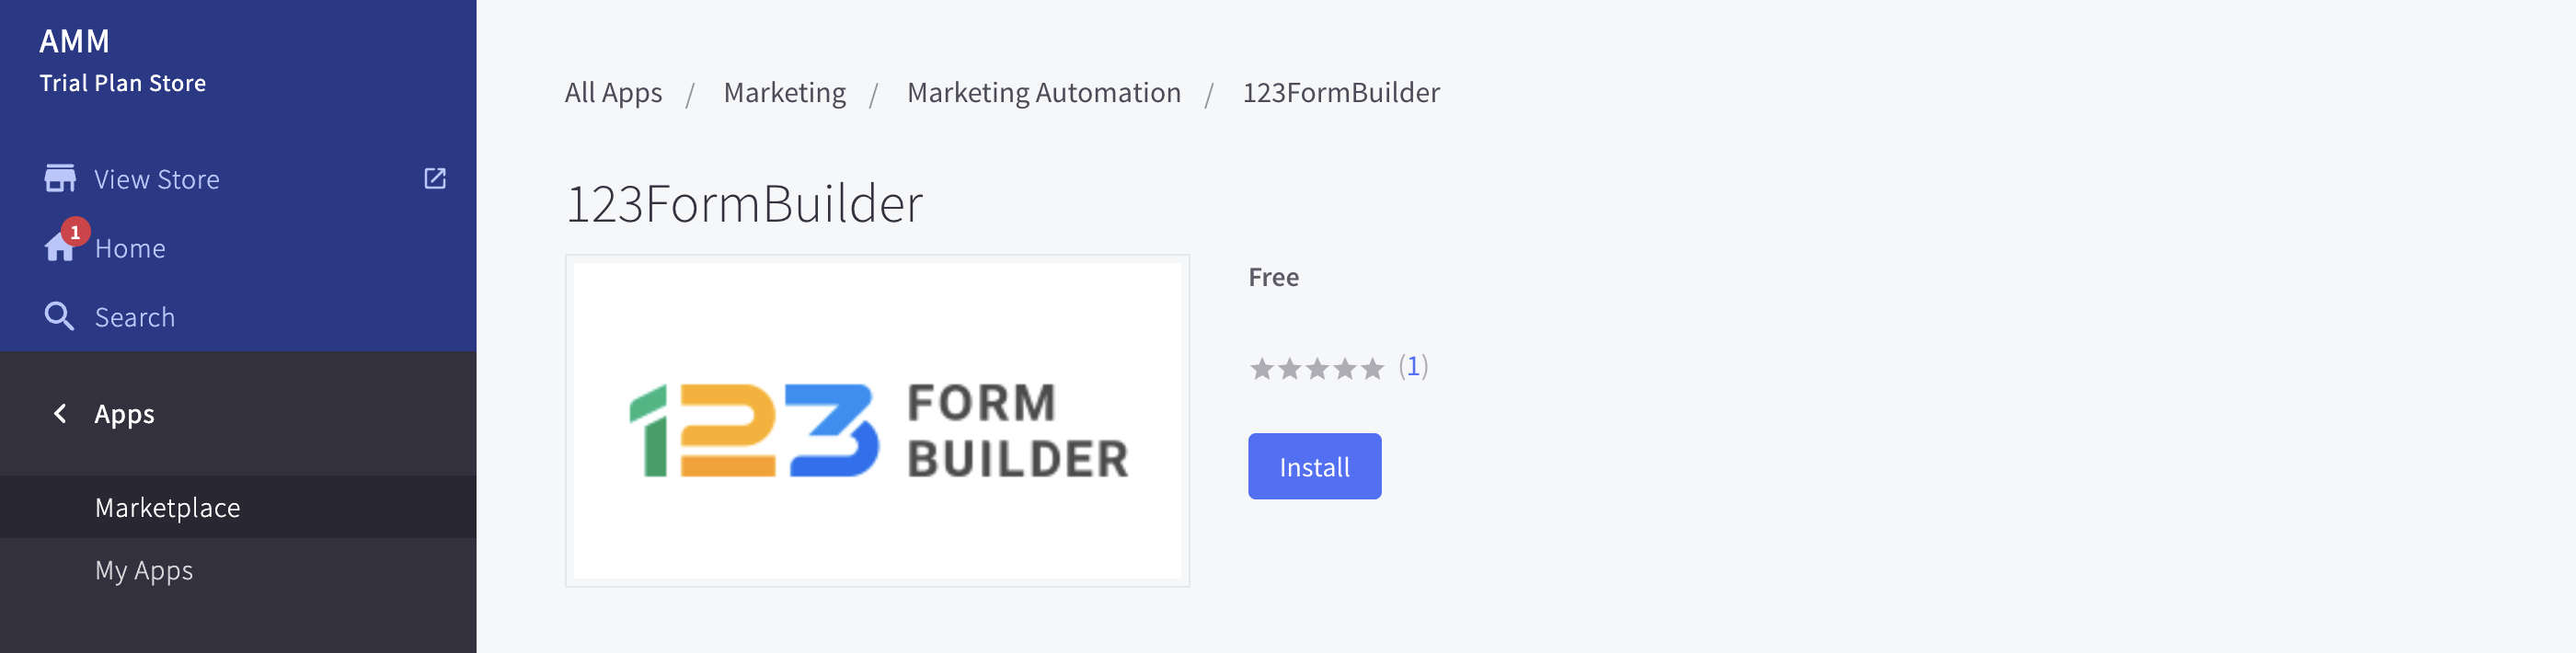
Go to Apps & Integrations and start searching for 123FormBuilder.

Once accessed the app, you will have to click on Get this app and then Install & Launch.

Start creating your first form and publish it on your webpage. Copy the publishing code from Publish – Embed Methods and paste it into the HTML source code of your webpage.
The form will appear on the live version of your webpage.
Respondents will be able to submit the form and all form submissions will be sent to your 123FormBuilder account, in the Submissions section of your web form.
Create powerful online forms with 123FormBuilder and add them to your WebStarts webpage in quick easy steps. We recommend you use the JavaScript code of your online form located in the Publish → Embed form section of our form builder platform. Whenever you edit the form, the changes will automatically apply to your WebStarts webpage without having to publish it again.
Let’s start by copying the JavaScript code located in Publish -> Embed form section of your online form.
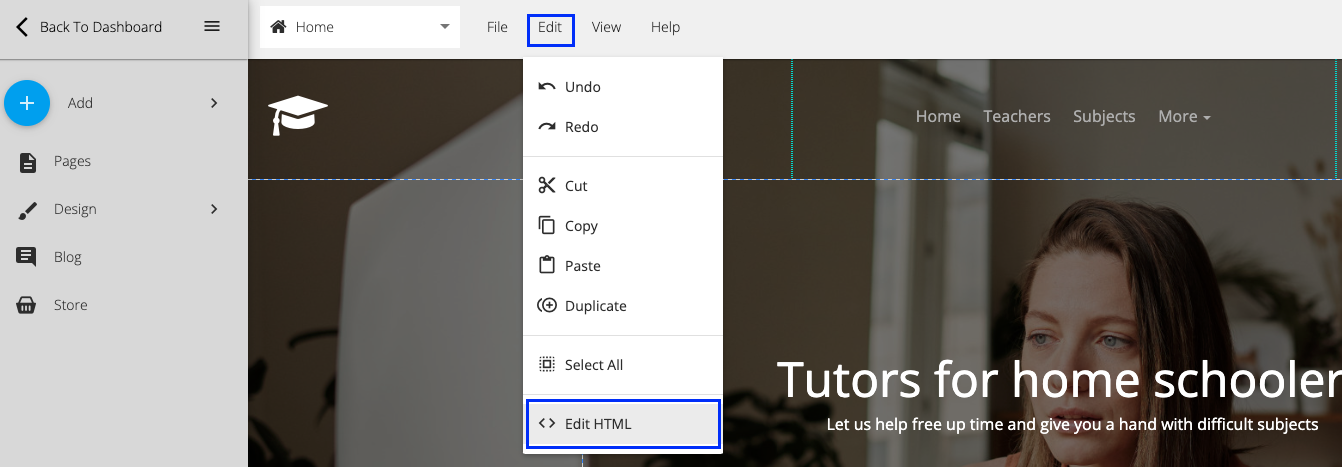
In WebStarts, access your webpage in the editor mode and go to Edit → Edit HTML.
To edit the existing code located in the Body section of your page, select the View Source Code tab in the left panel and then edit the code provided as required and then click the OK button. To edit the Head section of your site, be it the Head of the entire website or that of just that page alone, select the appropriately labeled tabs located in the left panel and edit the code as required and then click the OK button.
The online form will be automatically displayed in the page editor. You can adjust the width and height of the widget, as well as its position, to make it look at its best on your webpage. Save your changes and there you have it! Form visitors can now submit your online form directly from your WebStarts webpage.
To adjust the form width, go to Design and expand the Layout section. Here you can adjust the form’s and the page’s width, their padding & the form direction.
You can change the default width to what fits you best. If working with pixels doesn’t come naturally, then you have the option of choosing the width to be calculated in percentages.

Our form builder offers many build-in theme options that you can choose from. Basically, you can change just about anything on your web form, from text font and color to the style of the submit button.
Additionally, you can go the extra mile and emphasize the look of your web forms with custom CSS codes using our CSS form generator. In this article, we will show you a few alterations that you can bring to your form fields.
First, go to the Design section. Next, click on the Add custom CSS button. Here you can create and paste all your CSS codes to stylize the form.

Now that you know where the location of the codes will be, let’s check some general CSS codes:
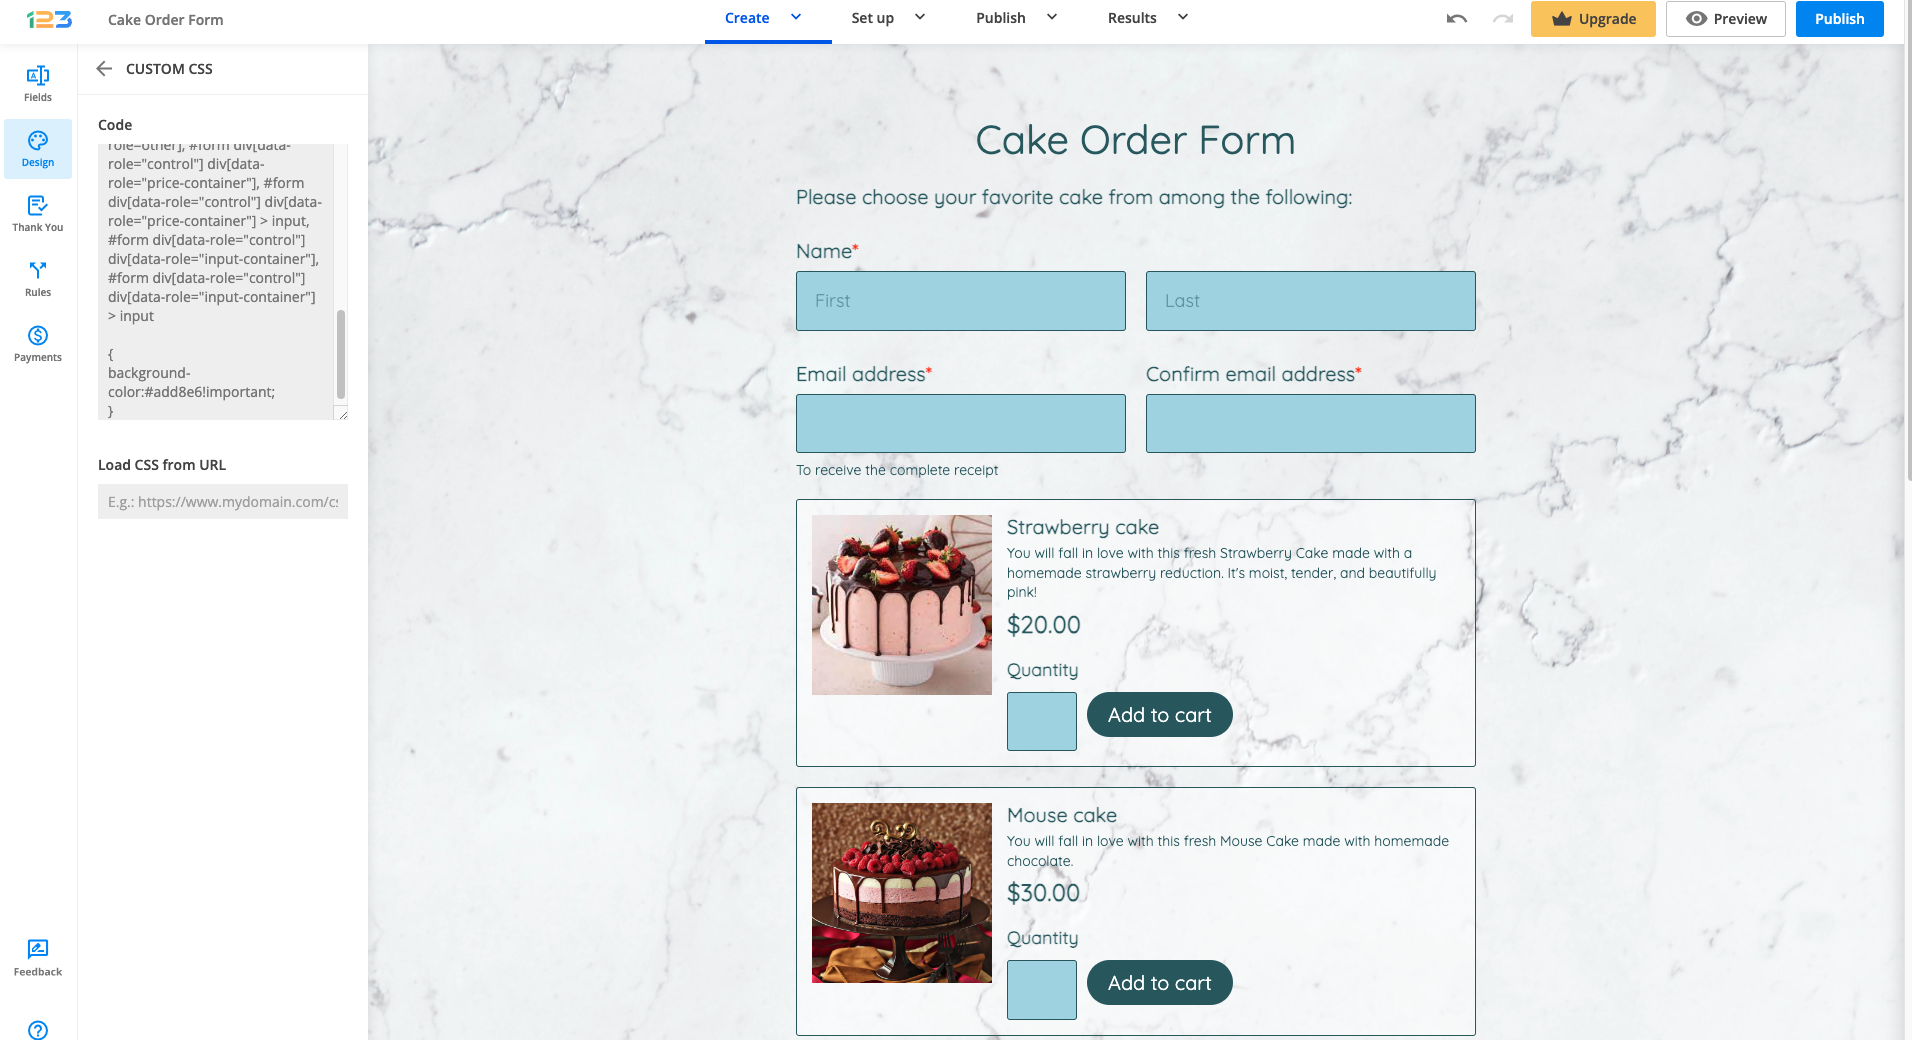
- Input – these attributes will change all input fields.
#form div[data-role=control] input[data-role=i123-input]:not([type=radio]):not([type=checkbox]):not([type=reset]):not([type=hidden]):not([data-no-theme]), #form div[data-role=control] select[data-role=i123-input], #form div[data-role=control] textarea[data-role=i123-input], #form div[data-role=control] div[data-role=i123-input]:not([data-type=file]), #form div[data-role=control] div[data-role=i123-input][data-type=file] > div[data-role=upload-overlay], #form div[data-role=control] div[data-role=i123-input][data-type=file] > div[data-role=abort-all-uploads], #form div[data-role=control][data-type=check-box] input[data-role=other], #form div[data-role=control][data-type=radio] input[data-role=other], #form div[data-role="control"] div[data-role="price-container"], #form div[data-role="control"] div[data-role="price-container"] > input, #form div[data-role="control"] div[data-role="input-container"], #form div[data-role="control"] div[data-role="input-container"] > input

{
background-color:#add8e6!important;
}
With this code, we changed the background color of the input boxes to a light blue color. You can further add as many CSS properties and style your form as you need. Here is the result:
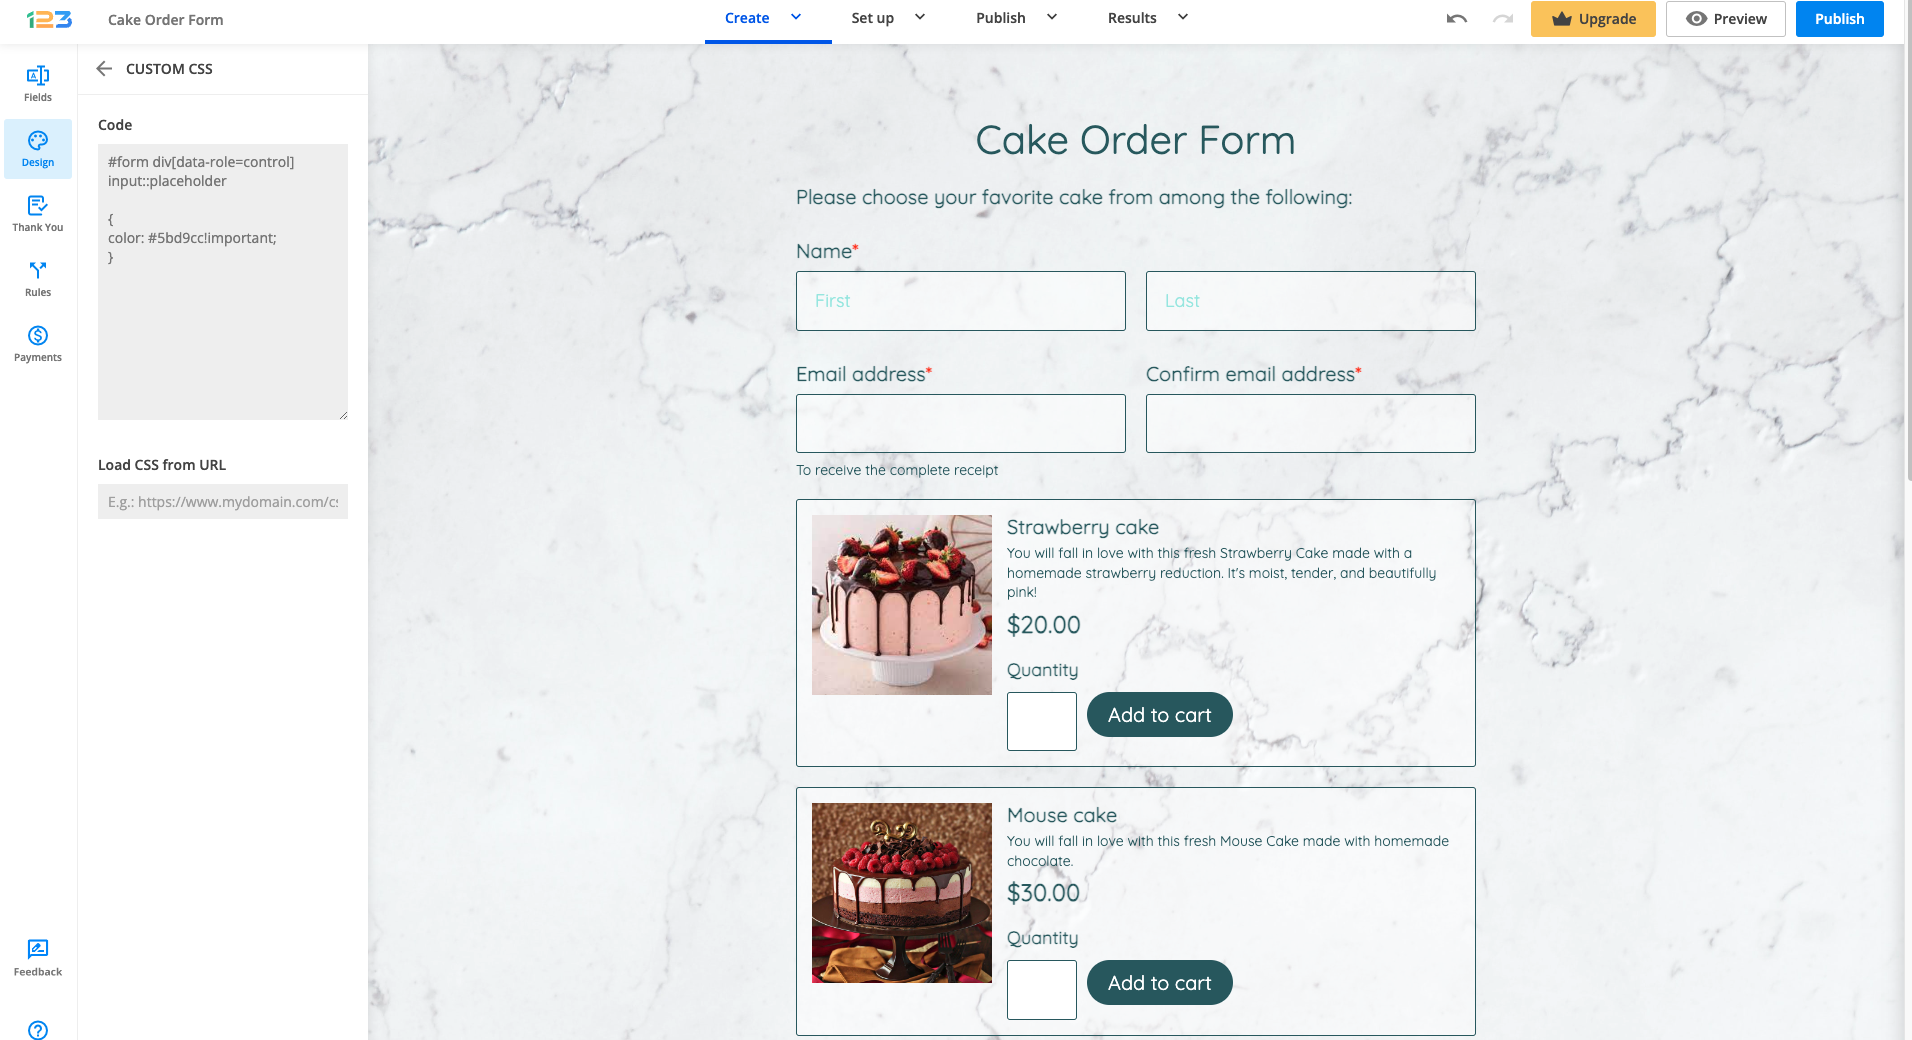
- Placeholder text – change the color of the information found in an input field. (e.g. Street Address, City, First, Last).
#form div[data-role=control] input::placeholder

{
color: #5bd9cc!important;
}
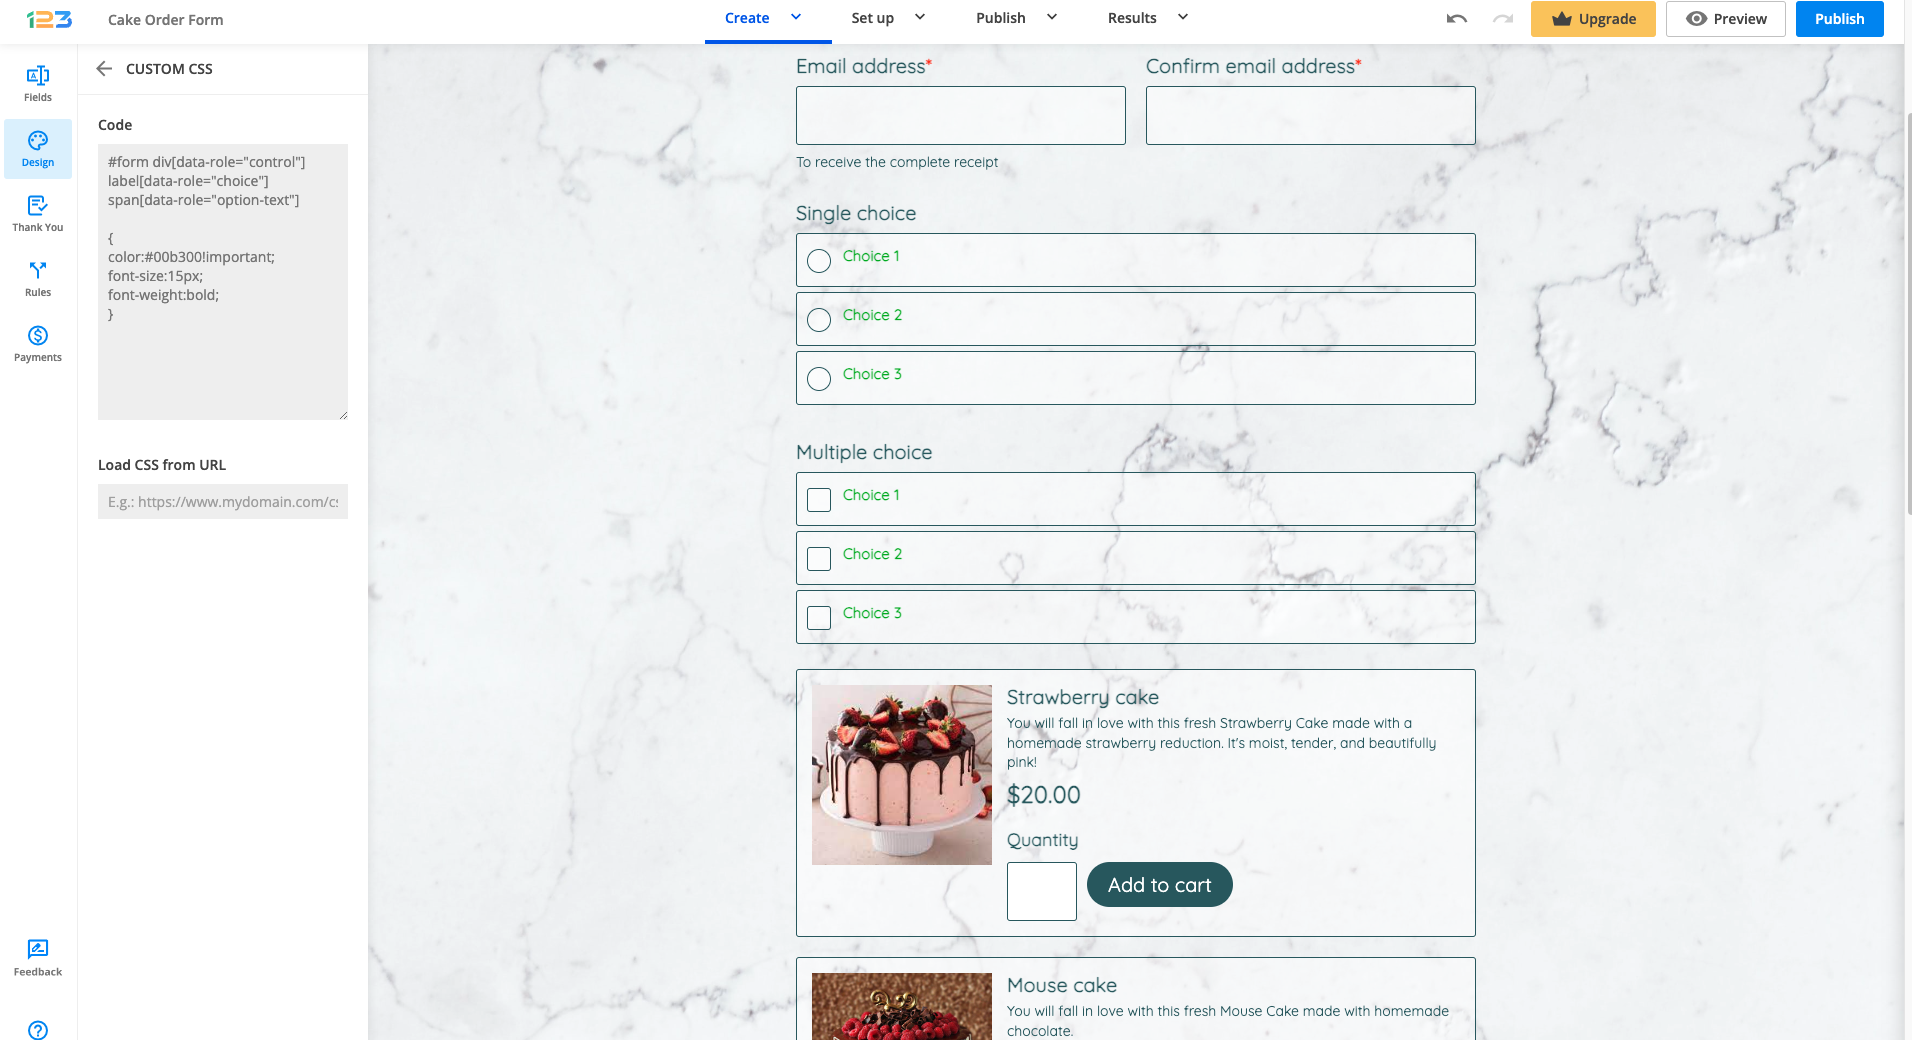
- Choices – change the appearance of the choices (Single choice and Multiple choice fields).
#form div[data-role="control"] label[data-role="choice"] span[data-role="option-text"]

{
color:#00b300!important;
font-size:15px;
font-weight:bold;
}
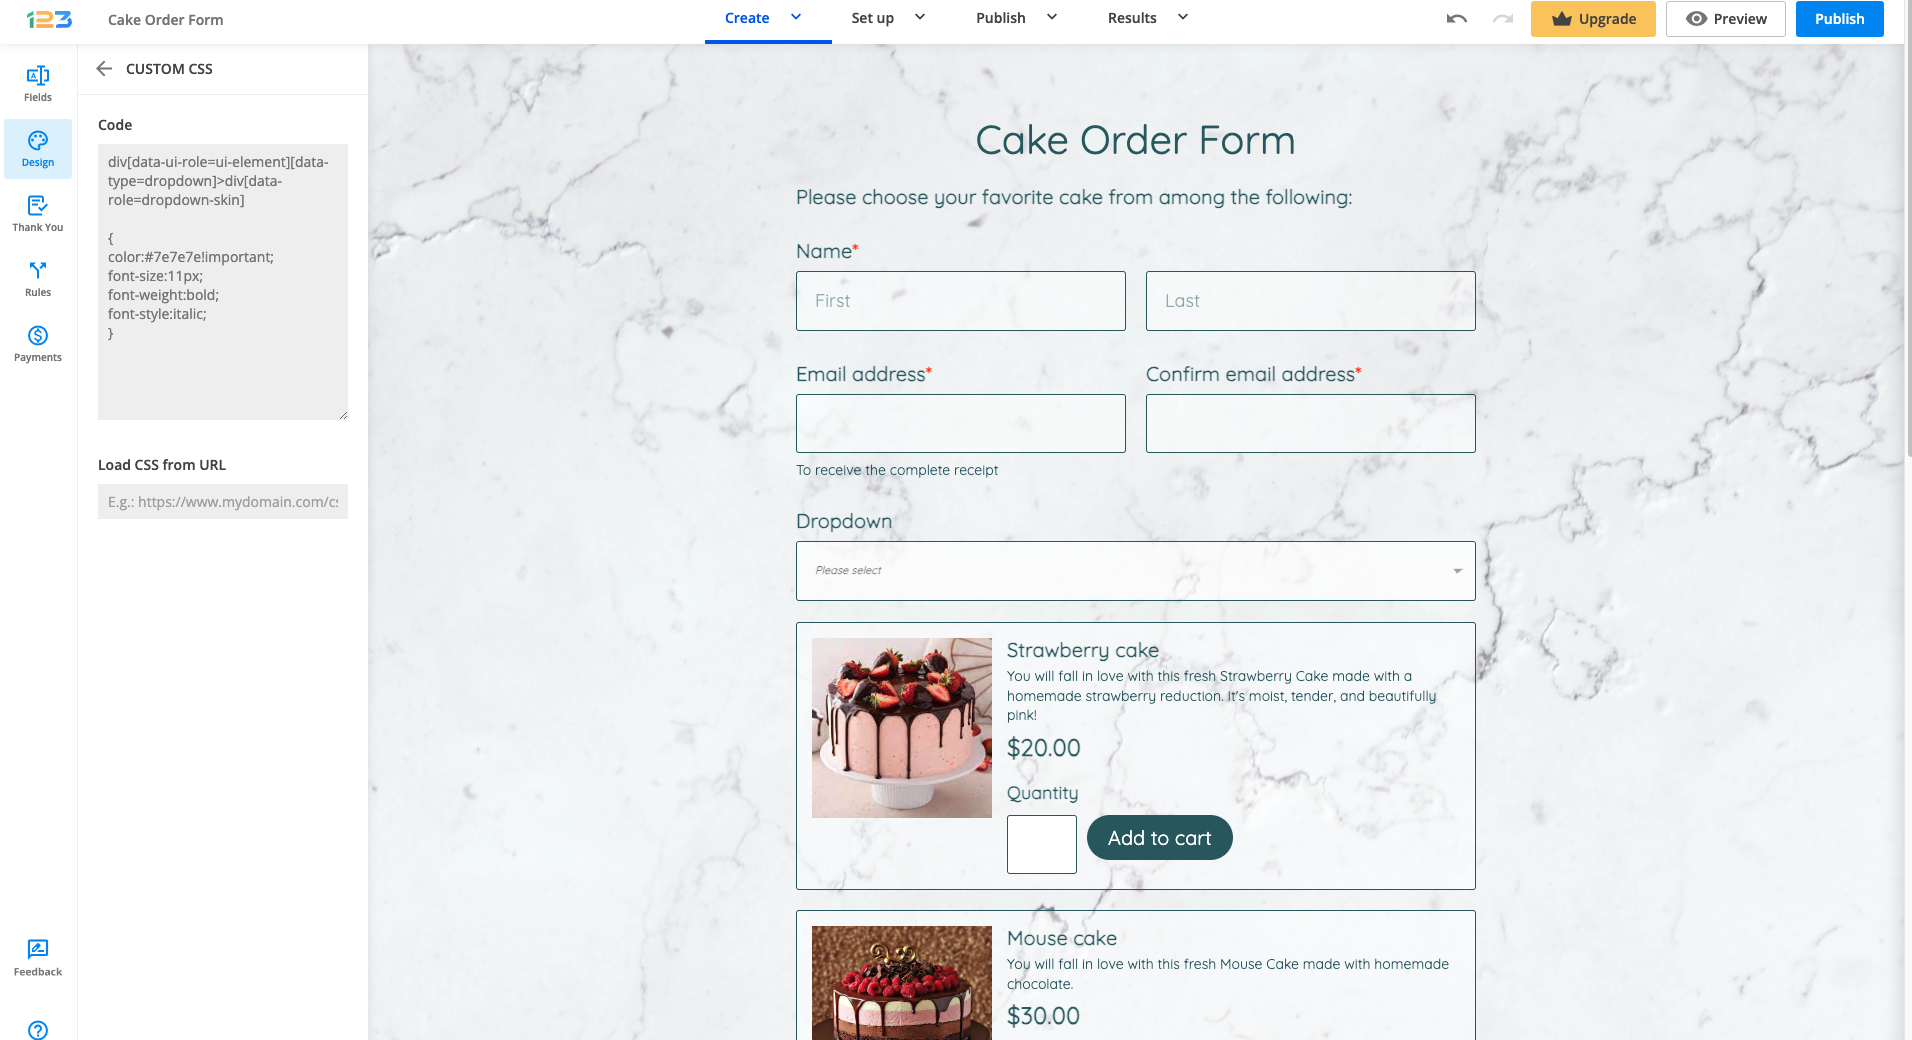
- Dropdown placeholder text
div[data-ui-role=ui-element][data-type=dropdown]>div[data-role=dropdown-skin]

{
color:#7e7e7e!important;
font-size:11px;
font-weight:bold;
font-style:italic;
}
- Buttons – adjust the shape and style of your form buttons with this CSS code.
#form button[data-role]

{
font-family: 'Open Sans', sans-serif;
font-size: 14px;
font-weight: normal;
font-style: normal;
line-height: 2em;
padding: 0px 15px;
margin: 0 8px 0 calc(16px / 2);
border-width: 1px;
border-style: solid;
border-radius:50%;
min-height: calc( 0px + 2em + 35px );
margin-top: 8px;
}
This code will create rounded buttons. To see the effect click on Preview on the top right corner.

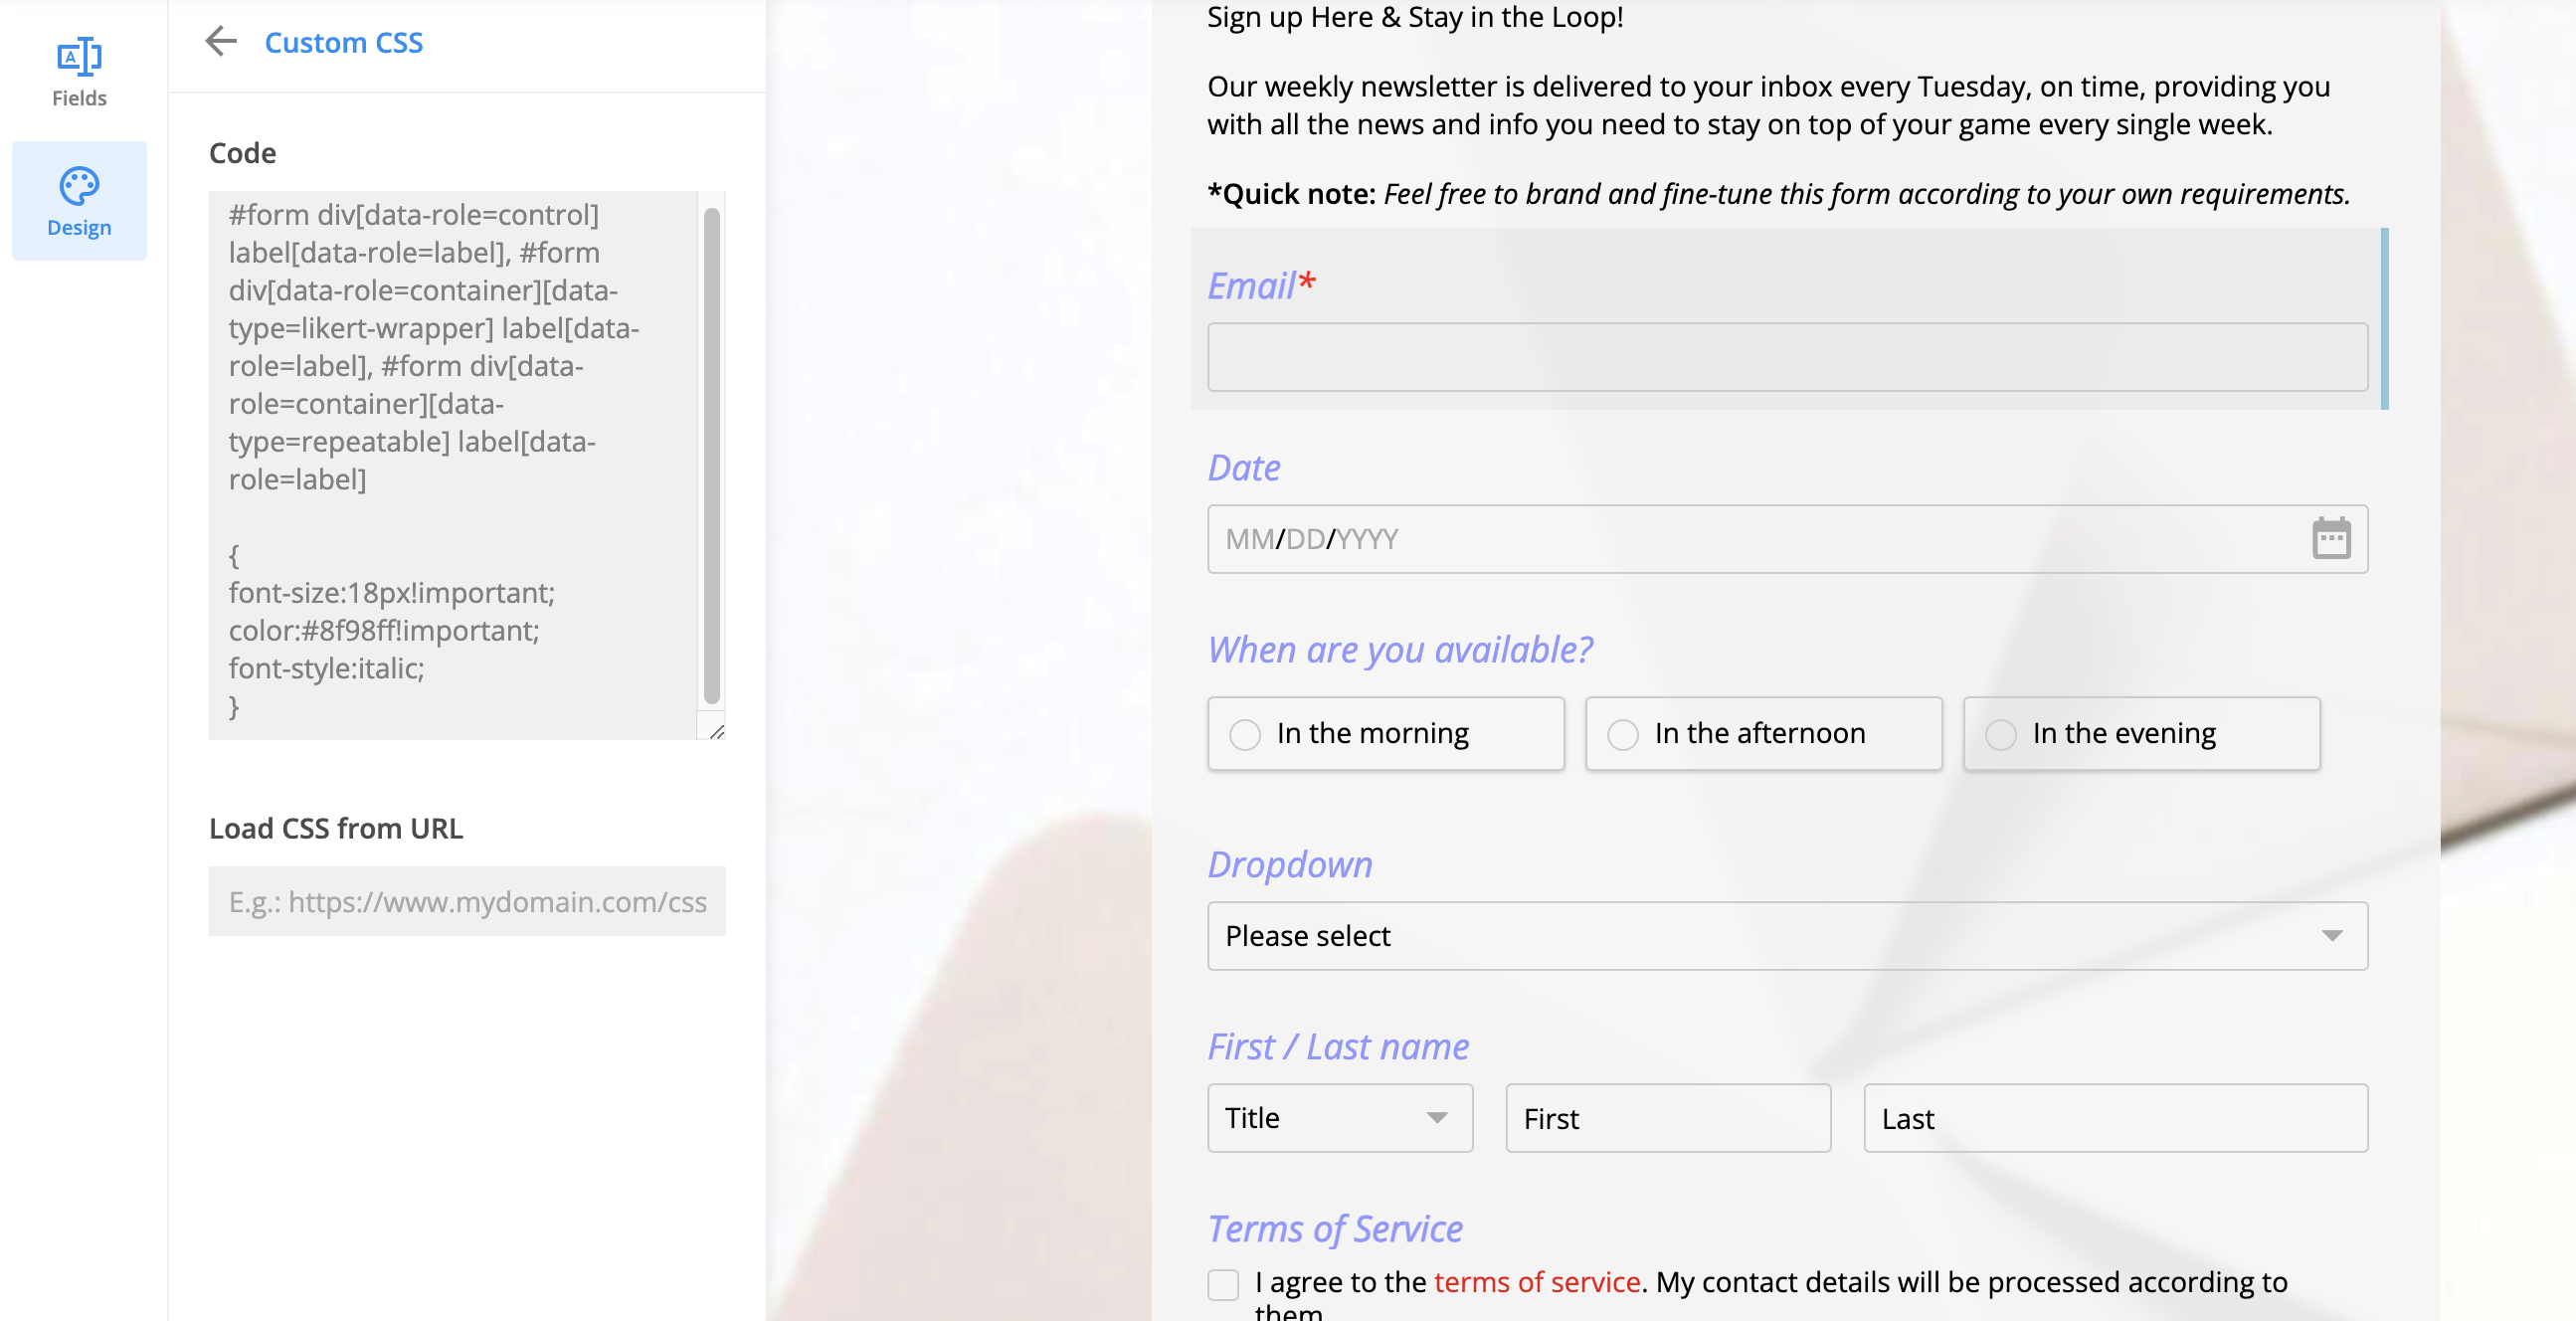
- Label text
#form div[data-role=control] label[data-role=label], #form div[data-role=container][data-type=likert-wrapper] label[data-role=label], #form div[data-role=container][data-type=repeatable] label[data-role=label]

{
font-size:18px!important;
color:#8f98ff!important;
font-style:italic;
}
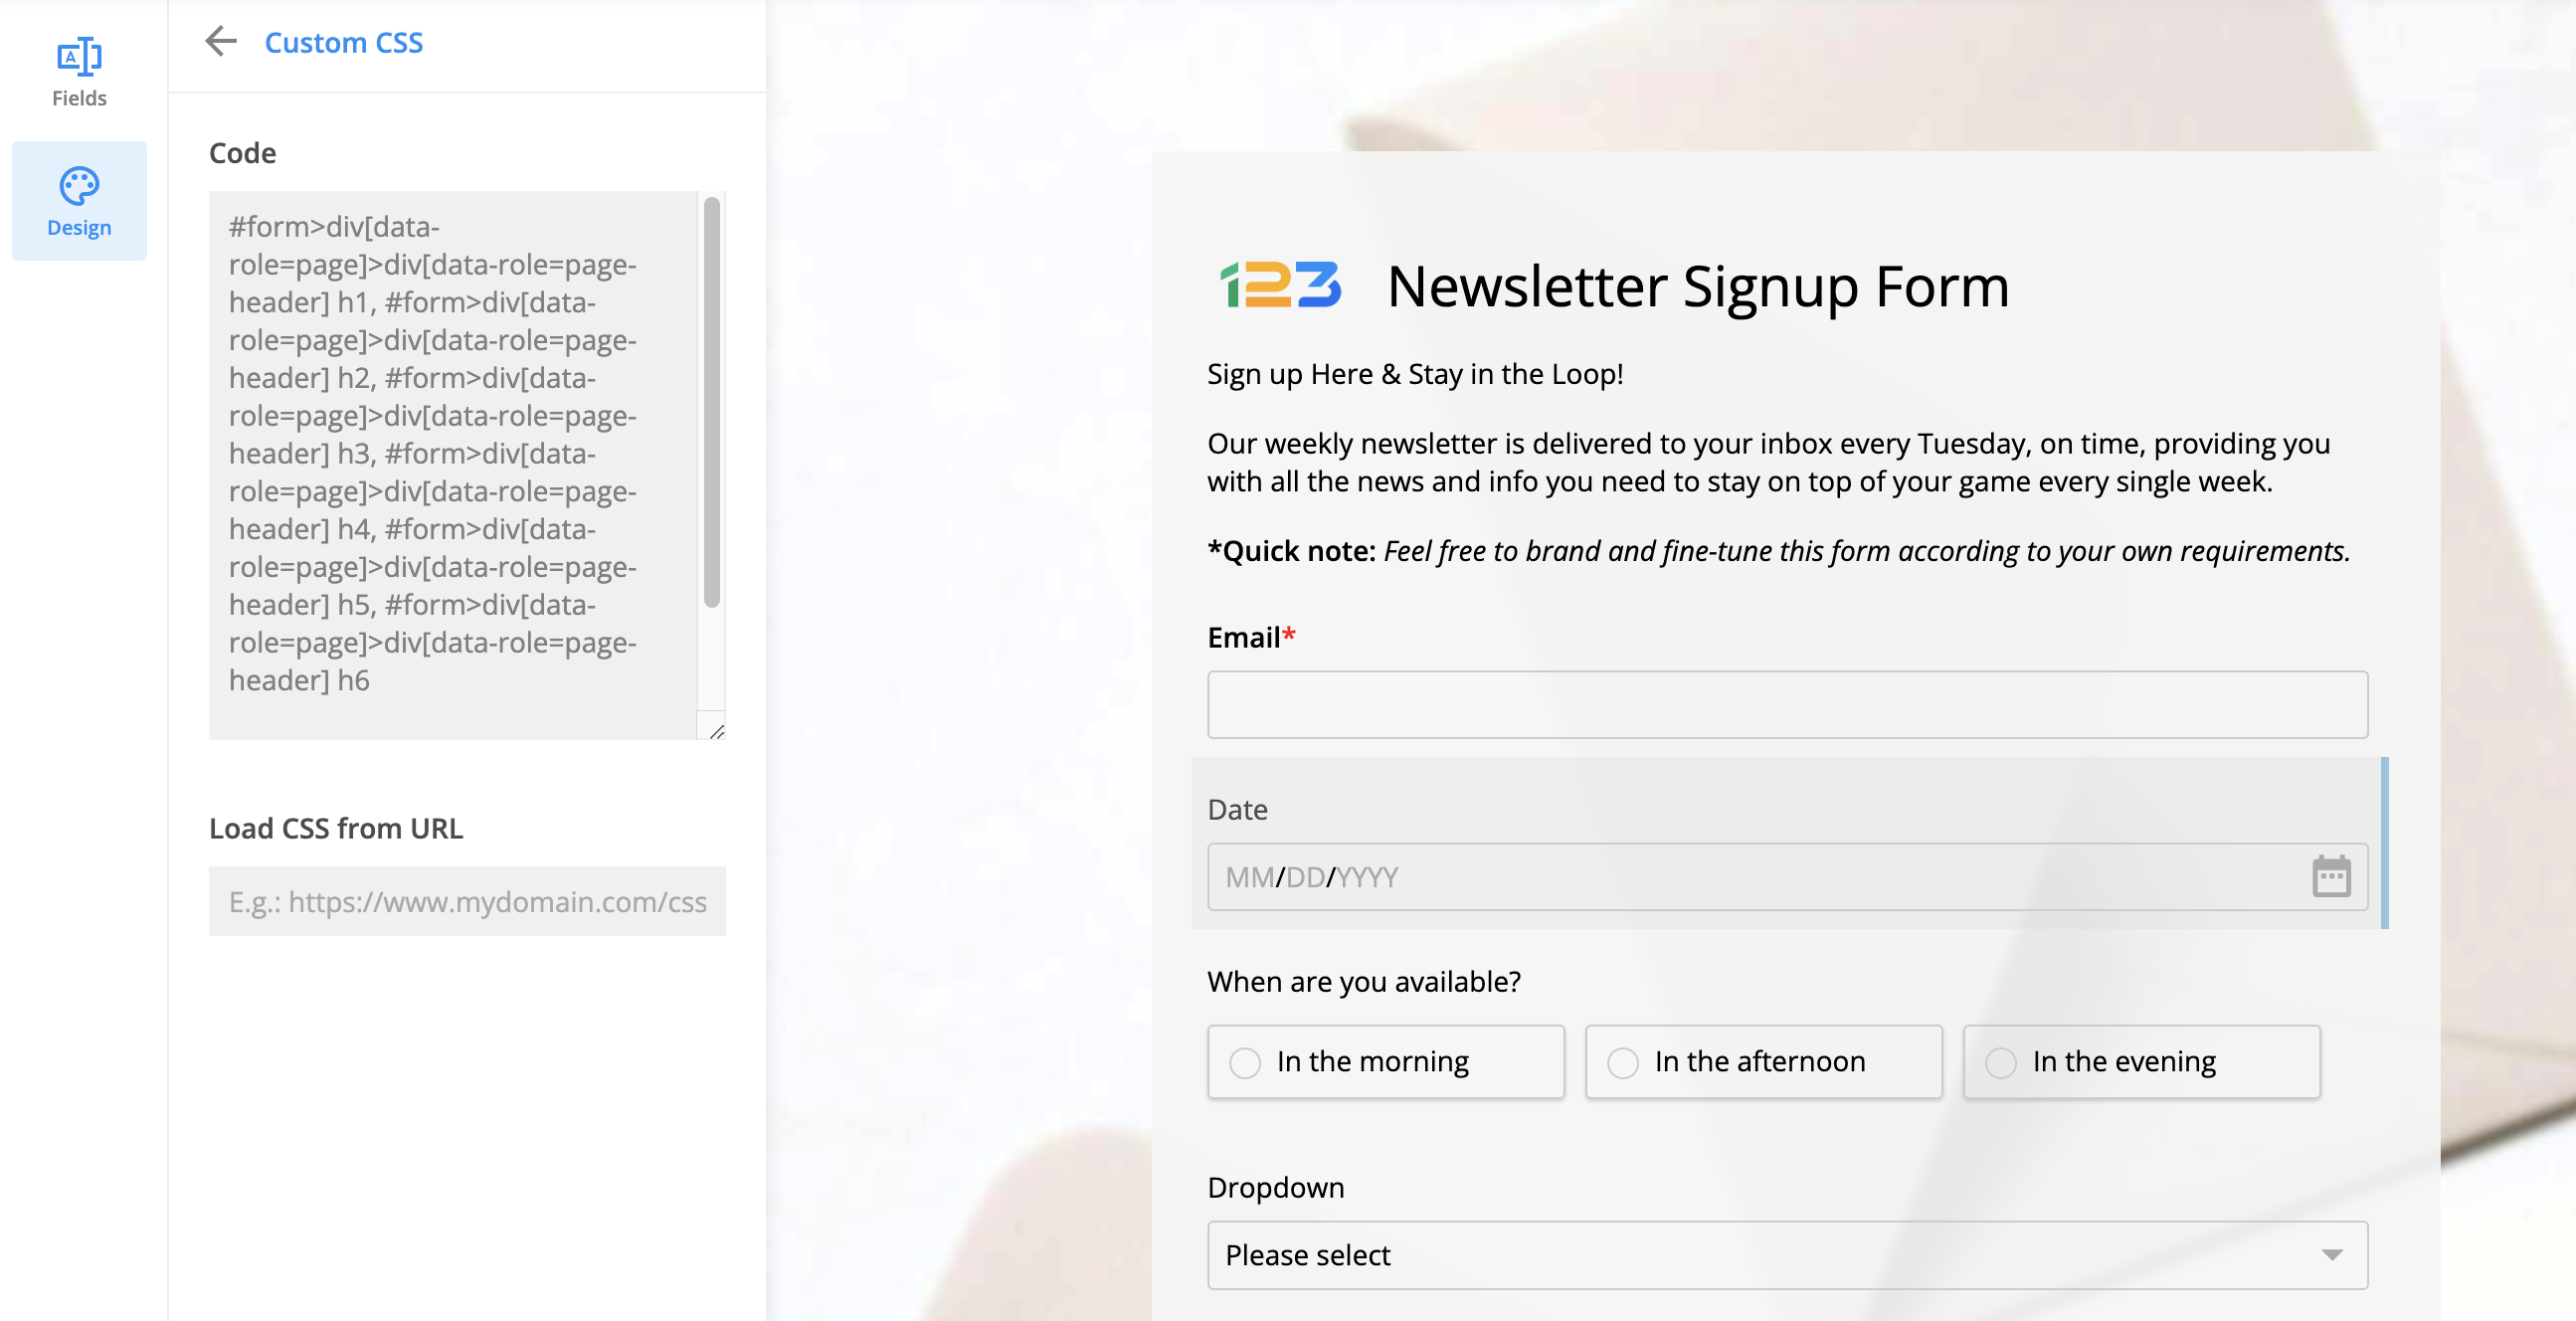
- Form Header text
#form>div[data-role=page]>div[data-role=page-header] h1, #form>div[data-role=page]>div[data-role=page-header] h2, #form>div[data-role=page]>div[data-role=page-header] h3, #form>div[data-role=page]>div[data-role=page-header] h4, #form>div[data-role=page]>div[data-role=page-header] h5, #form>div[data-role=page]>div[data-role=page-header] h6

{
color:#ac3d2c!important;
}
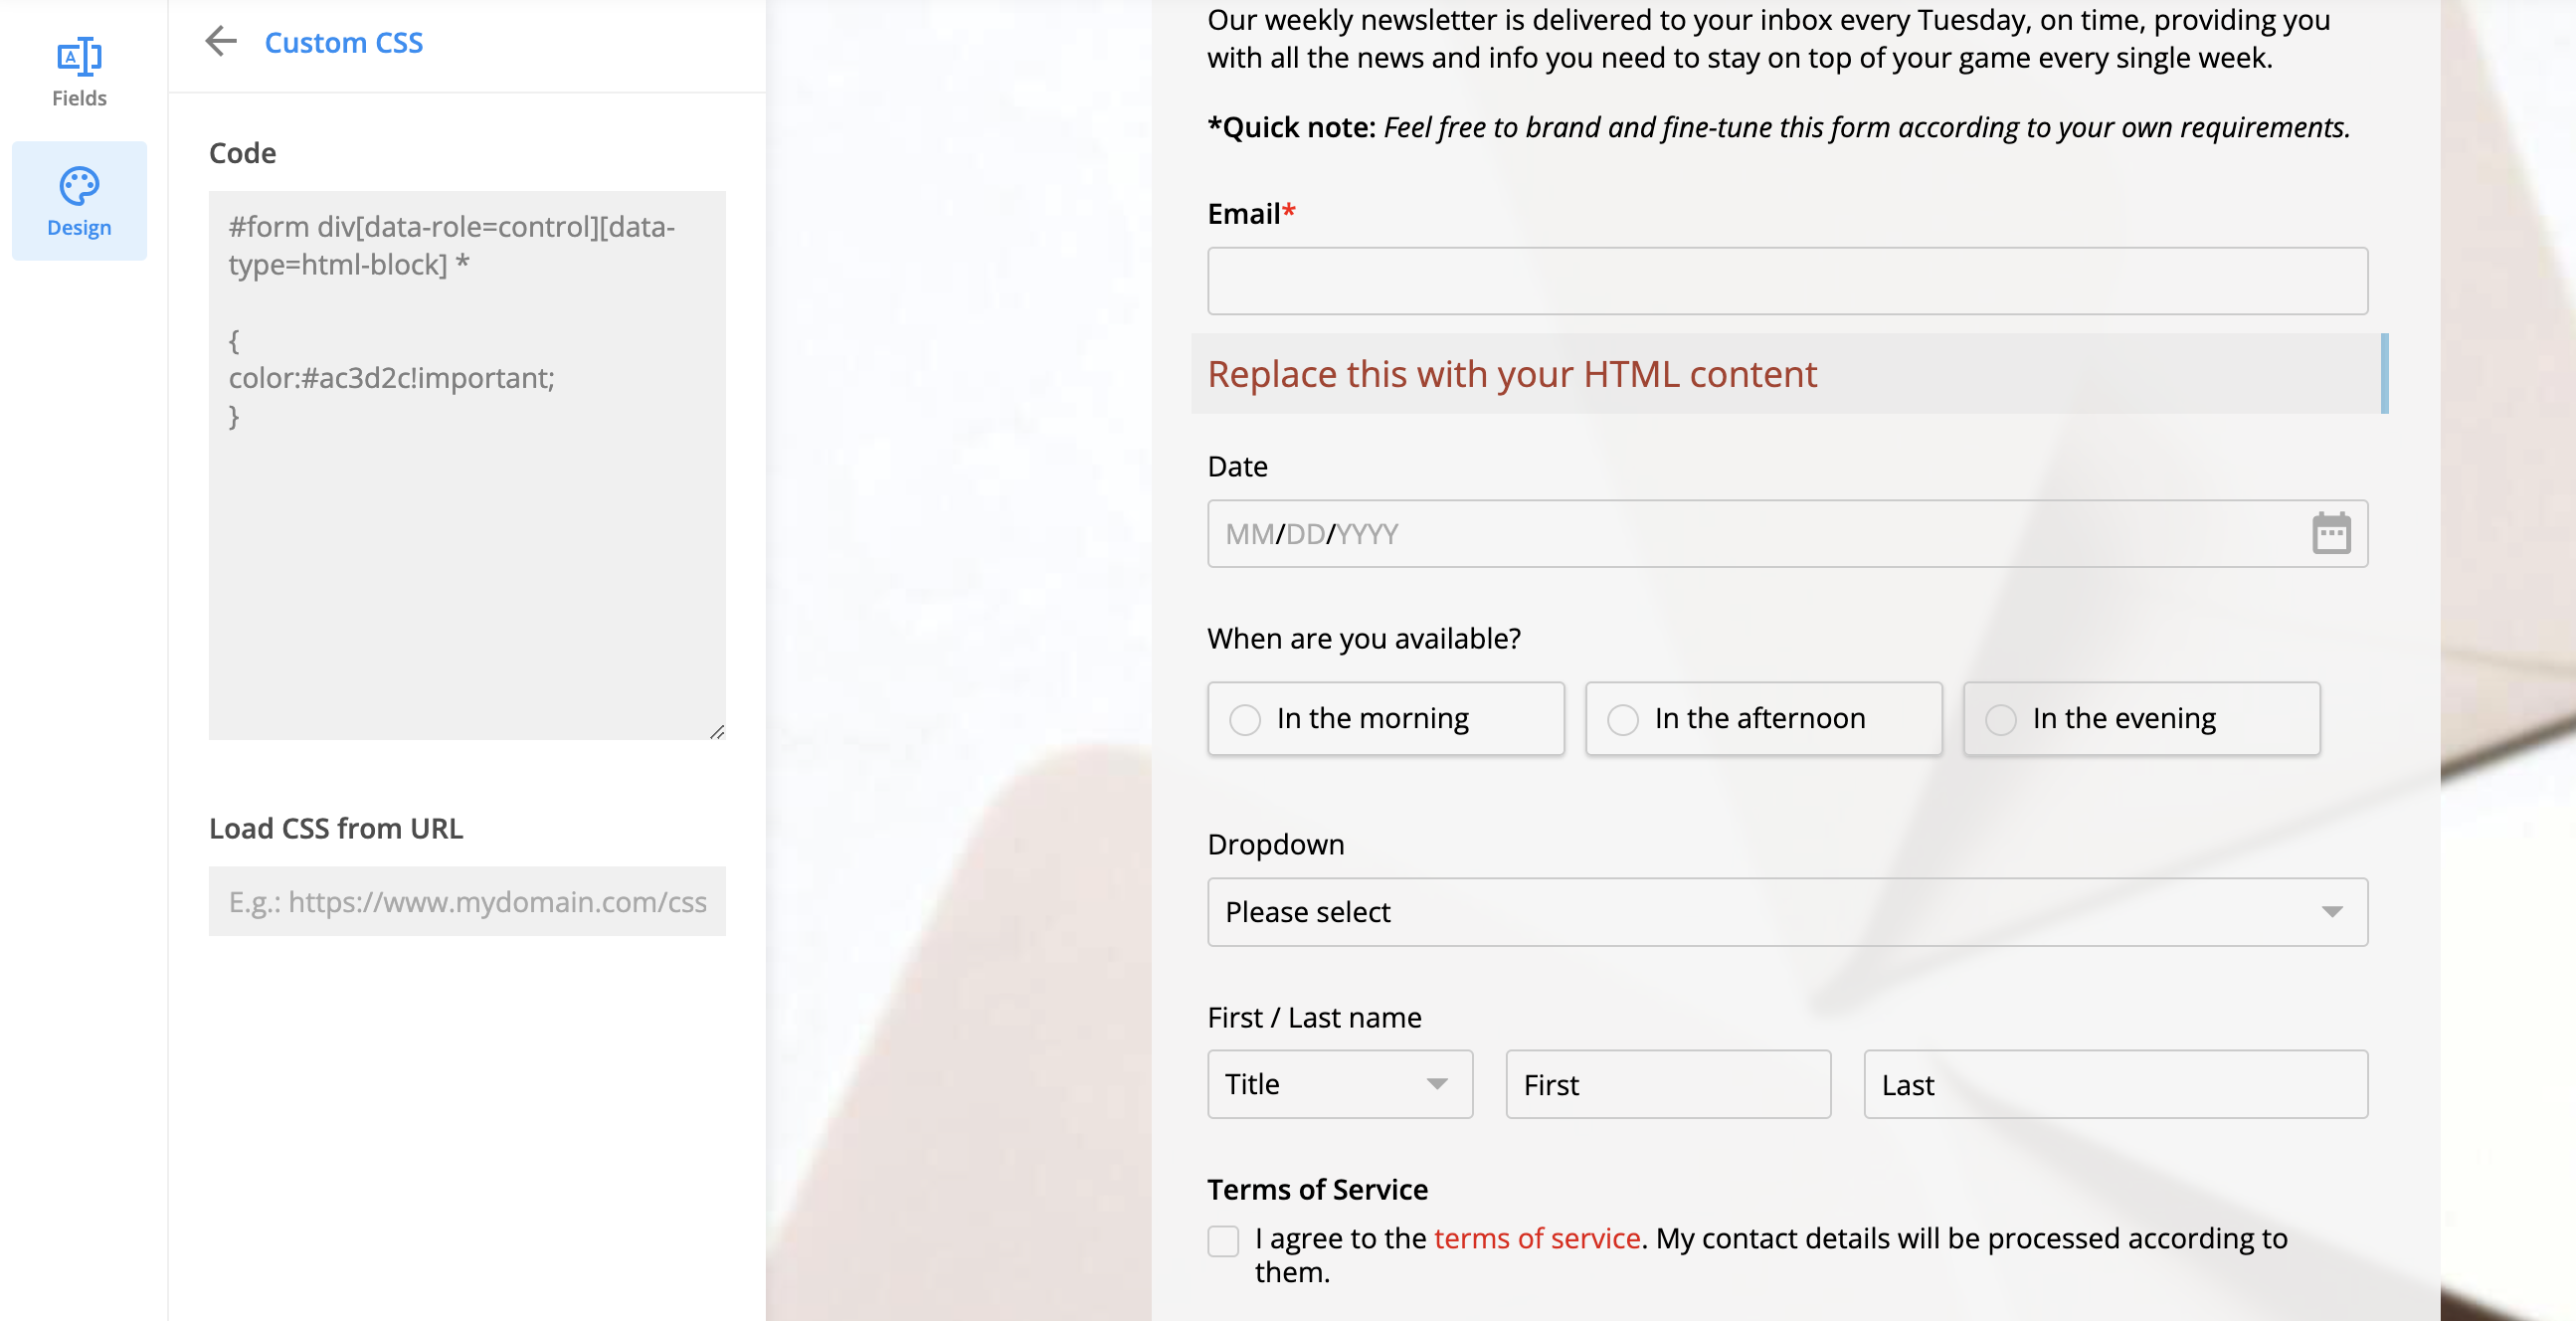
- HTML Block fields
#form div[data-role=control][data-type=html-block] *

{
color:#ac3d2c!important;
}
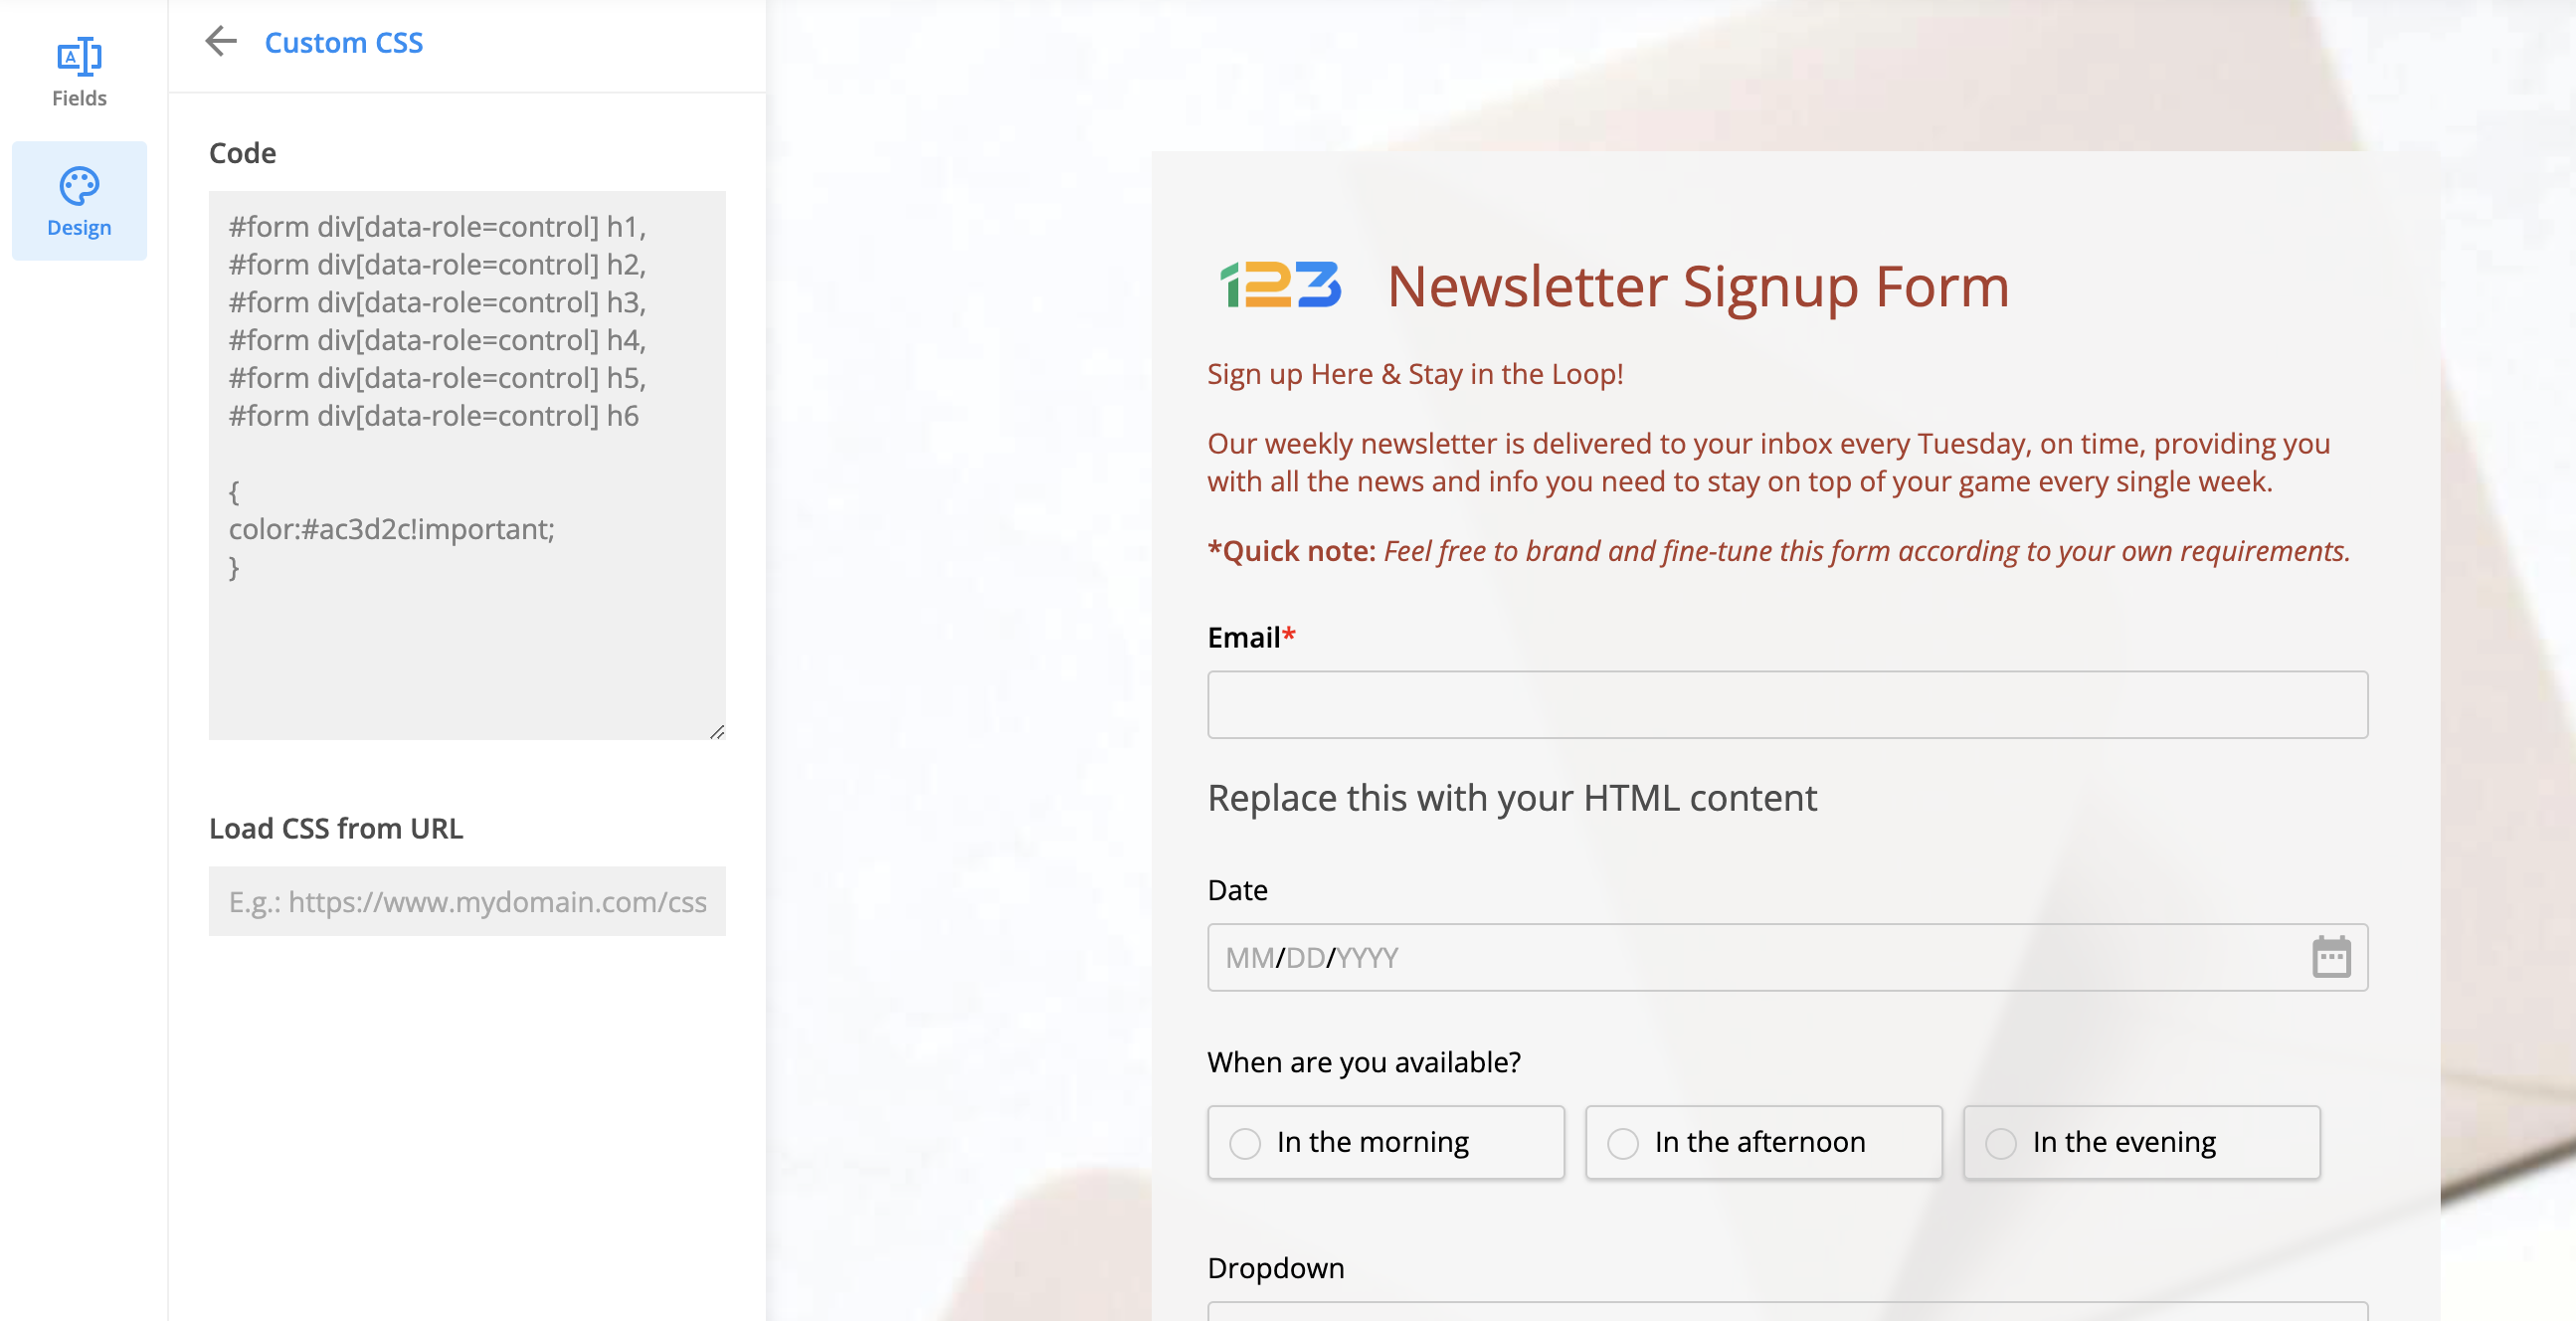
- Text content fields
#form div[data-role=control] h1, #form div[data-role=control] h2, #form div[data-role=control] h3, #form div[data-role=control] h4, #form div[data-role=control] h5, #form div[data-role=control] h6

{
color:#ac3d2c!important;
}
- Instruction text
#form div[data-role="control"] dt[data-role="instructions"]
{
color:#ac3d2c!important;
}
Most Popular
Frequently Asked Questions
Here is a list of the most frequently asked questions. For more FAQs, please browse through the FAQs page.