123FormBuilder Knowledge Base
Search our documentation platform for answers, service specifications and 3rd-party integrations.
Knowledge Base
Form reports display inaccurate data whenever you change the choice fields of your form, but haven’t updated the reports themselves. If you change the options of your choice fields in the form builder (Single choice, Multiple choice, Dropdowns), click on the Update Report link on the bottom page of your report.
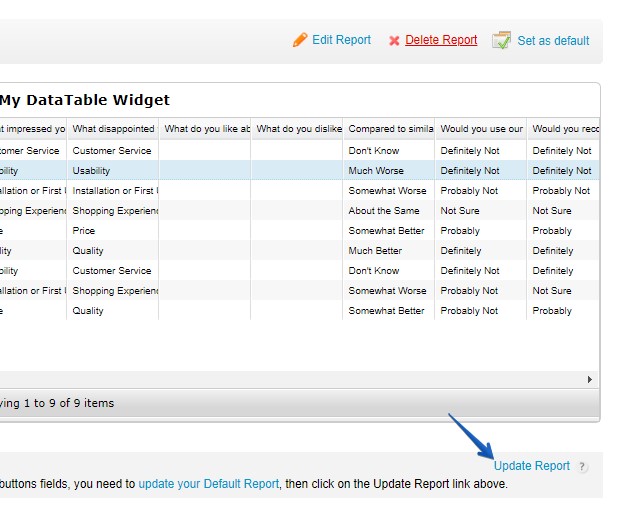
You’ll need to update each report you use. Start by updating the default report and continue one by one with your customized reports (if you have any). This will avoid your reports from displaying misleading data after you have deleted and changed some choices in your Form Editor.
NationBuilder is a community organizing system, offering solutions for NGOs, activists, and political parties, such as signing new members and volunteers, establishing agendas, and more. You can use the 123FormBuilder – NationBuilder integration to add new people to your nation and even assign certain tags for them.
All you need to do is create an online form with the contact details you need, add the NationBuilder application, then match 123FormBuilder fields with NationBuilder tags and/or fields. It’s plain easy and it doesn’t take more than a few minutes to set it up.
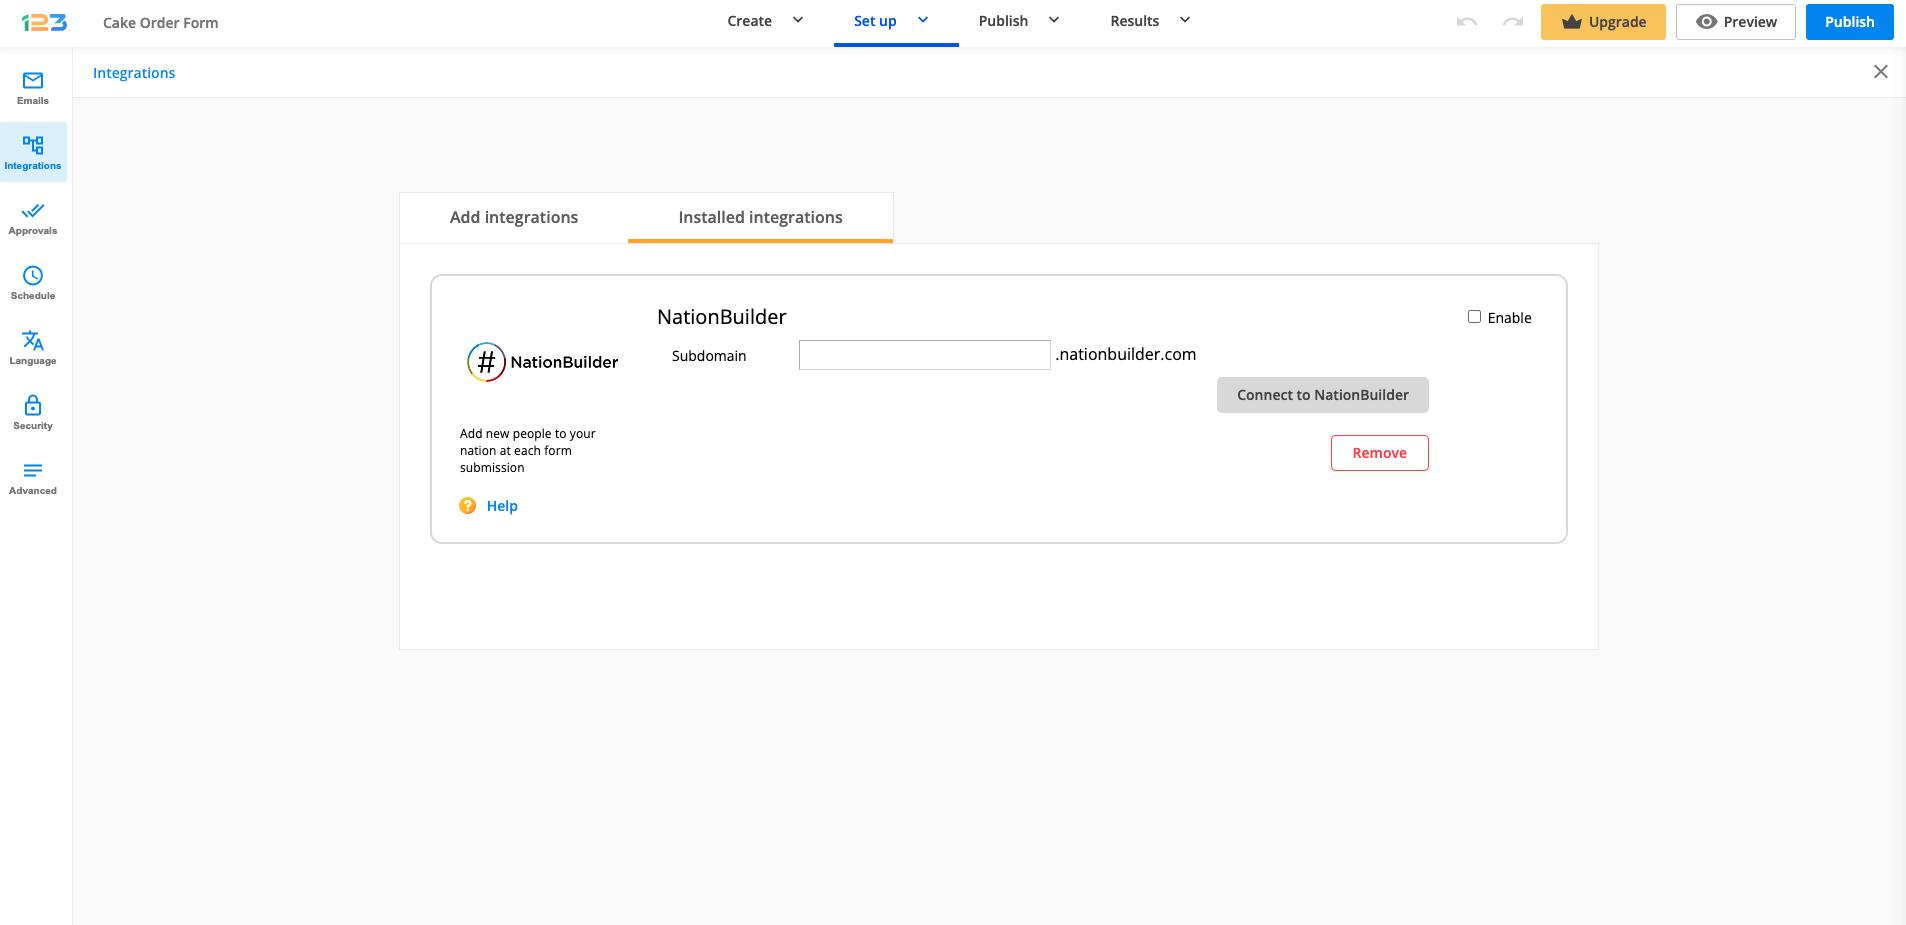
Add NationBuilder from the Integrations section of your form and follow the steps below:
Connecting 123FormBuilder to NationBuilder
1. Provide the subdomain of your nation in the application box and click on Customize.
2. If you are already connected to NationBuilder, you will be redirected to the customization phase of the integration. If not, you will be first redirected to NationBuilder to provide your username and password.
Customizing your settings
Here’s how you set up your integration:
1. Select a list from your nation where you want to add new people.
2. Select the Email field which represents the NationBuilder Unique Identifier. We recommend you set the field as required, in order for the integration to work properly.
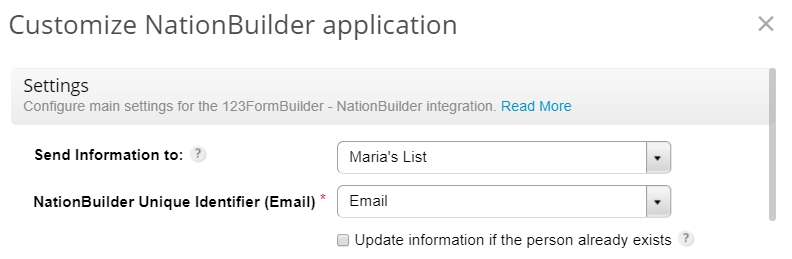
3. Tick the Update information option to update contacts from your nation if a new entry has been made with an email address that already exists in your nation. Once this option is selected, you can opt to overwrite all existing tags of the current person by ticking the option below. This will delete all assigned tags until that time.

Note: Form fields are located on the left. When you add new fields to your form, you will find them here. You can associate tags with your form fields and you can match 123FormBuilder fields with a large number of NationBuilder fields. It is not mandatory for a form field to be associated with a NationBuilder field in order for tags to be picked up at submission.

4. Associate tags to your form fields. They will appear in the profile details of each new person added to your nation.
Note: You can associate form fields with the Tags field from NationBuilder. This means user input will be transferred as tags in your nation.
5. Associate 123FormBuilder fields with NationBuilder fields to complete the profile of each person.
Important Note! The following form fields will not appear in the Customize lightbox, even though you’ve added them: Heading, HTML Block, Social, Google Map, and Image. Therefore, you can not associate them with NationBuilder fields.
6. In the Error Handling subsection you can set the email address that will be informed of any errors that might occur upon submission.

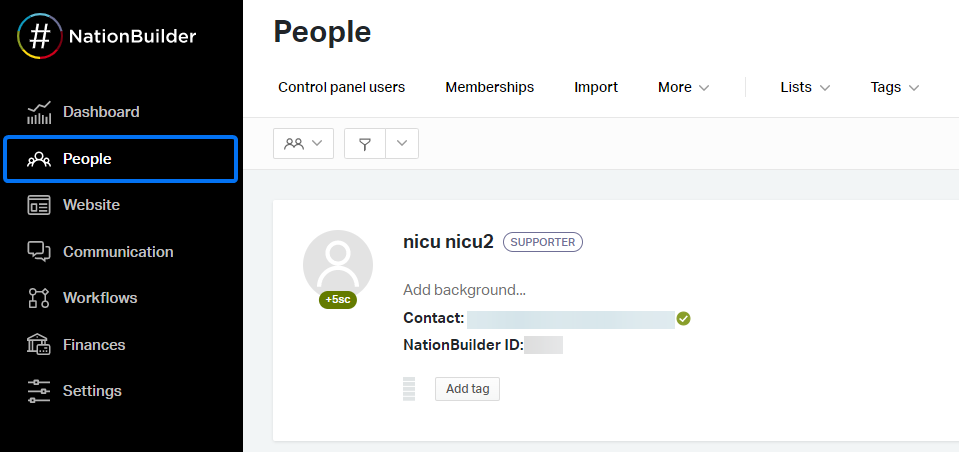
7. Lastly, press Save and your integration is complete. From now on, form submissions will add new people to your nation. You can access your contacts in the People section of your NationBuilder account.
If you want to change some settings of the integration at a later time, simply return to the Integrations section of your form and hit Customize in the NationBuilder application box.
Related articles
By default, the Reports section takes into account all the submissions ever received. When you delete entries from the Submissions section in your form builder account, they are not deleted from your reports. But you can update your Reports to mirror the content in your Submissions section.
Simply go to the Reports section of your form, select the report you want updated and press the Update Report link, on the bottom-right.
The report will then be updated and will no longer contain more messages than the Submissions table.
In the form builder, in Security → Form Password Protection you can set a password for your form. Share it with your target audience and forbid access for other submitters. Check the option to Enable password protection for this form, type a password in both fields and you’re ready to go. To make your form available to everyone, deselect the option.
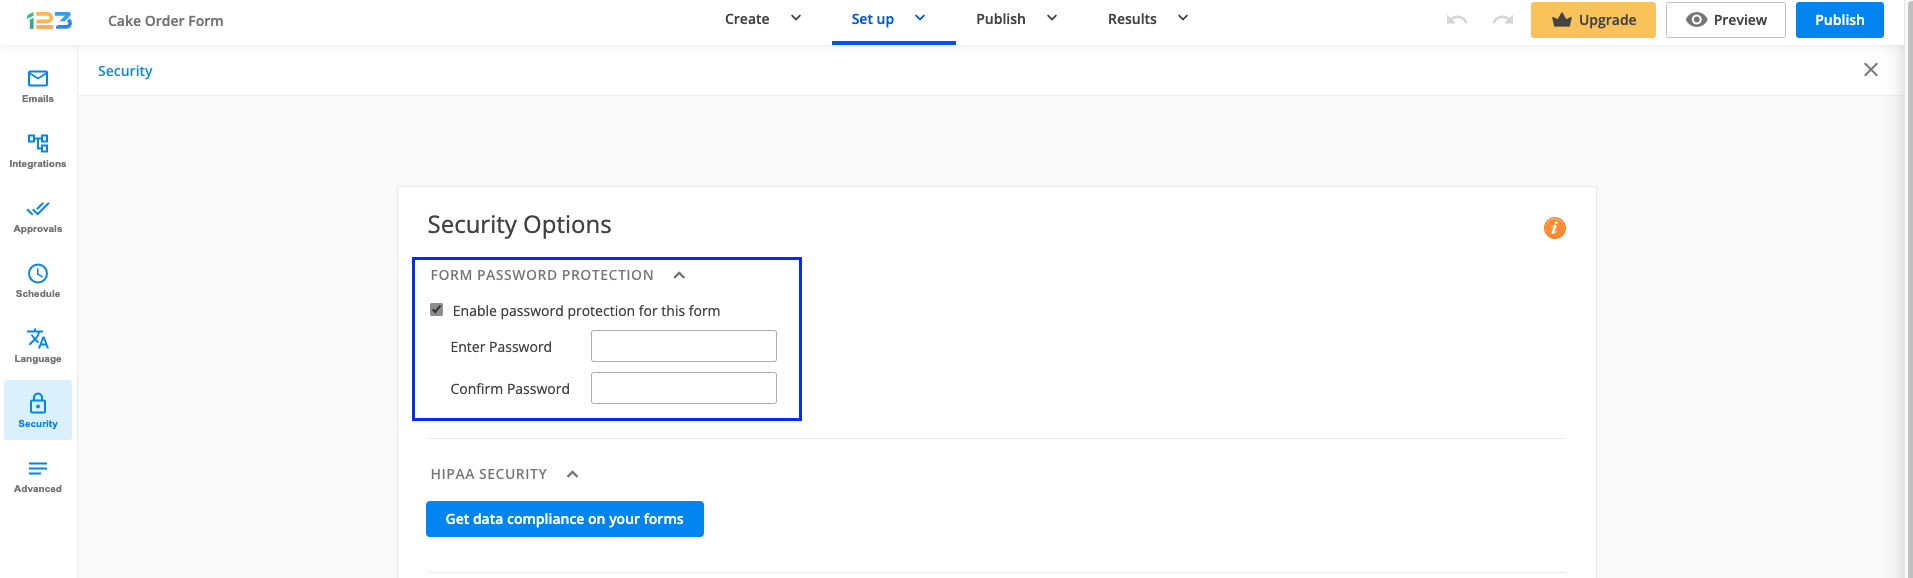
Important Note
The password cannot exceed more than 15 characters.Related articles
You can check your payments details by selecting your username and choosing the Account Details option within your form builder account. This will open the My Account section where you can check your plan and the payment method used. You’ll have access to payment-related options like Transaction History and are able to Change Payment Details. In the My Account section, you can also see how many submissions you have received and how much upload storage space you have left.

A form published on a community page can be automatically prefilled with the username or email of a logged-in user pertaining to that community.
Let’s take a look at the setup.
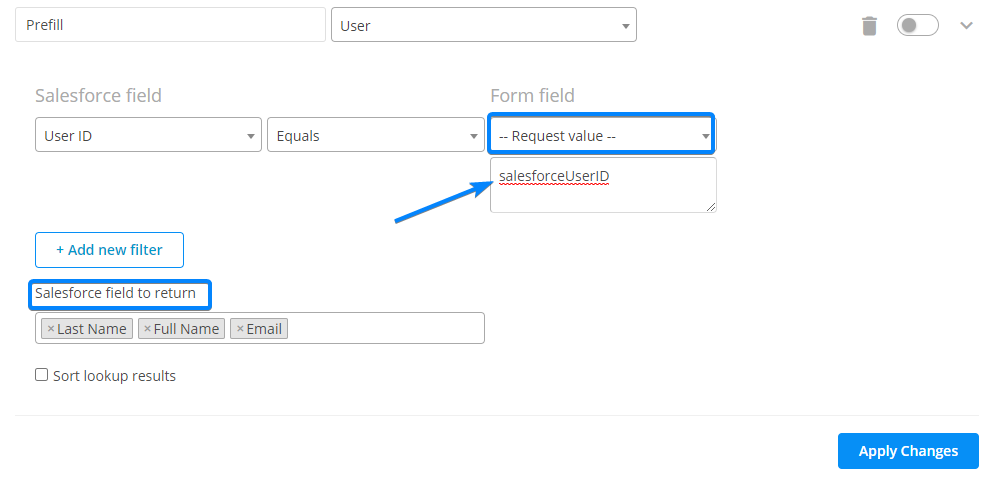
1. First, we will need to configure a Lookup. In this case, the search takes place in the Salesforce User object, where the Salesforce field User ID has to match the salesforceUserID value.
This means that a check will be made to see if the logged user is identified in that community. The Salesforce fields returned are the ones that will be used in the next step.
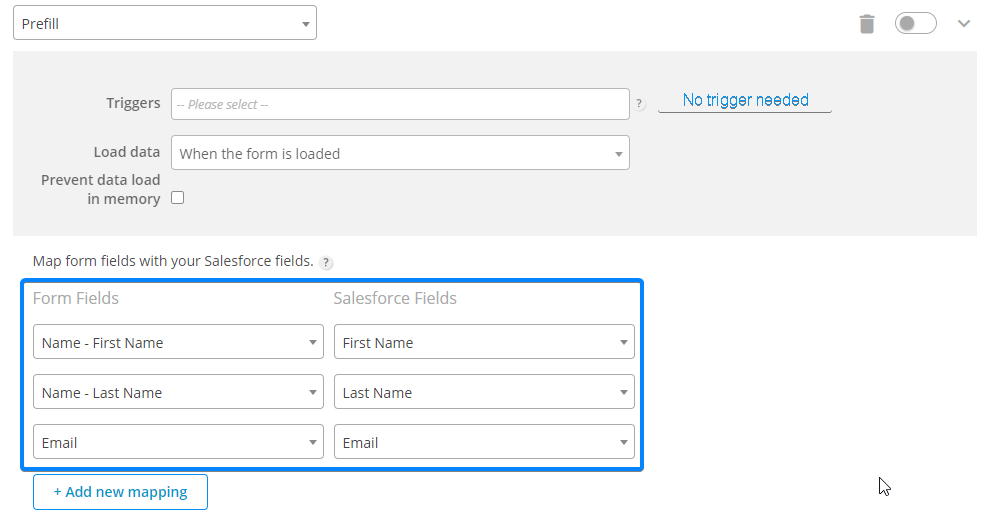
2. Afterward, we have to map the fields that will be prefilled with the user’s information. The data should be loaded when the form is loaded, so make sure you choose that option.
Below, the Salesforce fields holding the user’s information will be associated with the form fields where the values will be displayed.
At this point, everything is set up. Just publish the form inside your community and take a look at how the form is prefilled with the relevant data.
Related articles
After installing the 123FormBuilder app and assigning the license, Salesforce users need to find our app in App Launcher and access the app in order to authorize it.
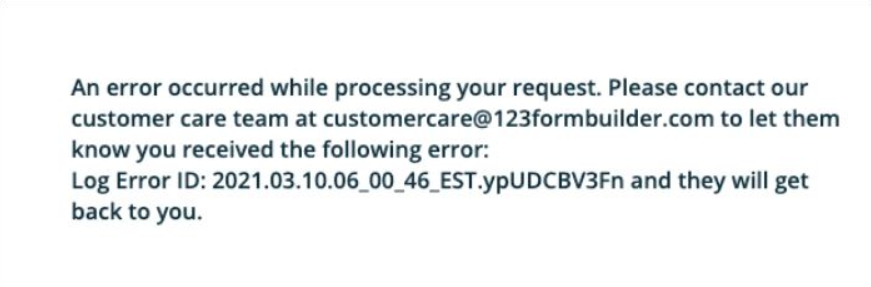
Some users may encounter the following error when trying to access the app:
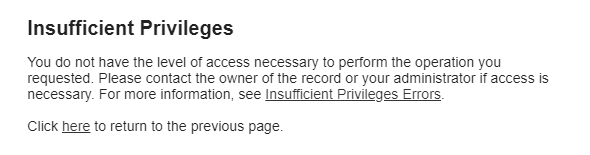
This error shows up because of one of the following two reasons:
1. The user doesn’t have the 123FormBuilder Permission set assigned. When the app is installed, three Permission Sets are automatically generated:
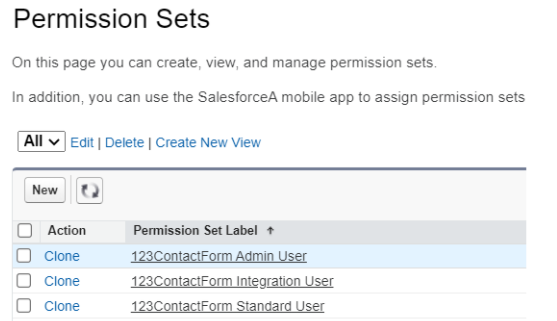
Please make sure to assign them to the user that received the Insufficient Privileges error.
2. The Login As option was used. In this mode, the form builder app can’t be authorized and that’s why the Insufficient Privileges error shows up. Please ask the user to access the app after logging into Salesforce with the username and password.
Related articles
Why does it show up?
When creating an Attachment in Salesforce, the body of the Attachment is a required field.
Therefore, if you get this error, it means that no file was uploaded on the form.
Full error message:
The record could not be created in the Attachment object. Reason: There was nothing attached to the body of the Attachment object.
How to prevent this from happening:
1. Make the File upload field on the form required (of course, if it’s mandatory for the submission) – this won’t allow the user to submit the form if there is no file uploaded.
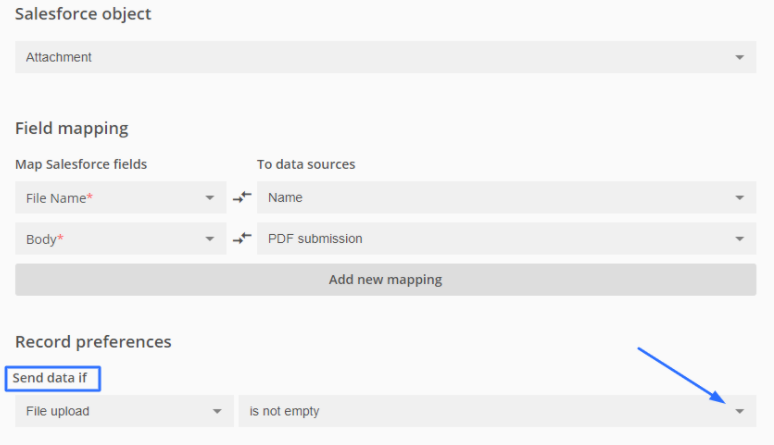
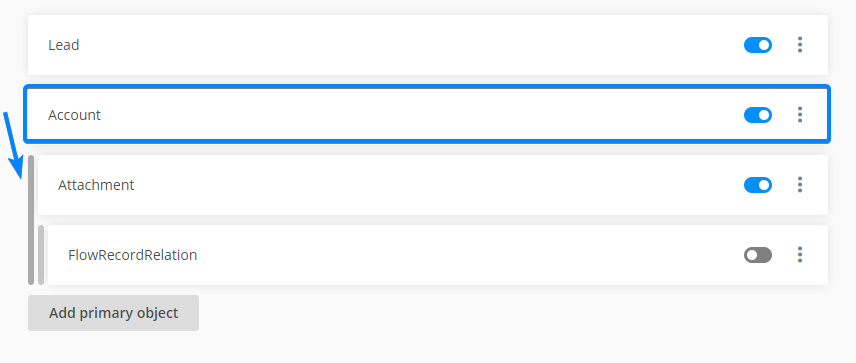
2. Send data to Salesforce only when the File upload field is not empty. Go to Object Mapping – Attachment and for Record preferences, under Send data if select your upload field and choose to create the record if this field is not empty.
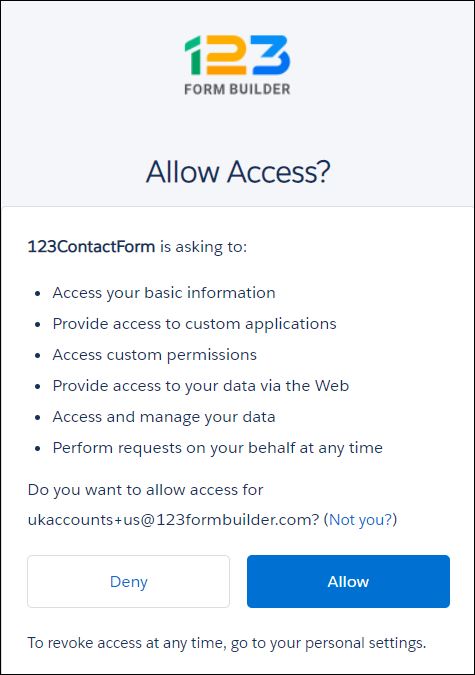
123FormBuilder is an OAuth-enabled connected app integrated with Salesforce. It can access a subset of your Salesforce data after you explicitly grant app permission and obtain an access token. In this article, you will learn how to refresh the OAuth token.
OAuth 2.0 is an open protocol that authorizes secure data sharing between applications through the exchange of tokens. Therefore, the form builder Salesforce app needs a valid token in order to access the Salesforce data and to allow the set up of lookups and object mappings on the form.
If the token expires and you have lookup on the form, in View form you will most likely see a similar message:
Tokens are set to expire as a security best practice, but you can refresh the token at any time.
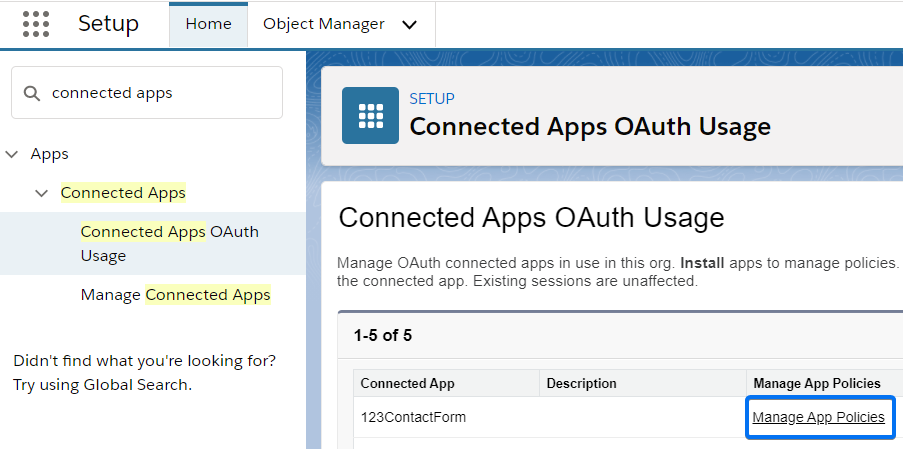
In order to see the Refresh token policy for the 123FormBuilder app go to Setup, search for Connected Apps OAuth Usage, find 123ContactForm and click Manage App Policies.
In the Manage App Policies screen, scroll to the OAuth Policies section. On the right side, you will see the Refresh Token Policy. If you need to change it, just click Edit Policies at the top.

How to Refresh the token?
There are two possible ways of refreshing the token:
- Per entire application
– Go to Setup and search for Connected Apps OAuth Usage. Find 123ContactForm, click Block and then Unblock:

- Per individual user
– Go to Setup and select Users. Once you find the user hover the OAuth Connected Apps section. Find 123ContactForm and click Revoke:

Important Note
Once the token is revoked (per entire app or individual user), you’ll need to access the 123FormBuilder app in order to Re-authorize it.Search in the App Launcher for 123FormBuilder, click the app and go to the 123FormBuilder tab. Choose the server where your 123FormBuilder account is (US or EU) and Authorize the app.
Related articles
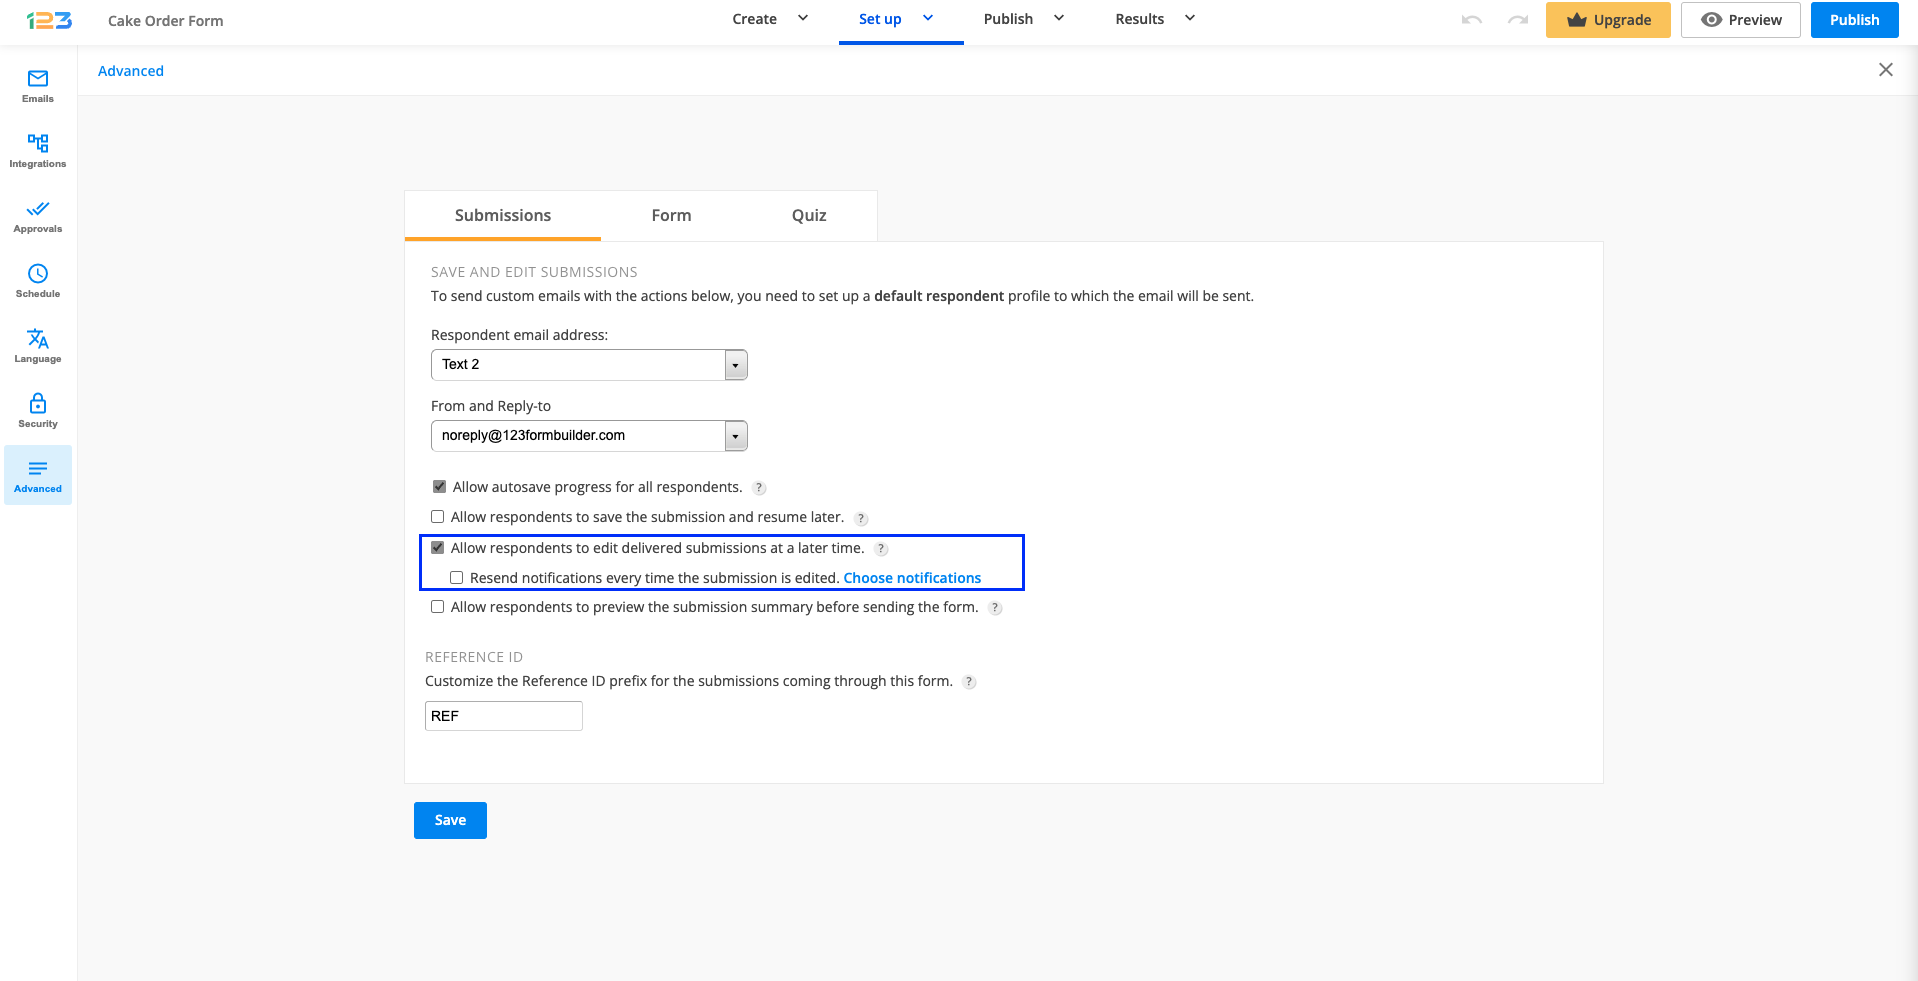
Users can update their submissions when the option Allow respondents to edit delivered submissions at a later time is enabled on your form.
This feature allows form users to bring changes to their entry and allows form owners to choose which emails to resend.
Tick Resend notifications every time the submission is edited and click on the hyperlinked text Choose notifications.
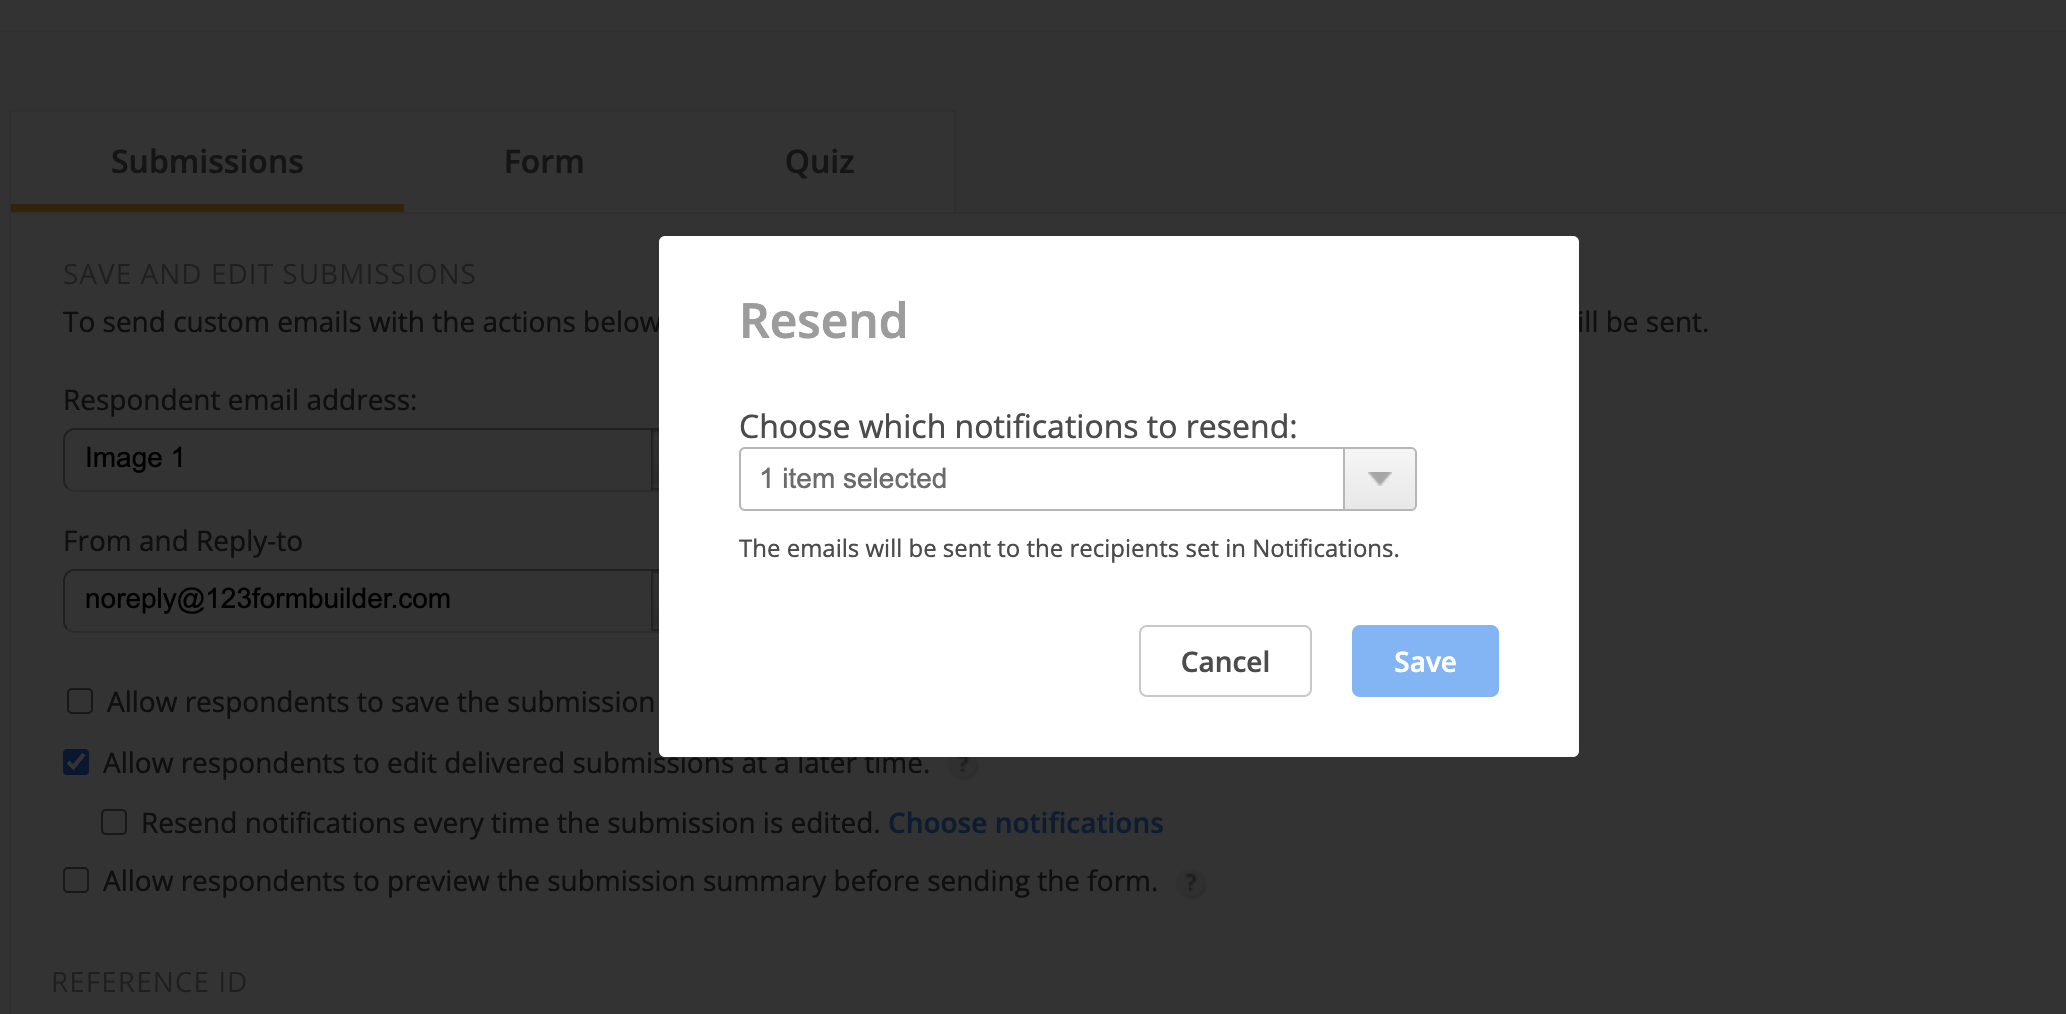
In the lightbox that appears, choose any of your email templates that you have created for your form. Select any notification templates that you wish to resend each time users are updating their submissions.
Related articles:
When you enable payments on your order form within the form builder, you can specify when to send records to Salesforce, including when payments were successfully processed.
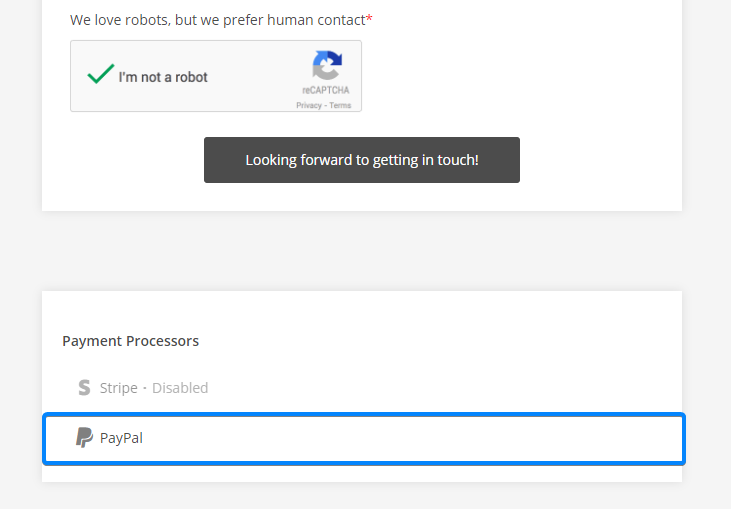
Important Note!
For this to work, you need to enable at least 1 payment processor. If the payment integration is disabled, the records are sent after submitting the form.
Open up your Salesforce integration and select your Object Mapping (Primary or Related).
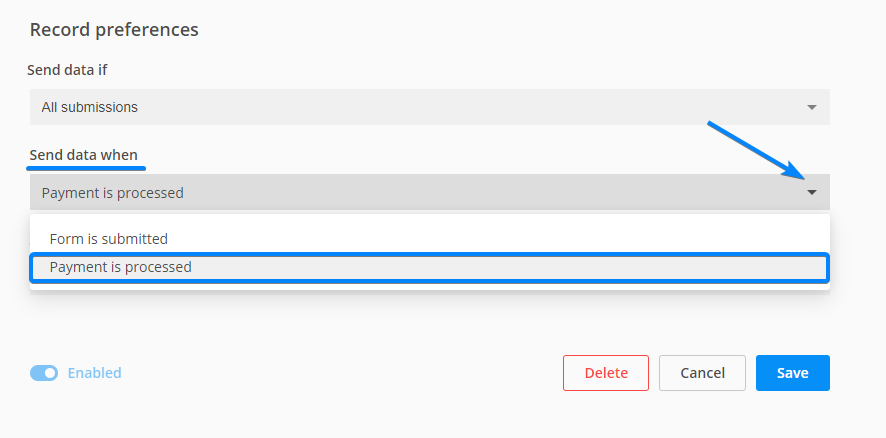
Below the object’s record preferences section go to Send data when.
From the dropdown list choose Payment is processed.
When you integrate with Google Sheets all the data is imported in the form’s spreadsheet. Sometimes you need only certain information about your users. In this article, you will learn how to send specific data to Google Sheets.
For this to work you will need to create a Zapier account and enable the Webhooks integration.
How does it work?
To summarize the whole process, you will create a zap between WebHooks and Google Sheets and use the Webhook link on your form.
Webhooks are automated ways for different apps to send messages to each other.
Webhooks are triggered by specific events and in our case, it will be a form submission. When you create the zap, a Webhook link is provided by Zapier. That link will be placed on your 123FormBuilder form.
Let’s jump right into it to have a better understanding.
Setting up the connection
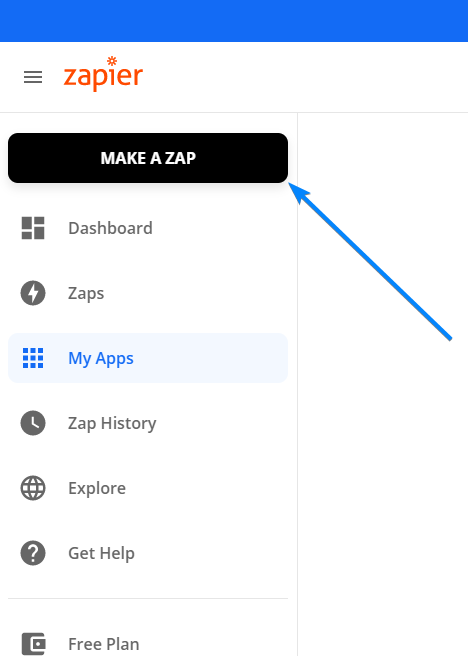
Open up your Zapier account and click on Make a zap.
Next, search for Webhooks.
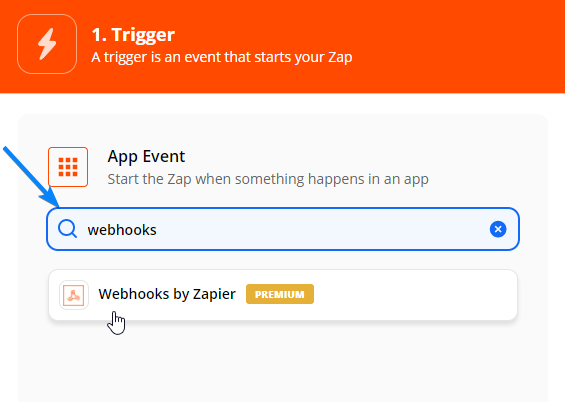
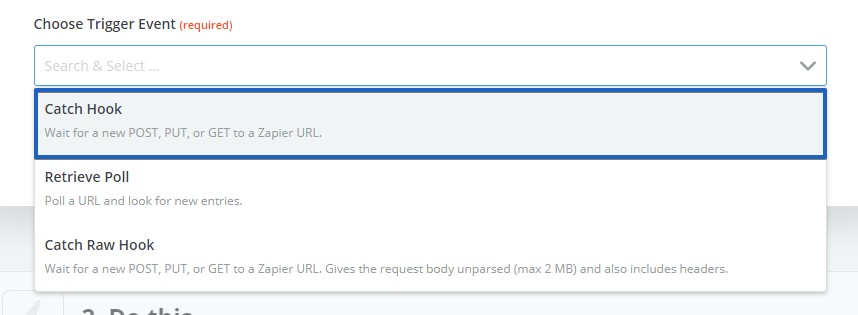
At Choose Trigger Event select Catch a Hook. Click Continue.
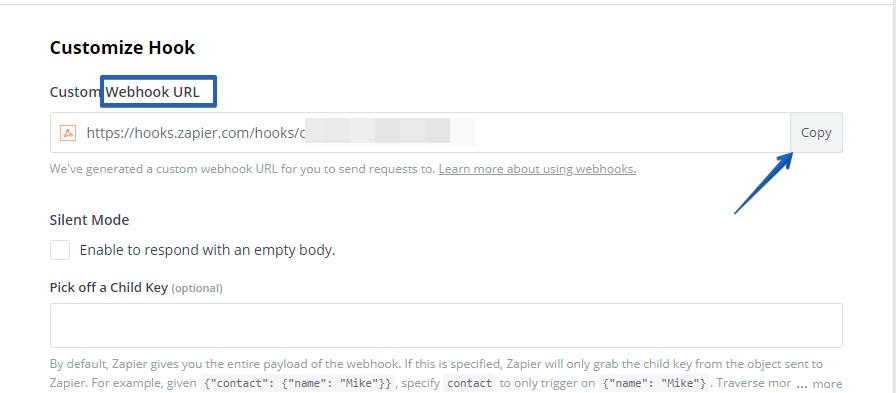
Copy the Custom Webhook URL.
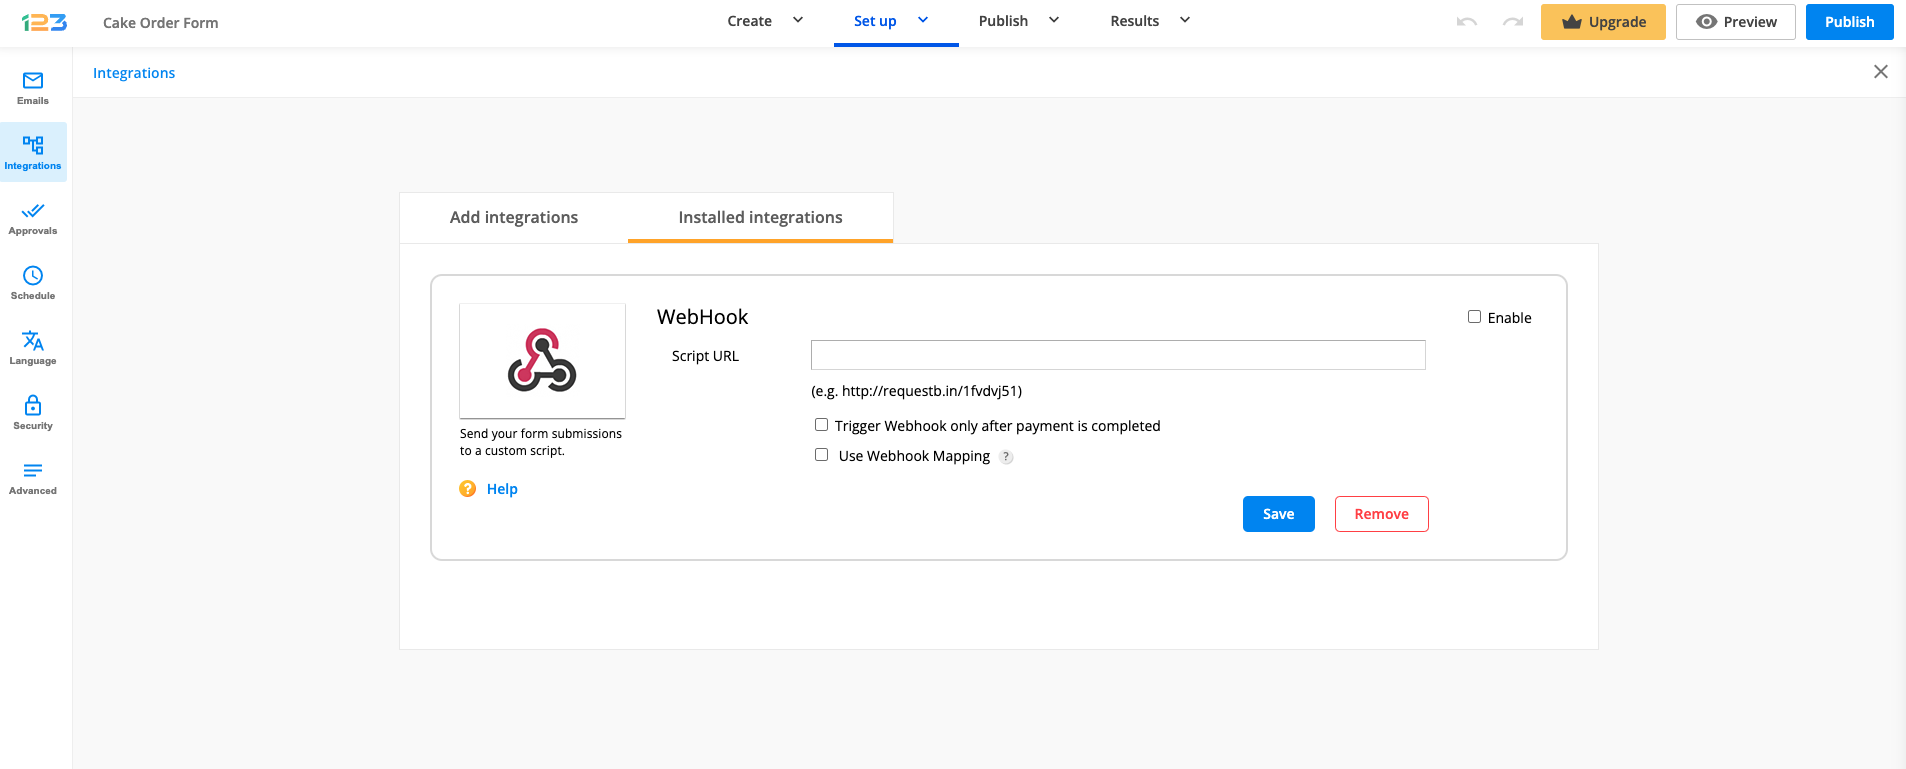
Go to your form’s Integrations section. Search for Webhooks integration and paste the Webhooks link copied earlier.
Now, form submissions are the trigger. You could add Google Sheets as well.
Make a test submission on your form to help Zapier find the data. Complete the form with relevant data, you need to identify it later in this guide.
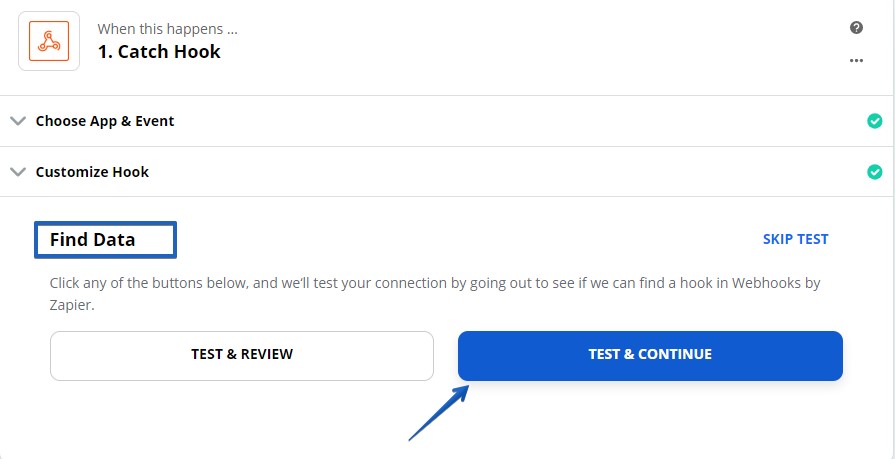
Go back to your zap settings. Below Find Data click on Test & Continue.
In the second part of the zap, search and add Google Sheets.
At Choose Action Event select Create Spreadsheet row.

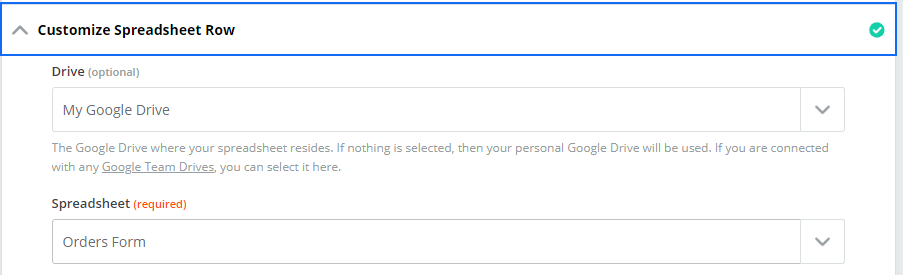
Next, connect your Google Sheets account and select the form’s spreadsheet.
Open up the Google spreadsheet created by your form. Insert a new blank sheet (a new tab) into the existing Google Spreadsheet. Type the title for each column into the blank cells at the top of the table.
The column name doesn’t need to be exactly as your field label.
In your zap’s settings at Worksheet click on the new sheet created.
The columns from the new sheet are listed below. Click the Insert a field icon and associate it with the corresponding form field.
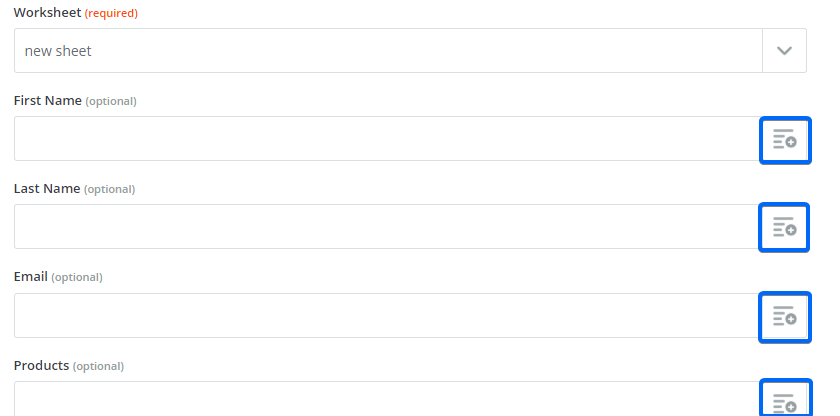
In the dropdown are first displayed the labels (control name) and not the field’s input value. Continue to scroll down until you see the data entered in your test submission (control value IDs). Map each field with its proper value.
Click Continue and Test & Continue. Toggle On the zap in the top-right corner and you’re done setting up the zap.
Make another test submission and check your new sheet. Only the selected columns will be populated.
Every time you receive an entry both sheets will be populated. The original one can not be deleted.
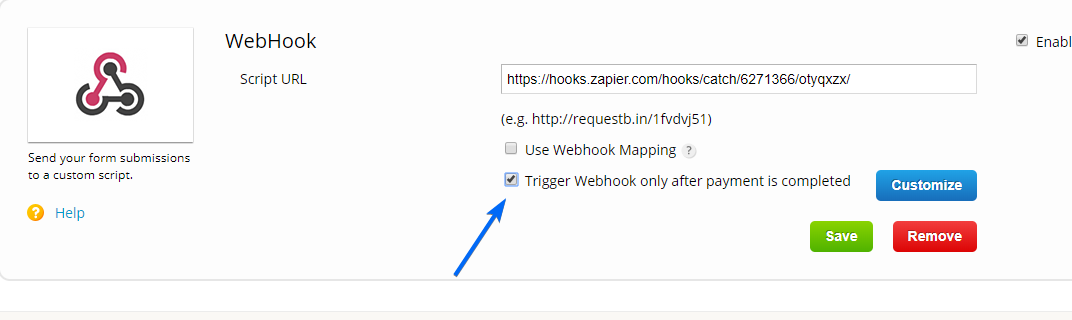
Additional Note! If you have an order form with payments enabled you can send the data in the last sheet only when the payment is completed.
To do so, go to Integrations, and at Webhook enable the option called Trigger Webhooks only after payment is completed.
Most Popular
Frequently Asked Questions
Here is a list of the most frequently asked questions. For more FAQs, please browse through the FAQs page.