123FormBuilder Knowledge Base
Search our documentation platform for answers, service specifications and 3rd-party integrations.
Knowledge Base
Setting up notifications in our form builder is an easy process and we offer multiple customization options. We know that things have changed quite a bit, so let’s make them crystal clear.
Here is a breakdown of the Emails section.
Email recipients
Who should receive the emails? At Send to select from the options listed below:
- My email (the email address associated with your 123FormBuilder account).
- The email fields listed on your web form.
- Type in each recipient’s email address.
Anyone can receive email notifications: form owner, form user, and any recipient of your choice. You also have the possibility to create multiple templates for different purposes.
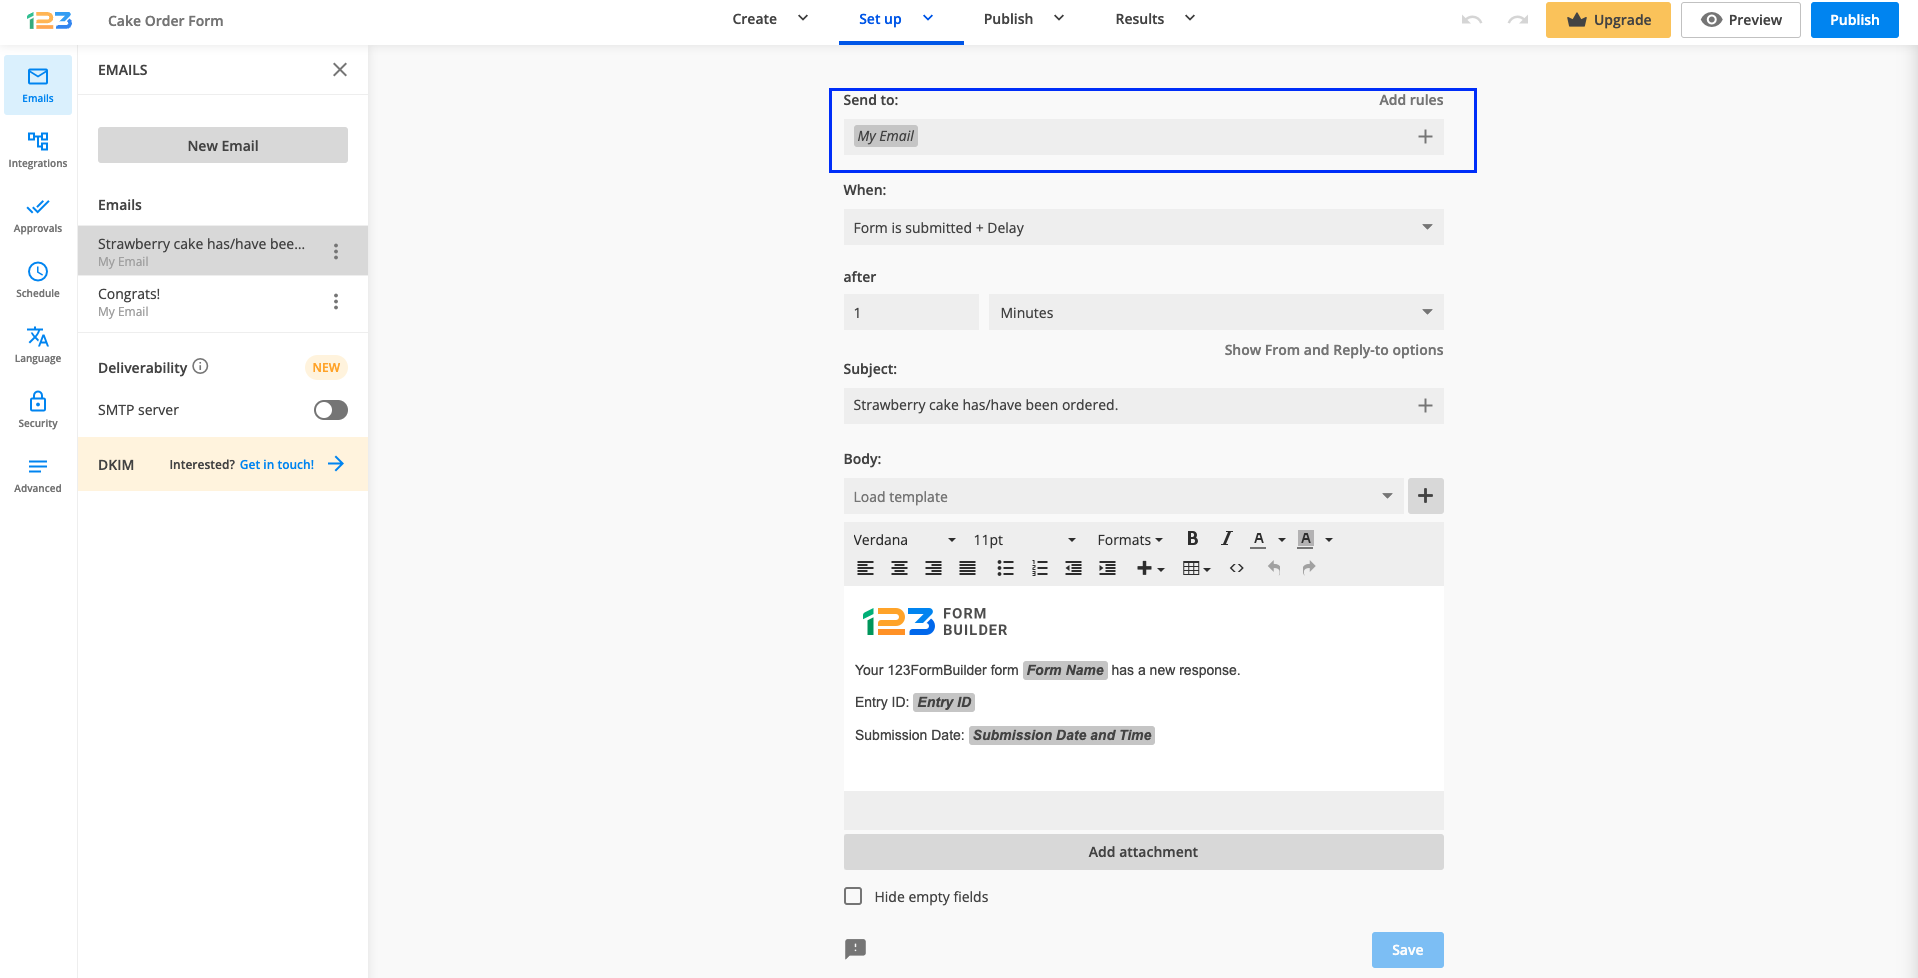
Setting up the email
Every email can be sent to 1 or multiple recipients, with or without conditional logic. If you want to send your emails to different recipients based upon how a respondent completes the form, you can set up rules. To do so, simply click on Add rules.
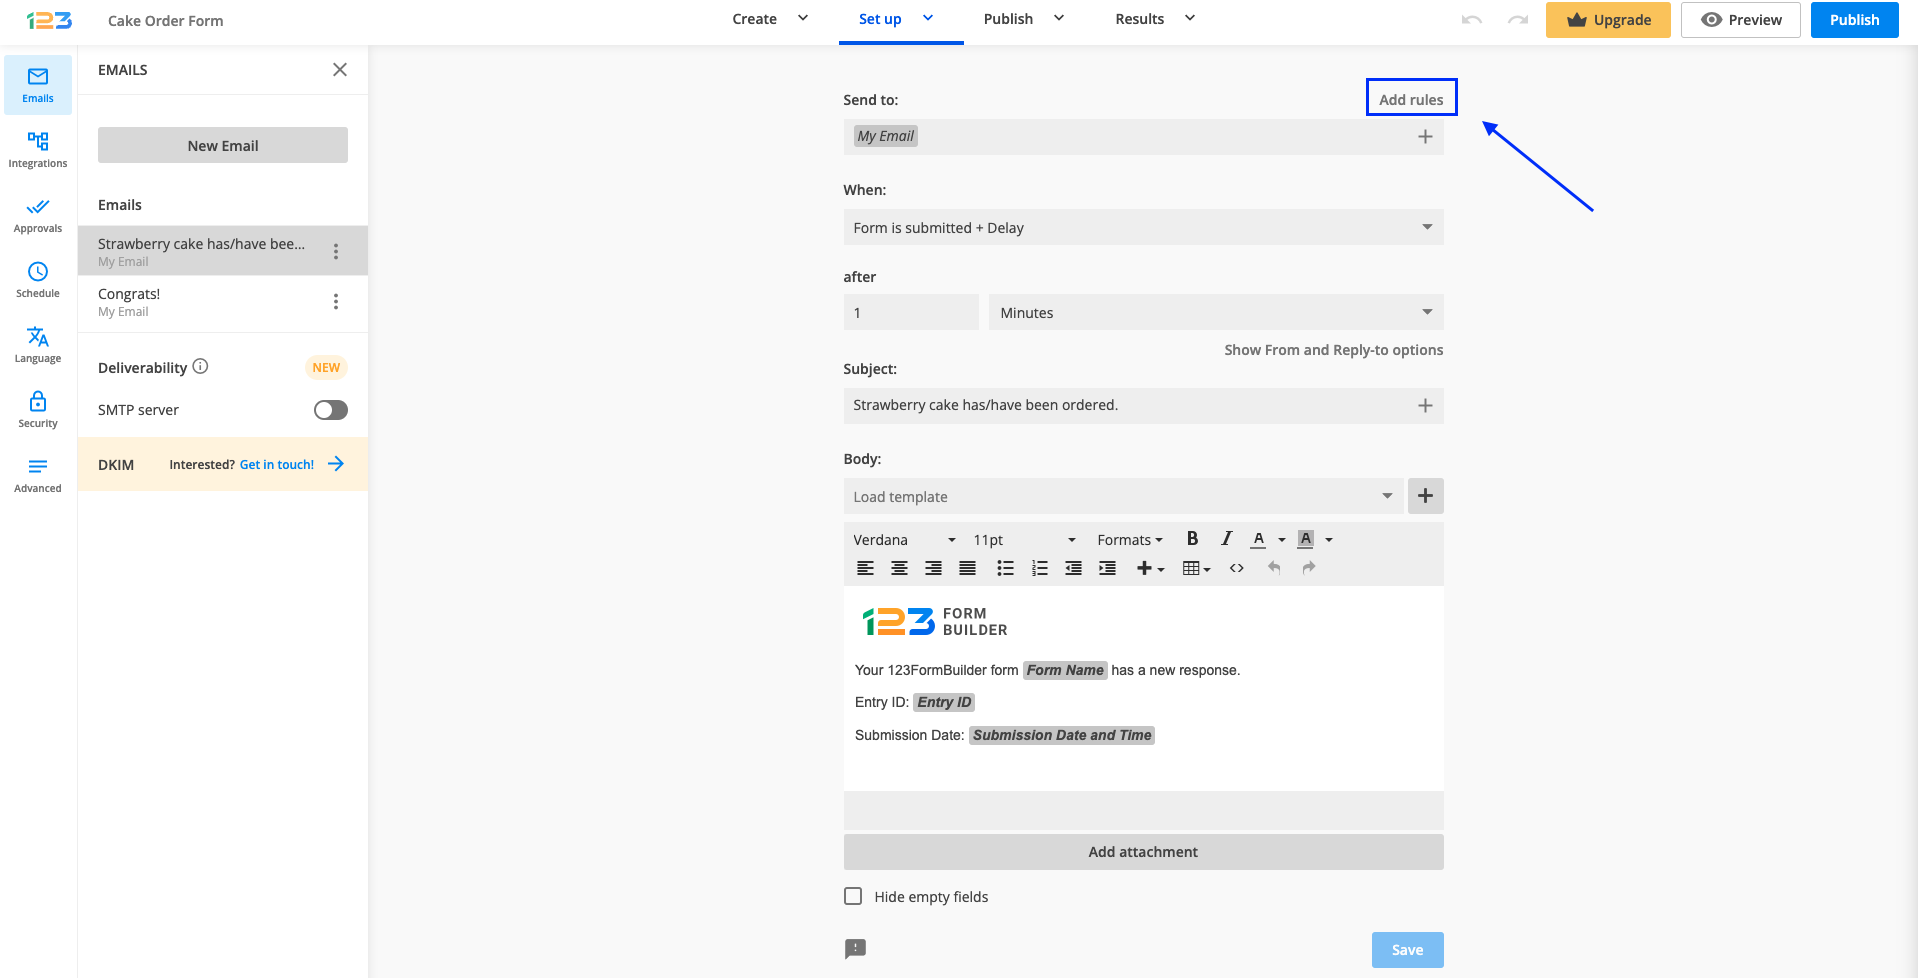
Once you have clicked on Add rules, you will be able to create conditional logic for your email template. You can choose to Send to or Only send to and input the email address you are interested in sending the email to.
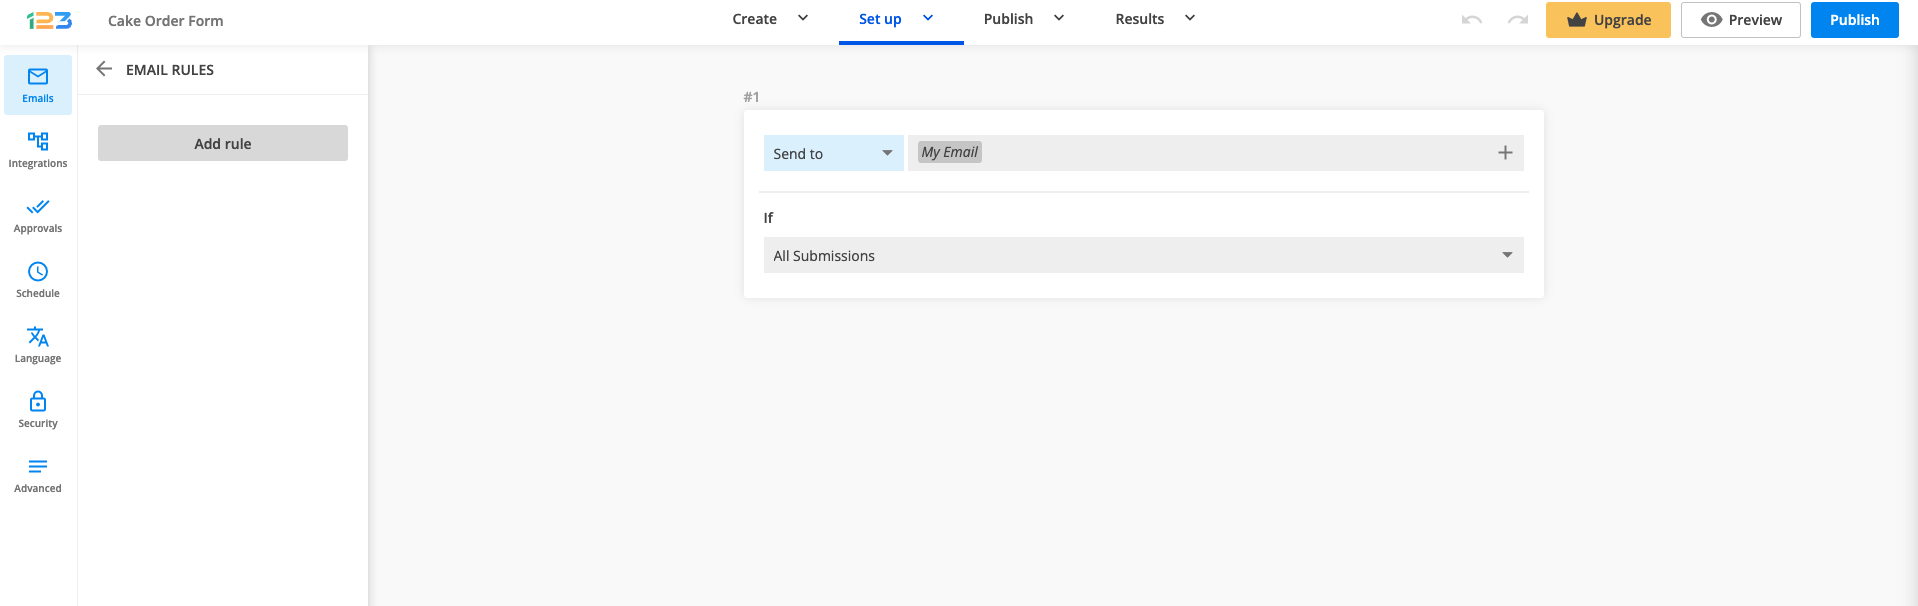
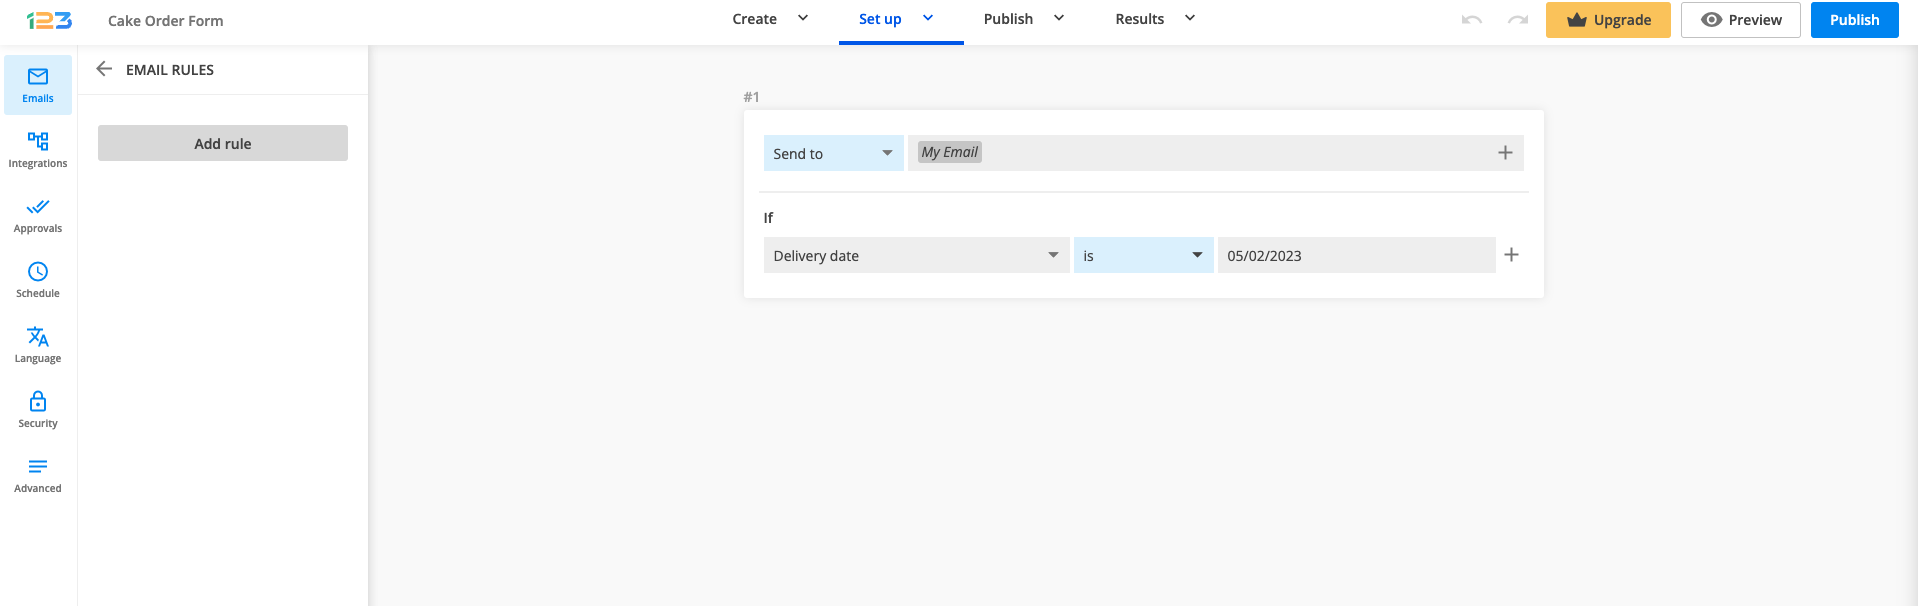
Now all you have to do is to set up the conditions. By default, it will be All Submissions – meaning the email will be sent to the email address that you have provided for all submissions. You can change that by clicking on the dropdown.
Now you have access to all fields on your form. If you select one field, an additional option is available: choosing the criteria based on which the email is sent.
You can establish when to send the email to your form recipients. Choose from the dropdown list the option that best suits your needs.
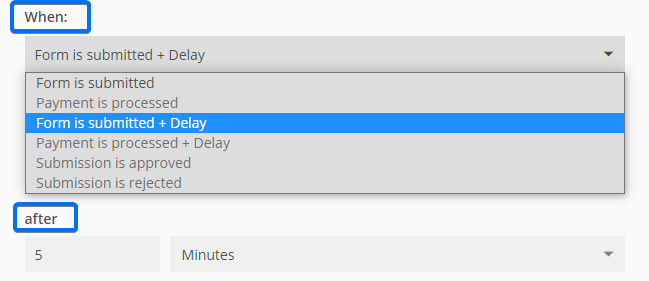
In order to use the Payment and Approval triggers make sure you first enable these features.
Change the Subject by adding a field variable. By doing so, new submissions will create new email threads.

Show From and Reply-to options
- From name. You can choose a name or title that will be recognizable to your respondents. Often that will be the company name.
- From email. Use our email server noreply@123formbuilder.com or send the emails through your own SMTP server. You can also choose noreply@myfor.ms (to simply remove any reference to our domain) or configure a custom domain to be the sender.
- Reply to email. This is the email address where you can reply to the submission email. You can select the email field to contact the form user.

Composing the email template
Click on Load Template to select which predefined template you wish to customize.
- Default notification template. The standard template commonly used by the form owner and form recipients.
- Payment template is the email sent to form users when their payment is marked as complete.
- Approval request template. Here you can change the content that the approver(s) of your form receive.
- Autoresponder. Set up personalized autoresponder messages to thank your users for their submission.
- Copy of submission template has the same structure as the default notification template but it’s addressed to form users.
- Quiz template shows the quiz results along with the Quiz Summary.
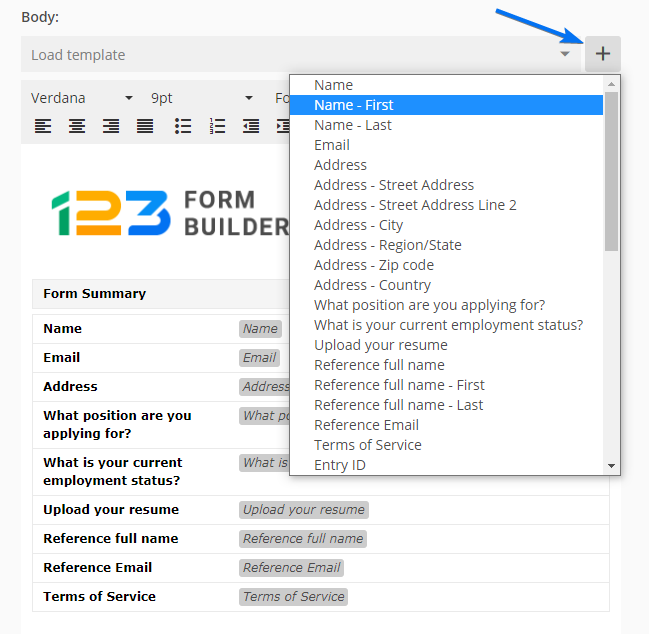
To insert submission input into the template, click on the plus sign and use the fields displayed in the dropdown list.
The content of your emails can be anything you wish. In each template, you can add your own images, links, tables, and text. Hit the Source code icon (< >) and create your own fully customizable template using HTML language.
Furthermore, you can attach a file to the email template. Attach your own file, a PDF with the layout of the form, or a custom PDF template.

If you have enabled the edit submission option, in the same Advanced → Submissions section you can choose the notifications that will be resent. The Resend functionality will trigger Email notifications. The form’s recipients will receive them each time the entry is updated.

In the Advanced → Submissions tab, you can also add a tracking code to your form submissions by enabling the Reference ID prefix.
Important Notes
- Each field has a unique ID, therefore custom templates will not work properly on different forms.
- You can set up a maximum of 15 email notifications/form.
- The Reference ID prefix can contain up to 9 characters.
Our form builder comes equipped with a wide range of features for creating powerful forms and is the go-to solution if you want to generate leads, capture complex data, create order forms, and automate workflows.
We offer a secure Stripe-hosted payment page that lets you collect payments quickly. In this article, you will learn how easily you can enable Stripe Checkout on your forms. Stripe Checkout payment integration provides an extremely easy way to collect payments with your online order form.
Setting up Stripe Checkout
Let’s get started. Follow these simple steps:
1. Open the Form Editor to edit your form’s content.
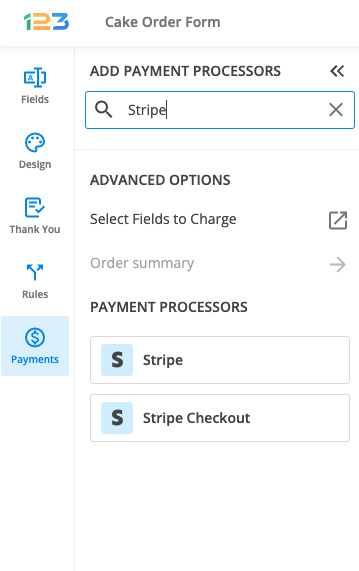
2. Afterward, from the Payments section click to add Stripe Checkout.
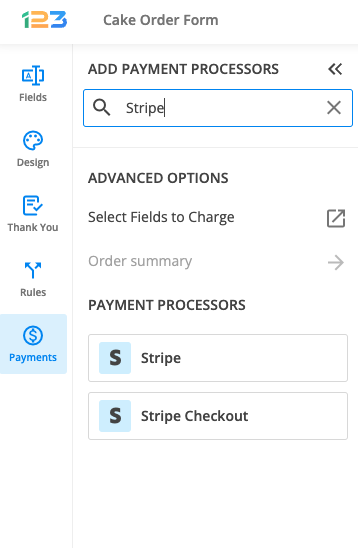
3. After adding Stripe Checkout to your form, you will notice a couple of changes: the Stripe Checkout payment processor has a tag near its name and the settings panel opens up to the right side of the page.
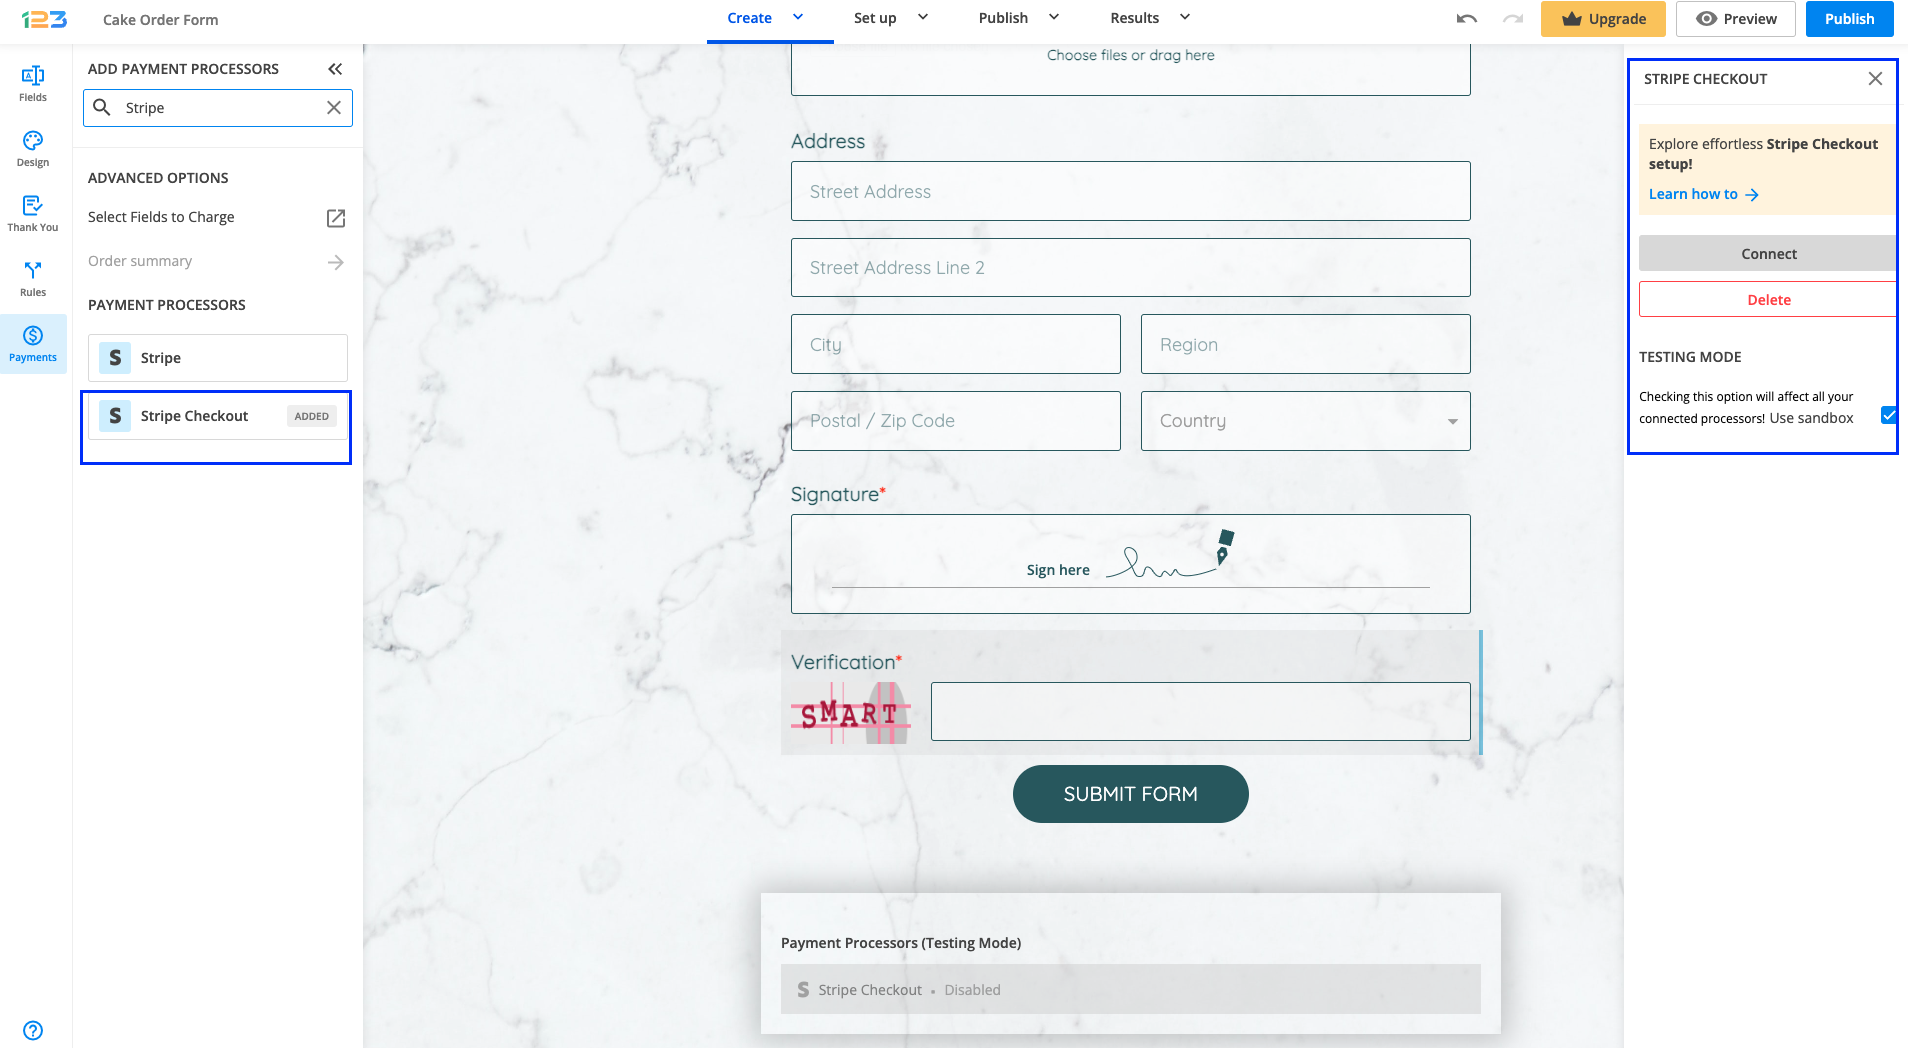
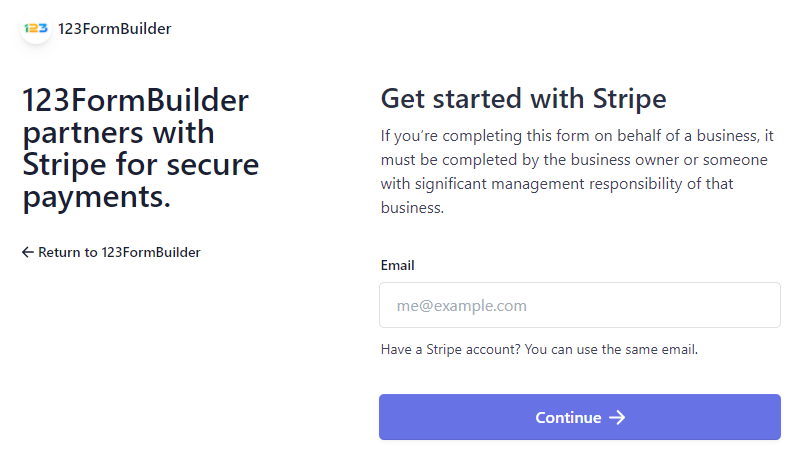
4. In order to set up the Stripe Checkout integration, you have to click on Connect and follow the instructions to enable the integration.
5. If you already have a Stripe account, enter your email address and follow the steps to connect your account. We also offer the possibility to create a new Stripe account.

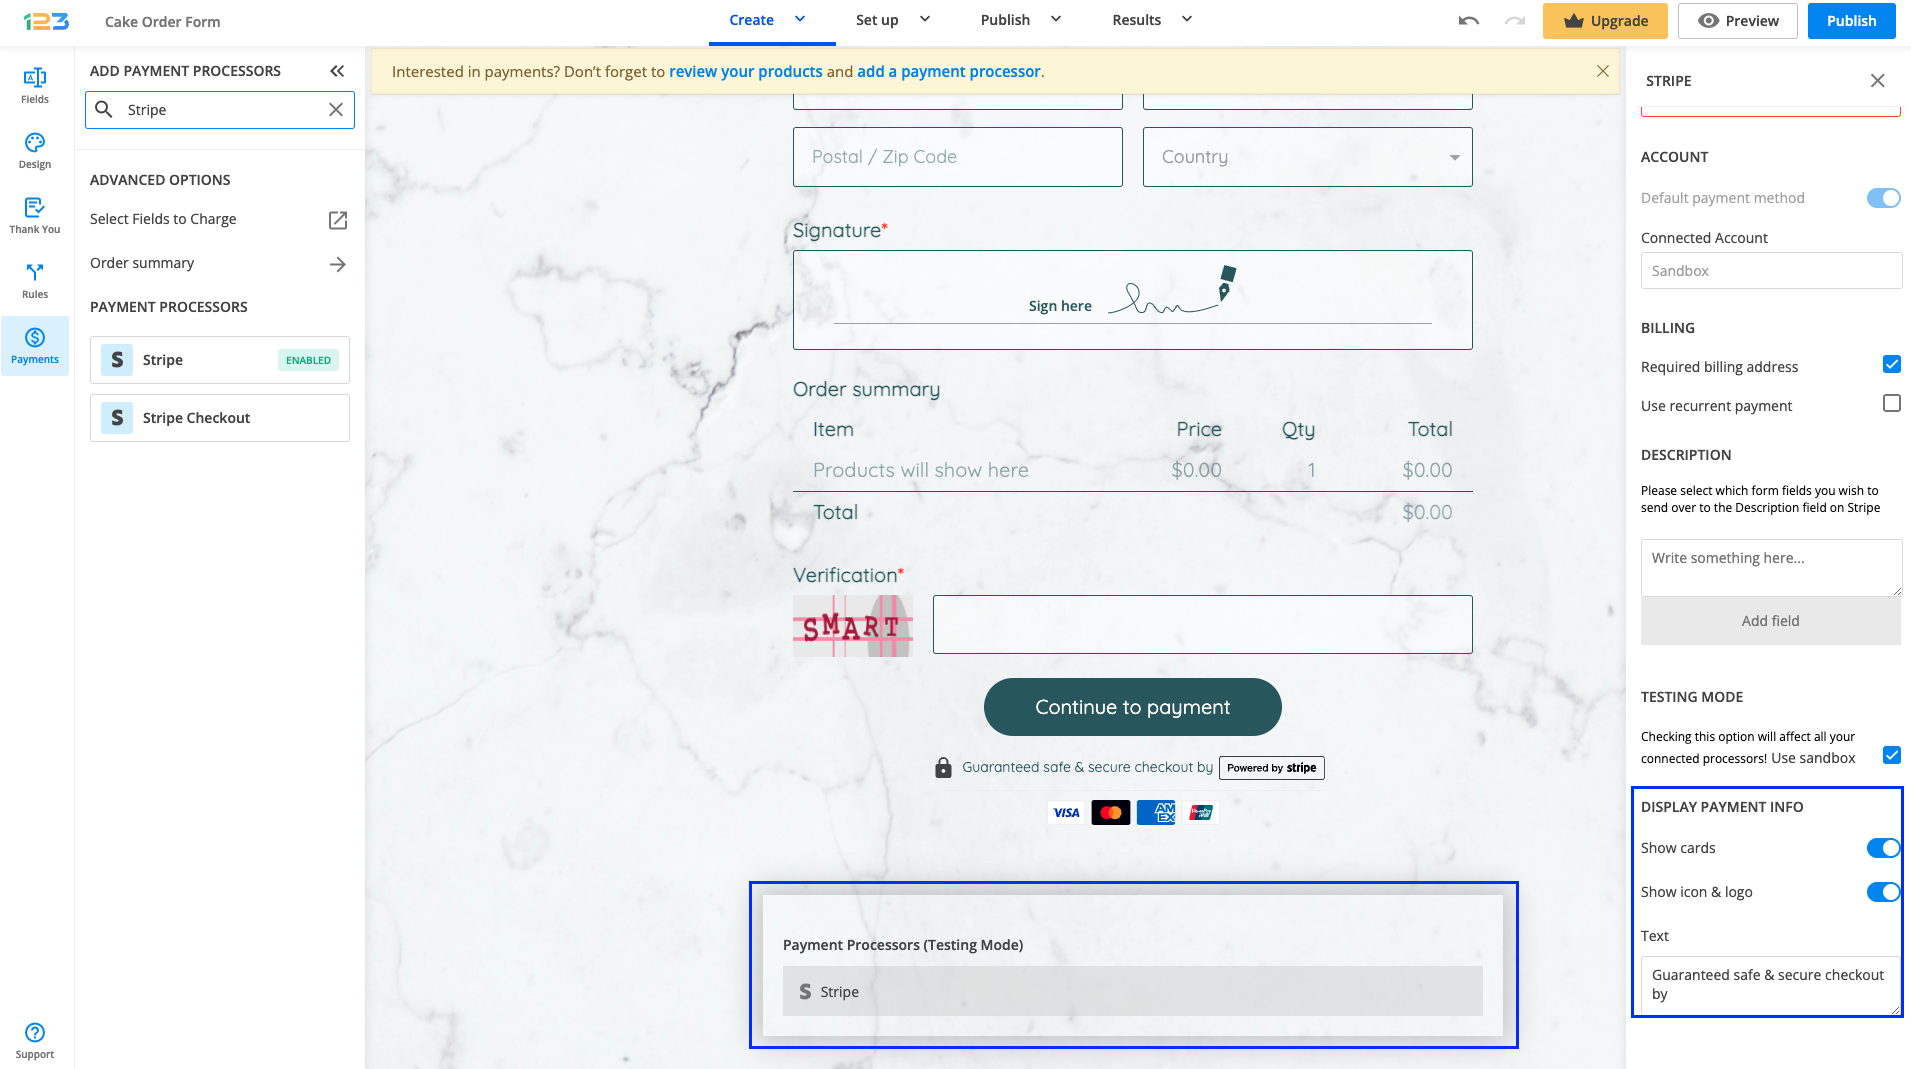
5. After you have created the connection between 123FormBuilder and Stripe, click Enable. By enabling Stripe Checkout, you will notice a couple of changes on your form.
The Stripe Checkout payment processor on the left side panel has an Enabled tag on it so you can easily scan which payment processor is enabled.

Another change is that an Order summary will be displayed on your form. Here will appear all the products your respondents select on the form, together with the price per option, quantity, and the total price. If you want to customize the Order summary, all you have to do is click on it and the available settings appear on the right-side panel.

You’ll also notice a change related to the Submit button. Once your payment integration is enabled, the Submit button is changed to Continue to payment. Below it, we are displaying a disclaimer together with the Stripe logo so that respondents are aware they are proceeding to a payment.
Also, the accepted cards by the Stripe integration are visually displayed so that respondents know from the start what is the accepted payment method.
You can customize the action bar (everything that is related to the submit button, additional buttons, disclaimer, etc) by simply clicking on this area.

You can also make changes to the default settings related to showing the accepted cards and the icon & logo of the payment processor. By default, both of these settings are enabled, but you can disable them by clicking on the payment processor.

You can customize the integration by adding your store name, a short description, and even pasting a custom image URL with your company’s logo.
If you have a donation form, you can also tick the option Payment represents a donation.

Once all the configuration is finished, the Continue to payment button will redirect your form users to Stripe’s Checkout pop-up window.
To the left side, respondents will see the total amount to pay, together with the Store name and the store short description you have provided in the 123FormBuilder app.
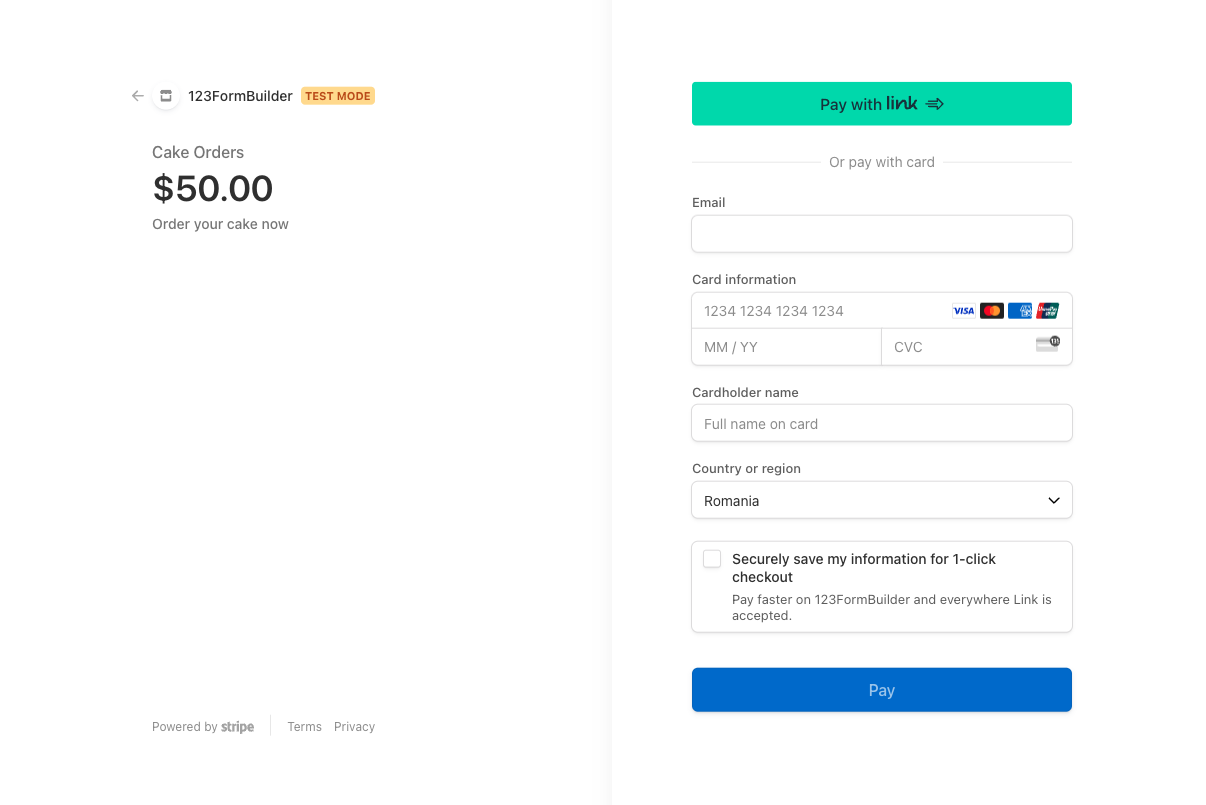
That’s it, your order form is complete!
Related articles
To configure your SMTP email server with Gmail, you need to enable 2-step Verification on your Google account and use an app password instead of your Google account’s normal password.
An app password is a 16-digit code that allows an external app or device to access your Google Account. We recommend turning 2-step Verification On because Google is constantly restricting access to non-Google products.
How to set up SMTP with 2-Step Verification On
Follow the steps below to learn how to send emails through your Gmail SMTP server with 123FormBuilder:
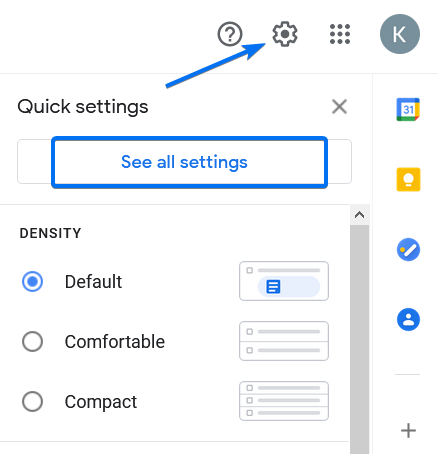
1. Open your Gmail account and head over to the gear icon to access its settings.
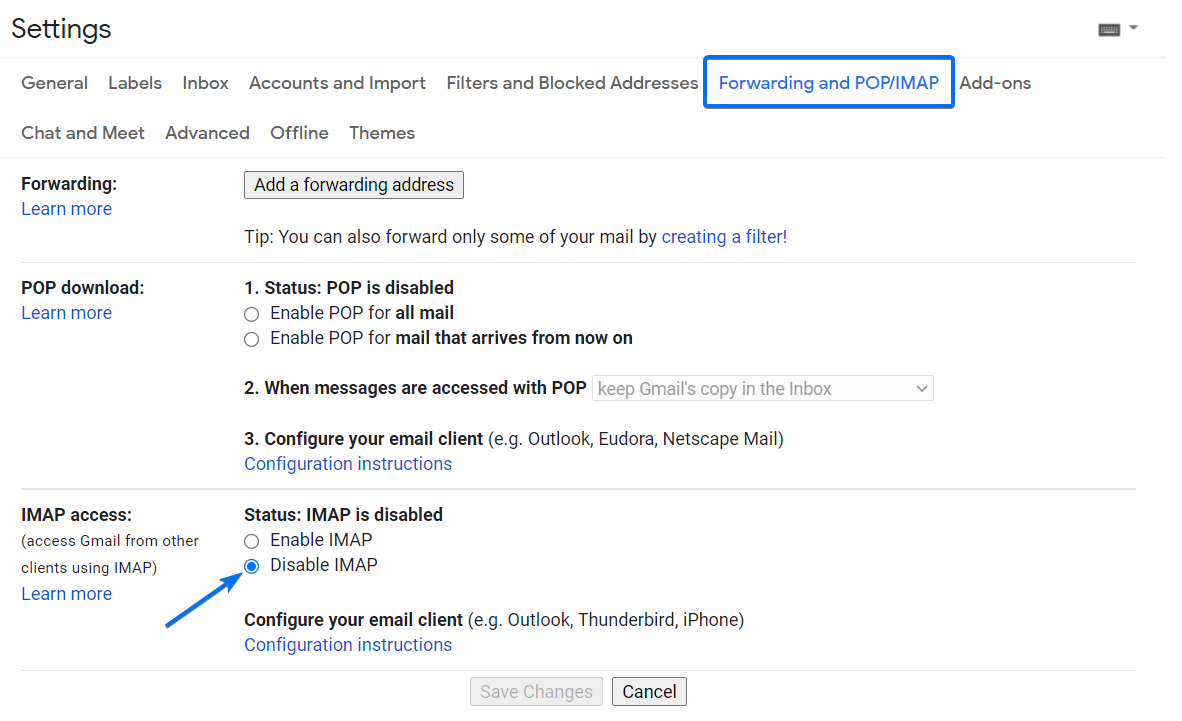
2. At Forwarding and POP/IMAP look for the option called IMAP access and disable it.
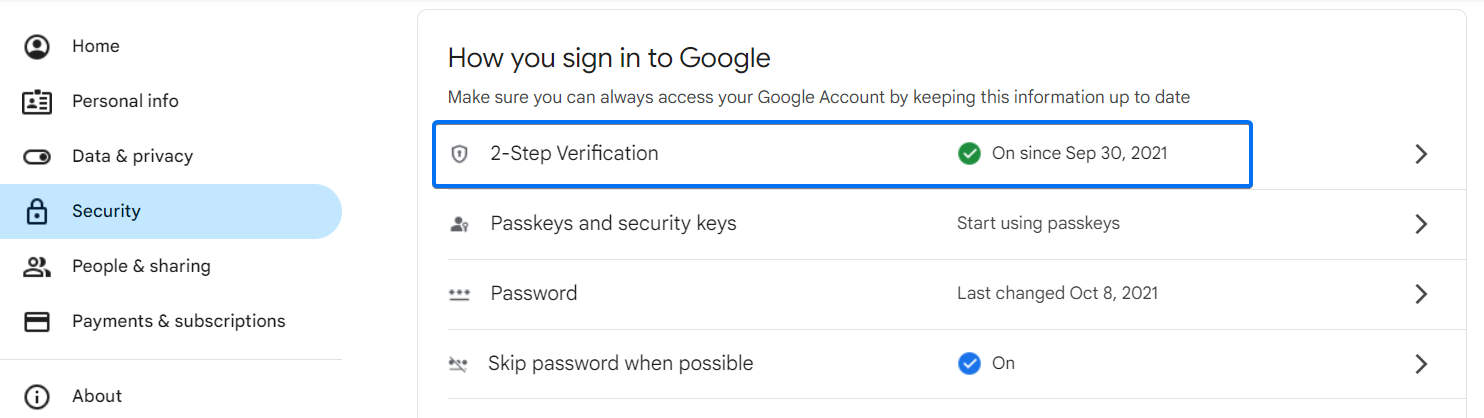
3. Next, click on your account’s icon and select Manage your Google Account.

4. Open the Security section and select 2-Step Verification.
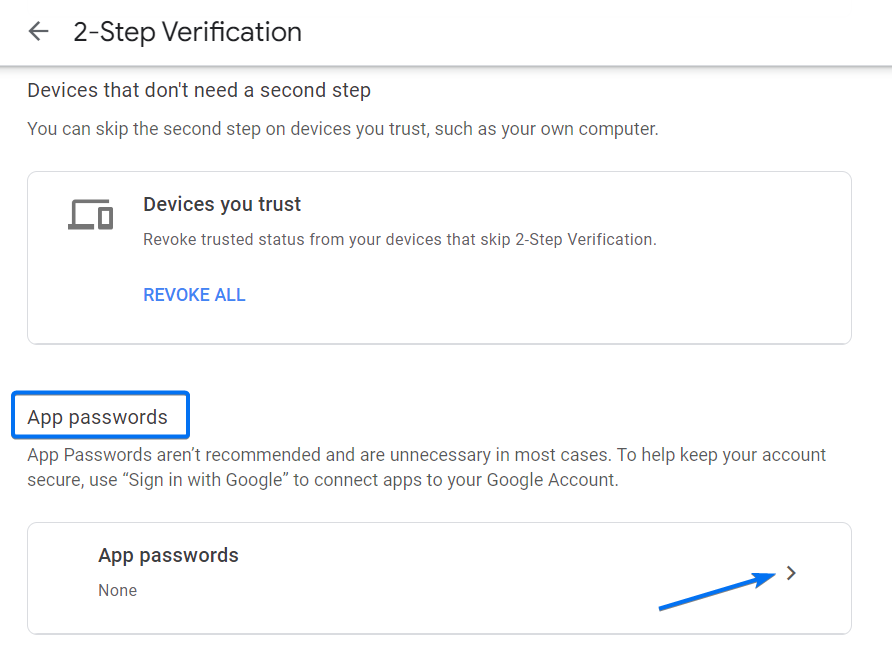
5. Scroll to the bottom of the page where you will find App passwords and select it to move forward.
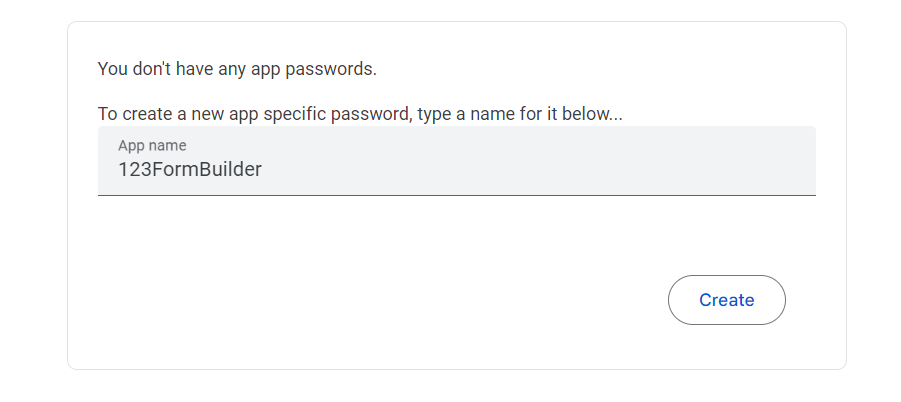
6. Now it’s time to type in a name for your password and press Create. The name can be 123FormBuilder. This way you know that the password is related to your 123FormBuilder forms.
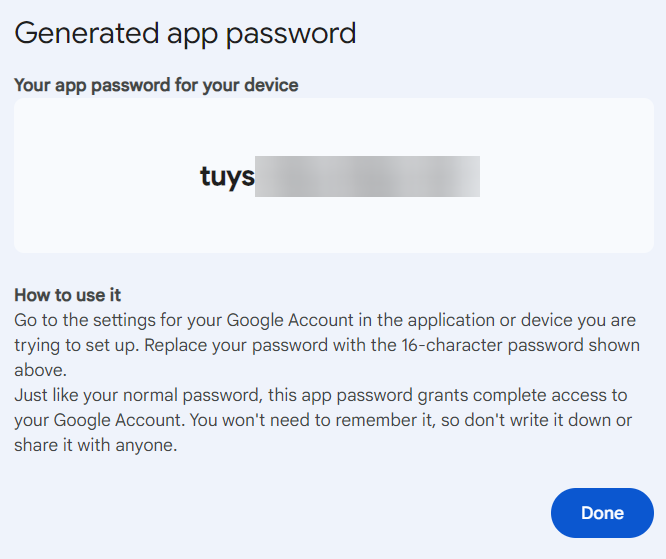
7. You will receive a 16-digit code. Copy and save the password.
Important Note
Once you click on Done, the password can no longer be retrieved. If you will need to re-use the password later for a different form, make sure you are copying and saving it somewhere safe before clicking on Done. However, you can generate a new password at any given time and your old password will still work on the forms where you enabled SMTP with it.8. Now that you have the password, head over to your 123FormBuilder account and open the SMTP configuration window.
9. Insert your SMTP server details. Where it asks you to enter the Password, paste the app password copied earlier.
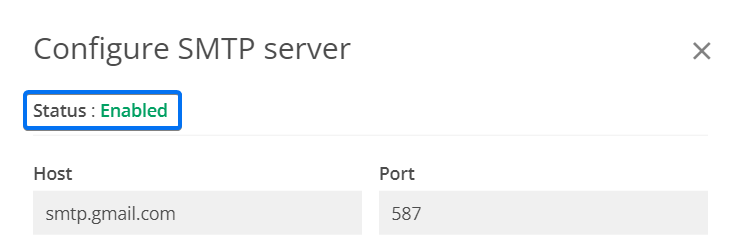
Use the following settings:
- Host: smtp.gmail.com
- Port: 587
- Username and Email: your Gmail email address
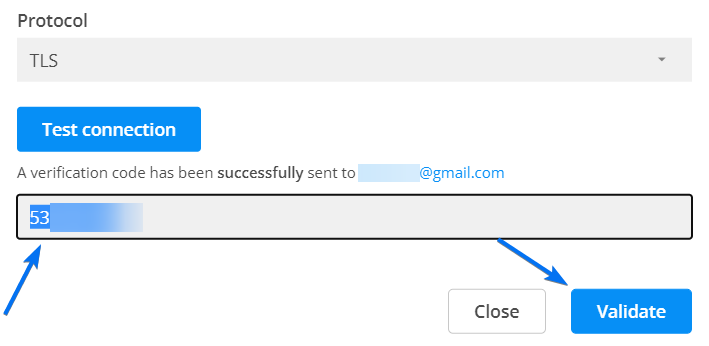
- Protocol: TLS or Auto
10. Click Test connection and open your Gmail inbox.
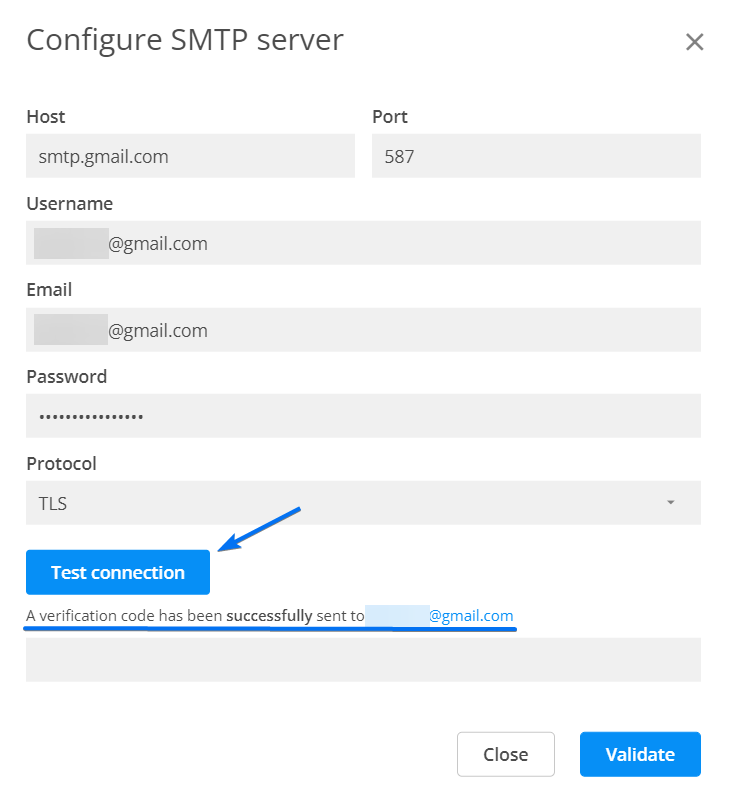
11. A verification code is sent by 123FormBuilder. Copy your verification code. If the email isn’t there, you might have to whitelist and mark us as a trusted sender.
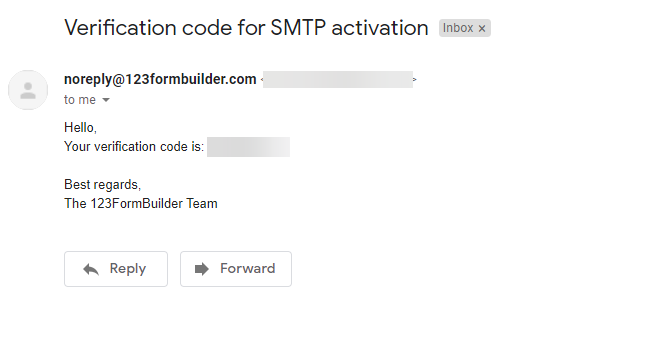
12. Back to your SMTP settings, place this verification code, and hit Validate.
13. Close and open again the window to check the SMTP Status.
14. Make a test submission.
From now on, all email notifications for your 123FormBuilder forms will be sent through your SMTP server.
Use the 123FormBuilder – FreshBooks integration to create invoices or estimates in your FreshBooks account upon form submissions.
Setting up your FreshBooks integration
1. Click New Form from your account dashboard and start creating your payment form.
You can use choice fields (single/multiple choice and dropdown lists) to display the products on sale or, even better, Product field.
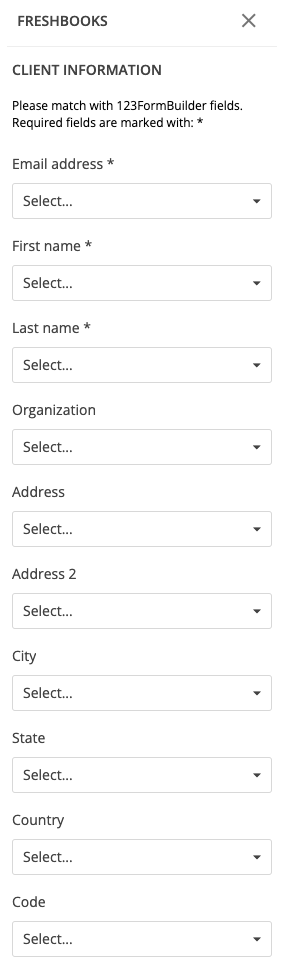
It’s required that you associate form fields with the First Name, Last Name, and Email address Freshbooks fields. Therefore, add the fields Name and Email to your order form. Make sure to set them as required.
2. In your Form Editor, in the left side panel, you will notice the Payments section. By using the search bar, you can quickly find FreshBooks.
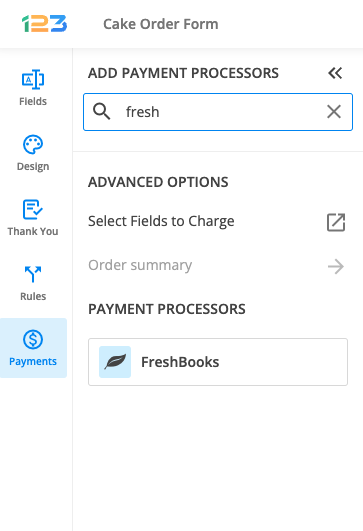
3. After adding FreshBooks on your form, you will notice a couple of changes: the Freshbooks payment processor has a tag near its name & the settings panel opens up to the right side of the page.
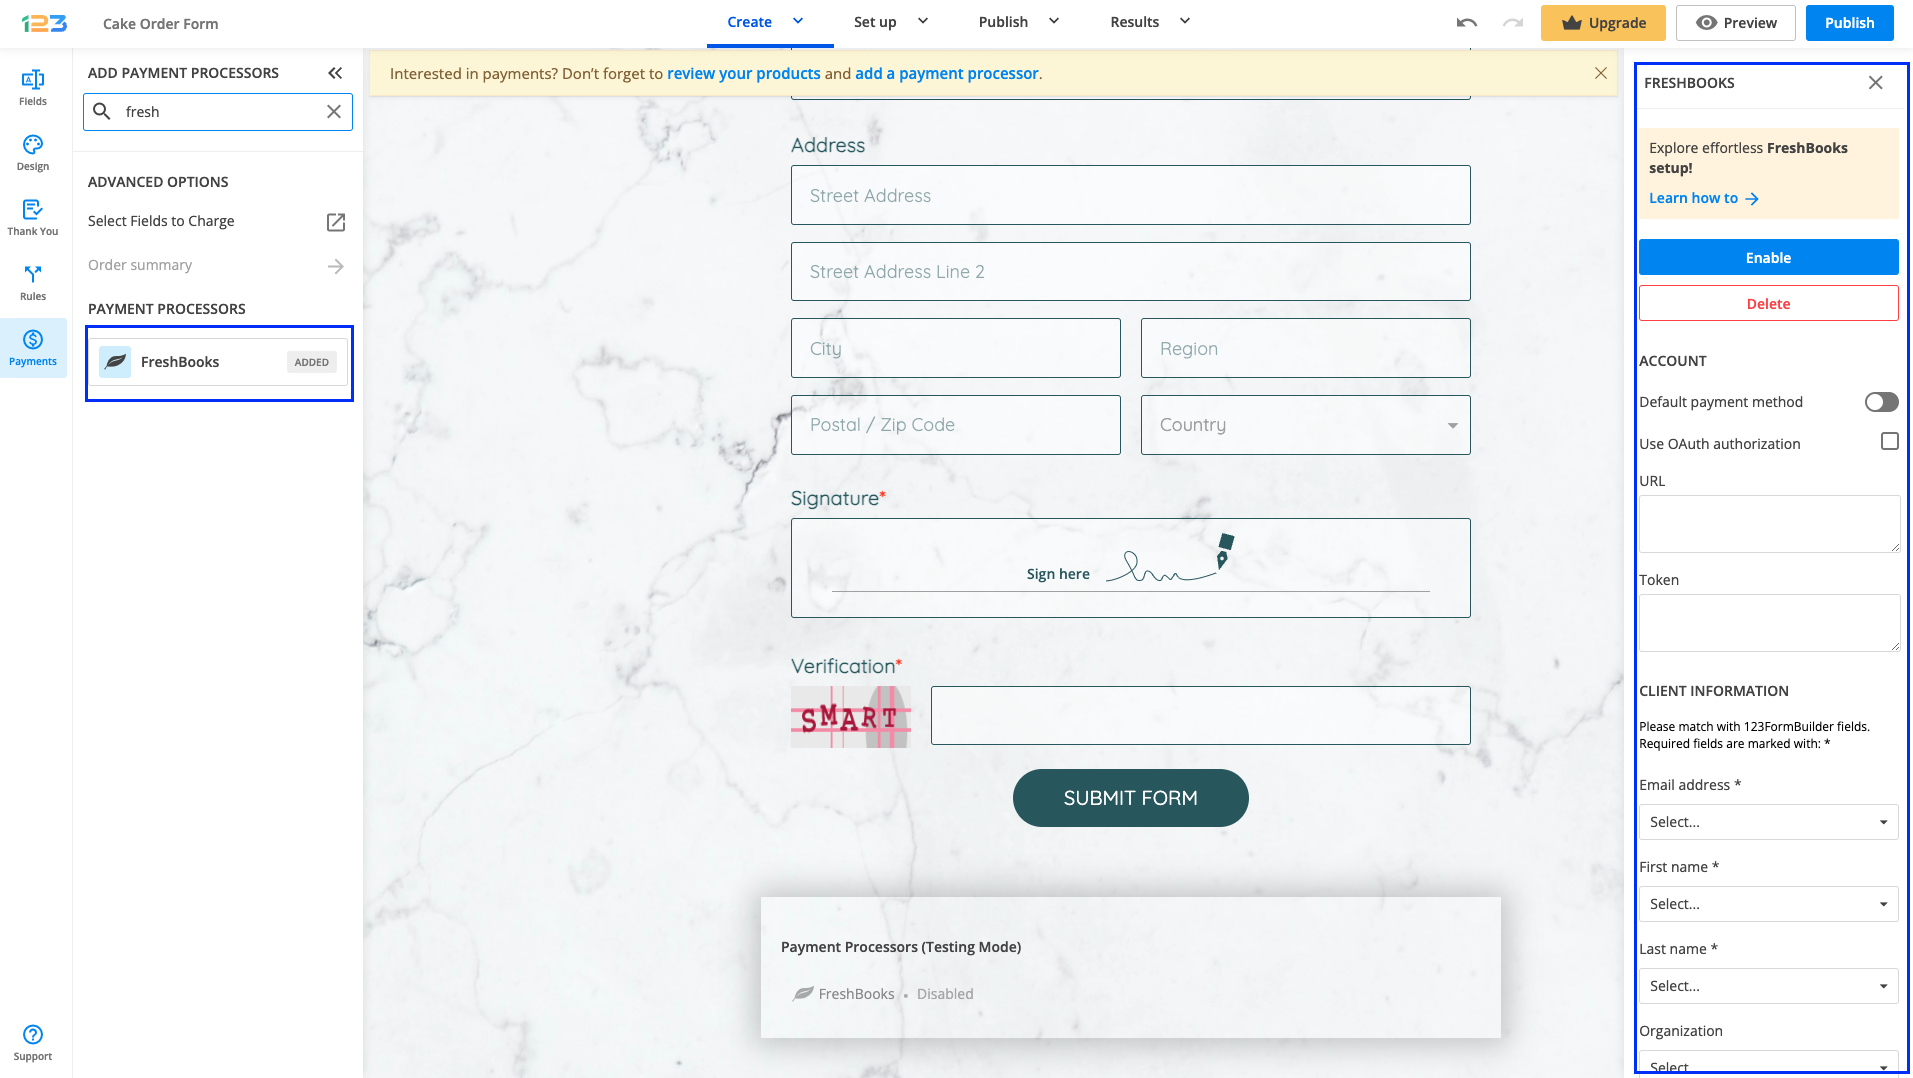
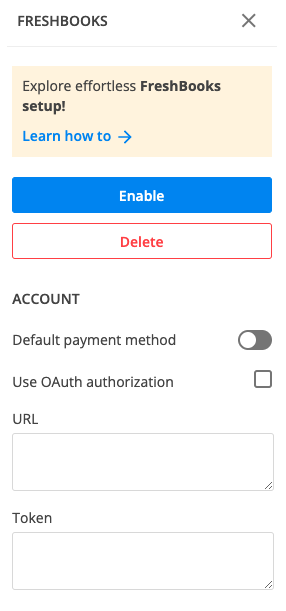
4. In order to set up the FreshBooks integration, you have to provide the necessary credentials of your FreshBooks account, as follows:
– Add the URL of your FreshBooks account, followed by the expression api/2.1/xml-in (e.g. https://www.youraccount.freshbook.com/api/2.1/xml-in).
– Provide the Token key of your account. To access your Token, log into your FreshBooks account, and go to the My Account → FreshBooks API section. Copy the code from Authentication Token and paste it in the FreshBooks merchant box back on 123FormBuilder.
Another way to connect the application to your FreshBooks account, especially if you are already logged on to FreshBooks in the same browser, is by checking the Use OAuth authorization option.
Under Client Information, match the required fields and any other fields you need.
Check the Update client if email exists option if you want to update invoices/estimates that contain the same email address.

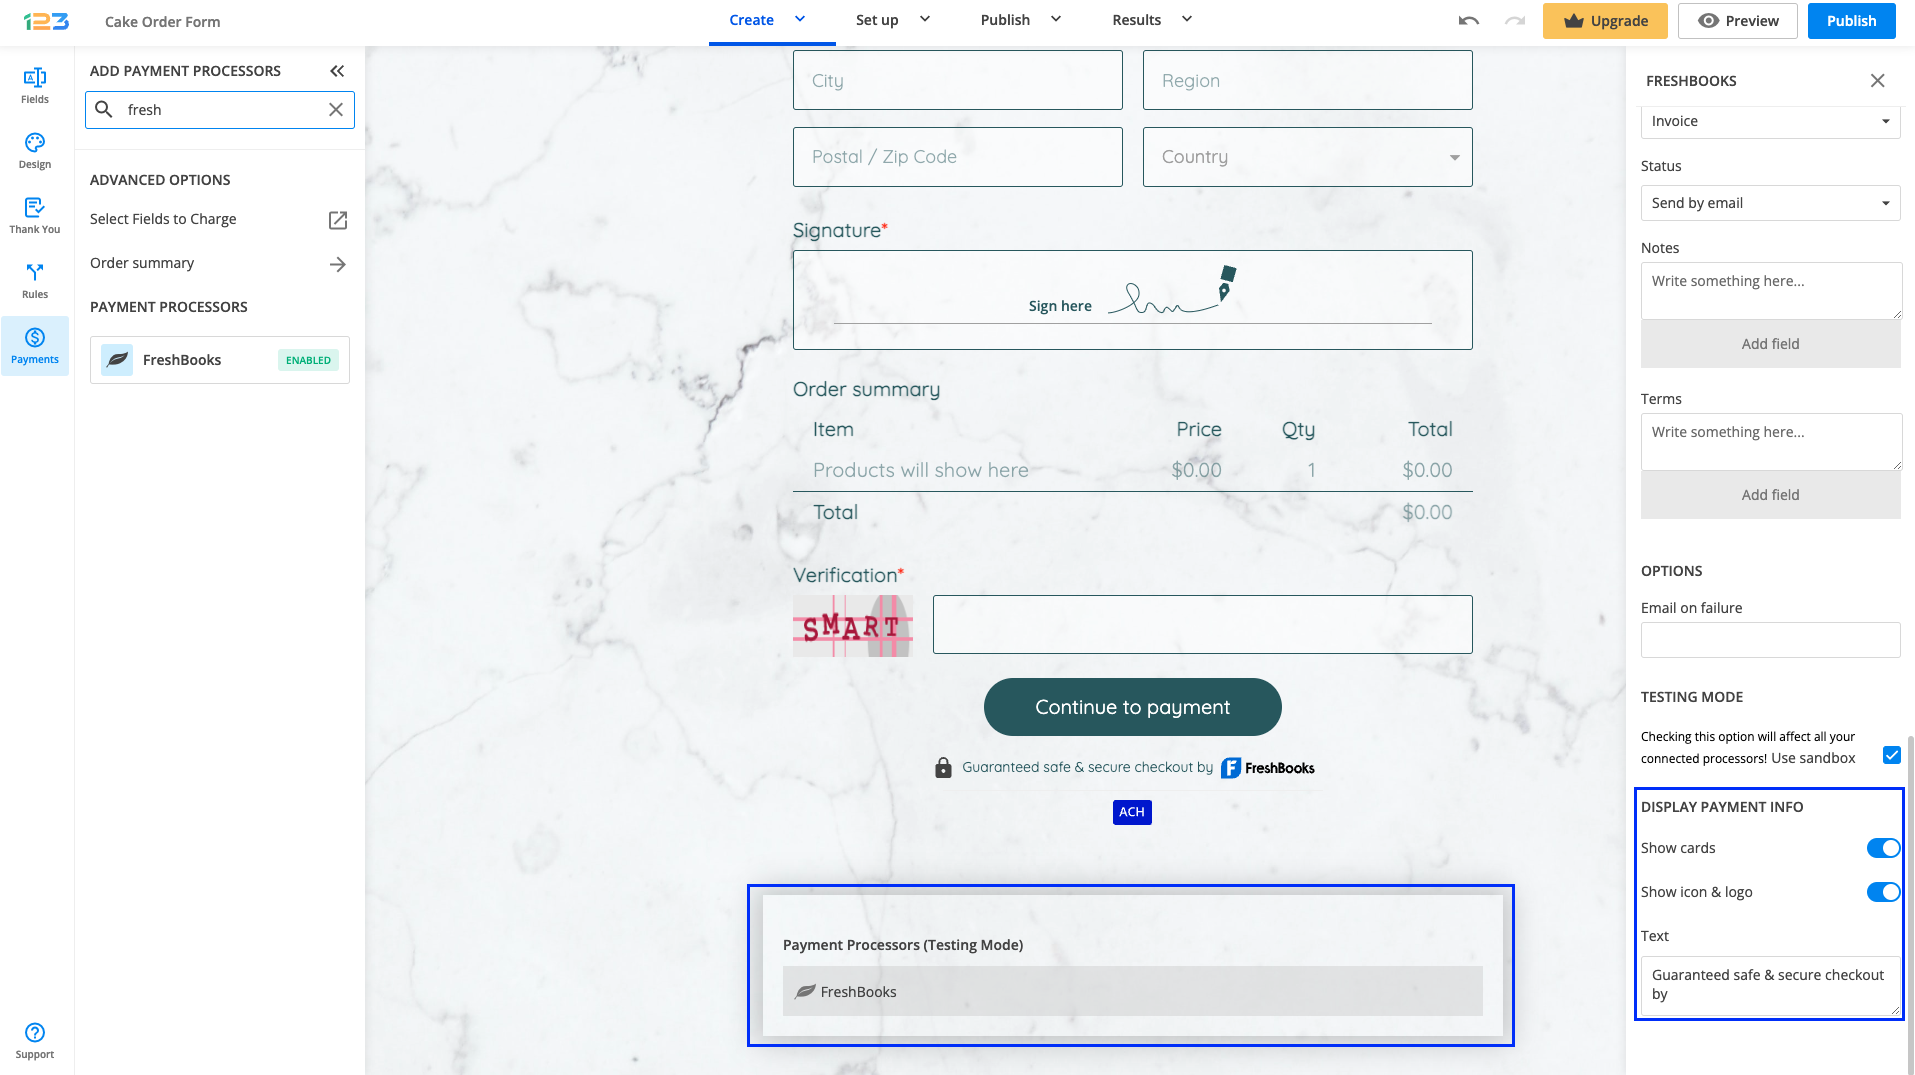
You can also customize and set different options in the Invoice/Estimate section.
- Create – Invoice or Estimate.
- Status – Send by email or Send as a draft.
- Below Notes and Terms, you have the possibility to add field variables from the form.
Where it says Email on failure, type your email address so you can be informed of any errors that might occur upon submission. You can change the email address at any time in this section.
To test your 123FormBuilder – Freshbooks integration, you’ll need to tick the Use sandbox checkbox.
Important: Whatever currency you’ve set up in the Payment Summary panel, it must be equivalent to your settings in your FreshBooks account, as the integration doesn’t change currencies.
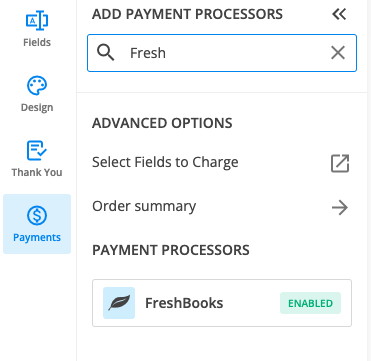
5. Enable the payment integration by clicking on Enable button. By enabling FreshBooks, you will notice a couple of changes on your form.
The FreshBooks payment processor on the left side panel has an Enabled tag on it so you could easily scan which payment processor is enabled.
Another change is that on your form it will be displayed an Order summary. Here will appear all the products your respondents select on the form, together with the price per option, quantity and the total price. If you want to customize the order summary, all you have to do is click on it and the available settings appear on the right side panel.
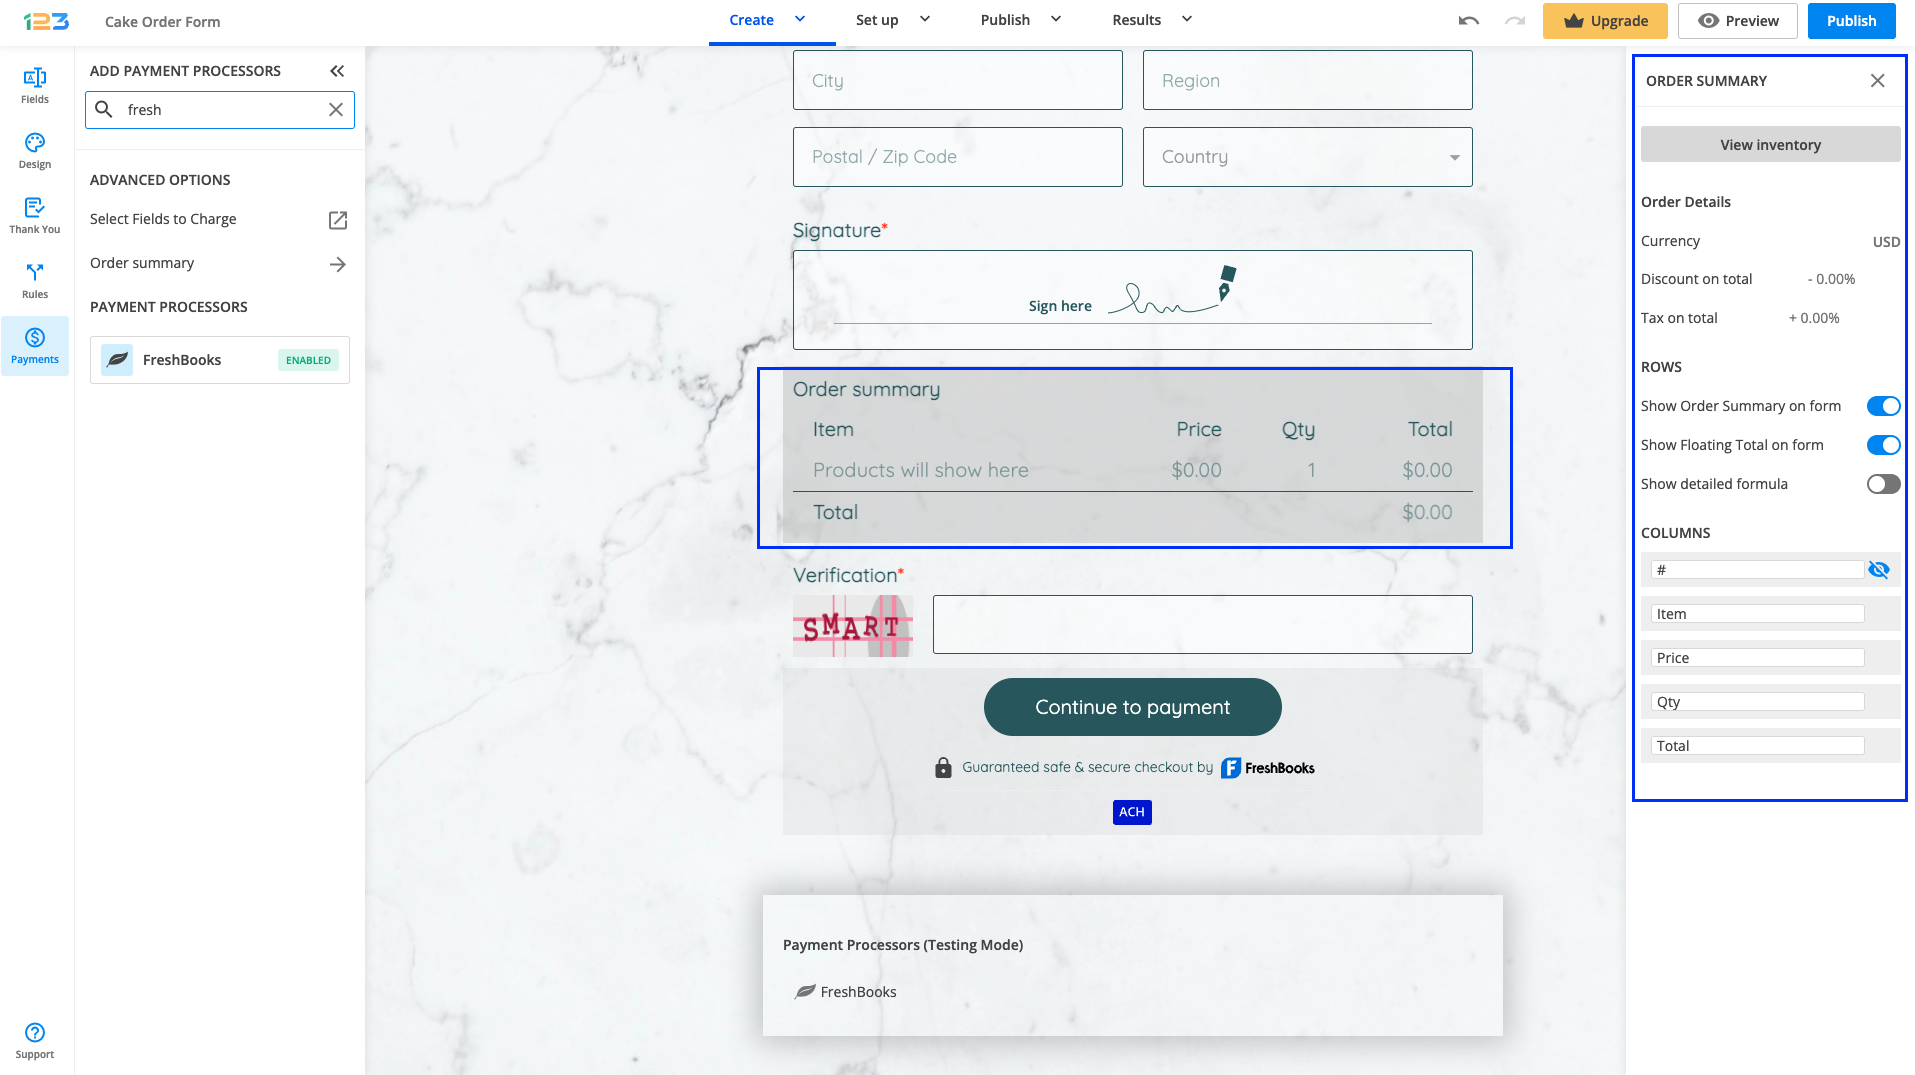
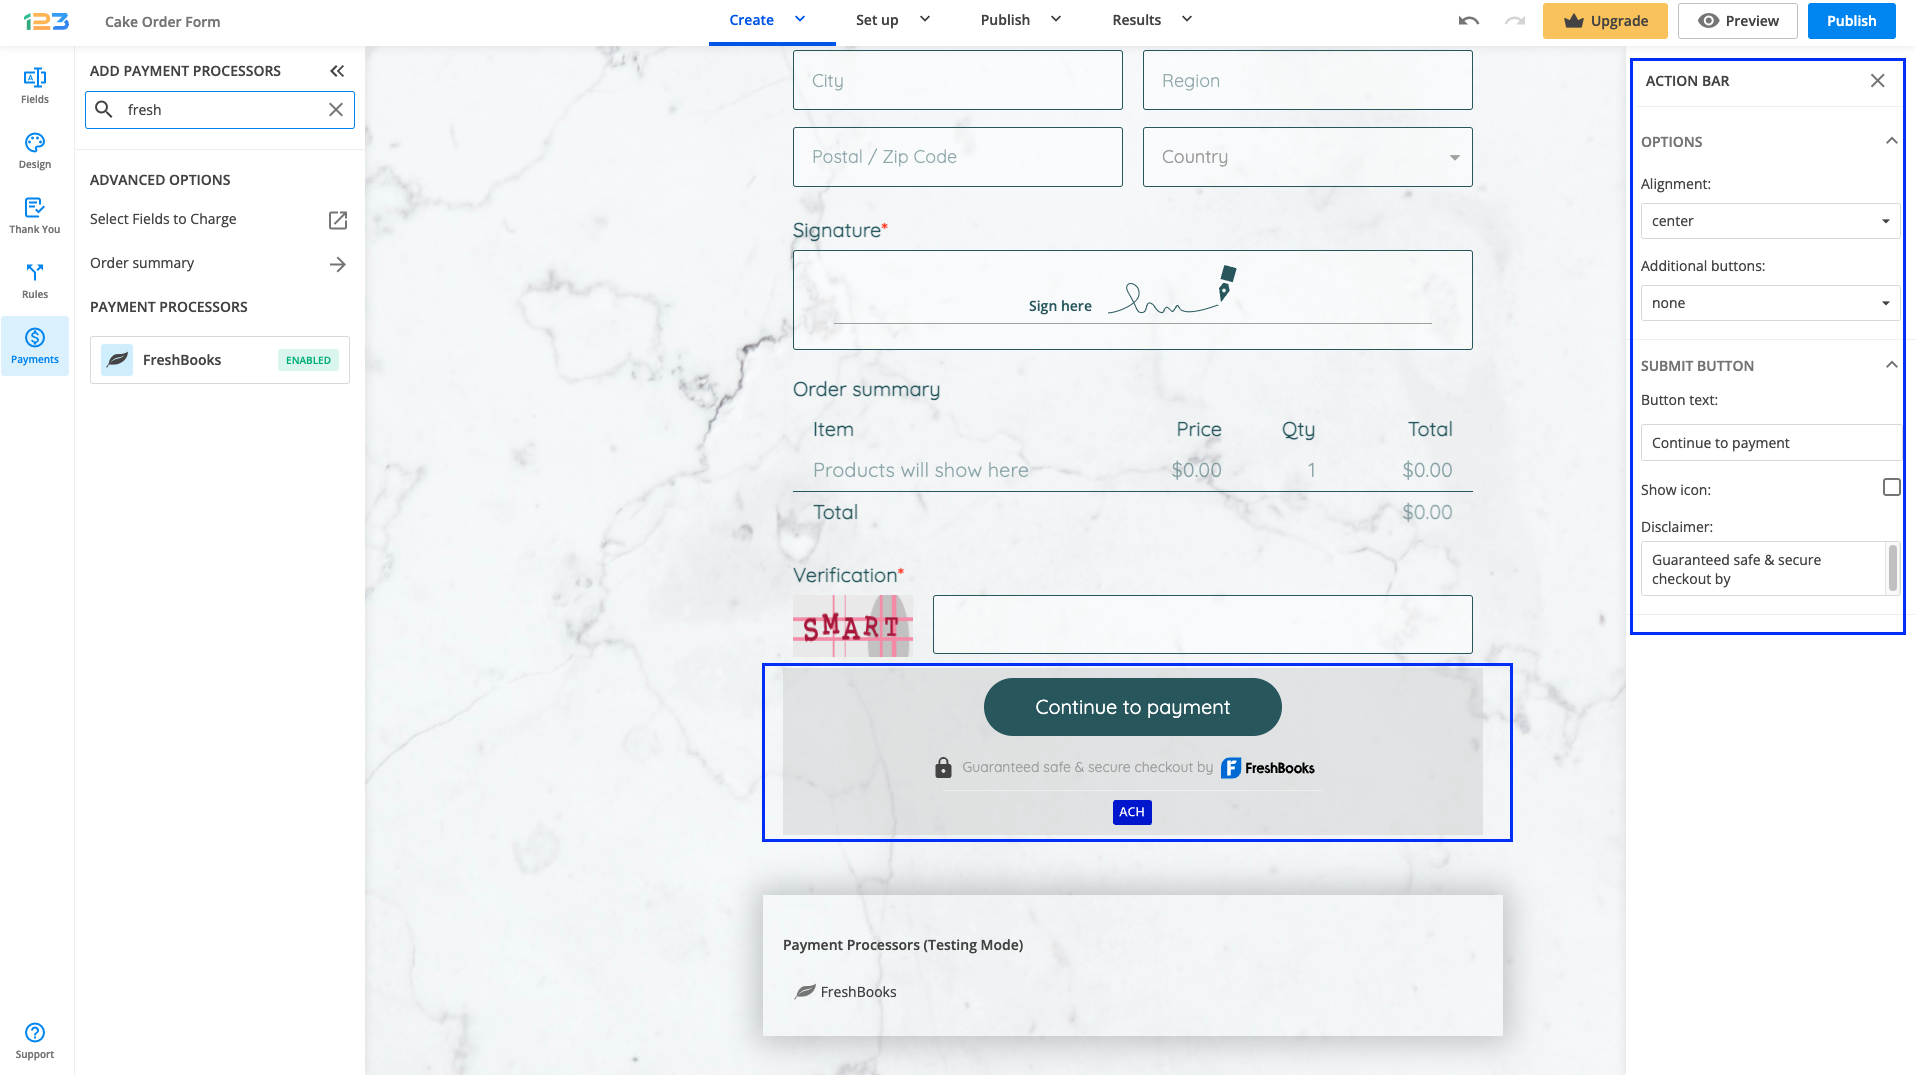
Another change is related to the Submit button. Once your payment integration is enabled, the Submit button is changed to Continue to payment. Below it, we are displaying a disclaimer together with the Freshbooks logo so that respondents are aware they are proceeding to a payment.
You can customize the action bar (everything that is related to the submit button, additional buttons, disclaimer, etc) by simply clicking on this area.
Another setting that you can enable/disable is related to showing the accepted cards and the icon & logo of the payment processor. By default, both of them are enabled, but you can disable them and even edit the text shown under the Continue to payment button.
You can use the Star rating field to get feedback on your products/services from your respondents. In the Submissions section of the form builder, you will be able to see the number of stars each respondent has selected.
All you have to do is add a Star rating field to your form and define the label so that your respondents know what they have to rate. You can also change the number of starts from 1 to 10, add a default value that will appear preselected on the form when your respondents access it, or change the star icons to adult or children icons.

- HTML emails allow you to use different colors and fonts, boxes and sizes, images and links. Upside: graphics. Downside: some email clients reject HTML.
- Plain text emails do not contain HTML elements. They consist of simple text. Upside: they are accepted by all email clients. Downside: no graphics.
Related articles
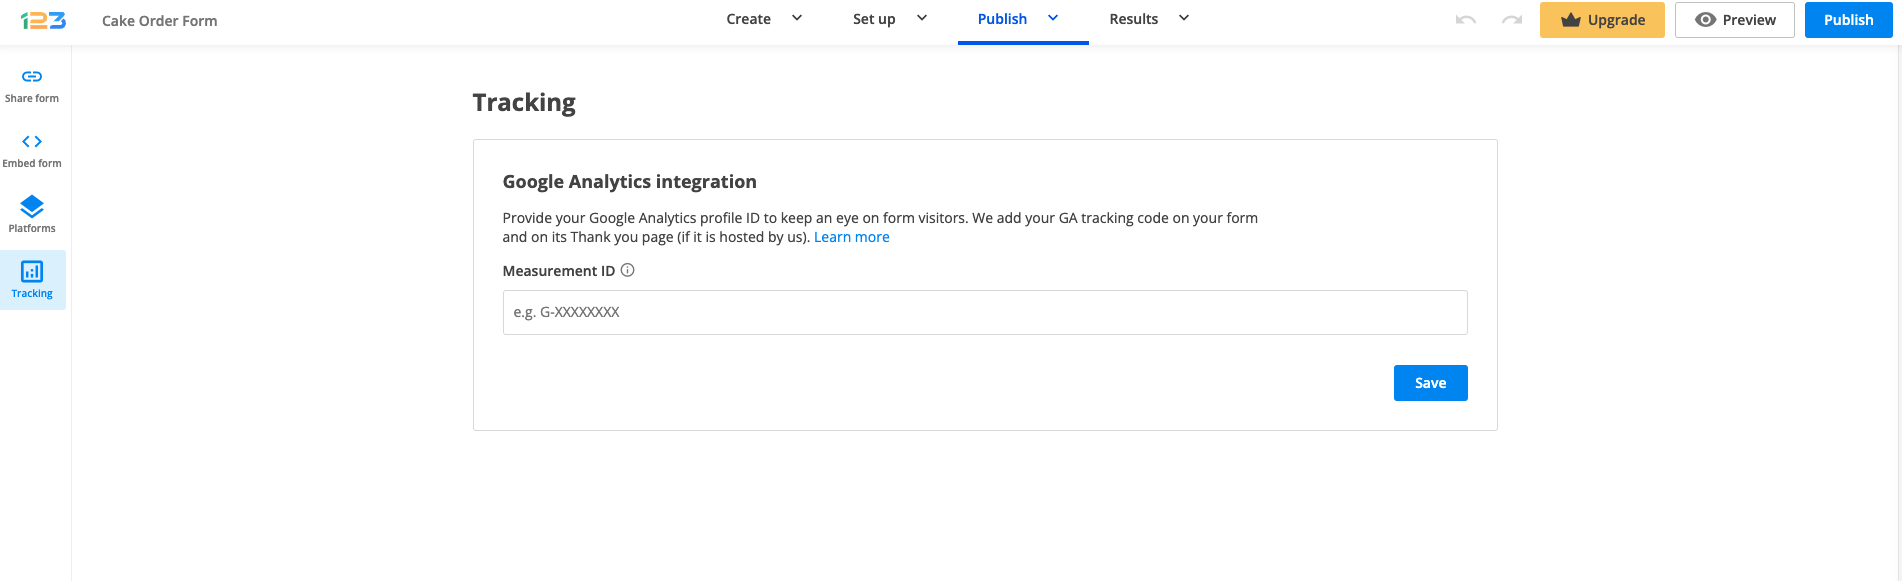
To track the form’s activity with Google Analytics, go to the Publish section of your form. Under Tracking, you can find connect your Google Analytics.
Setup instructions
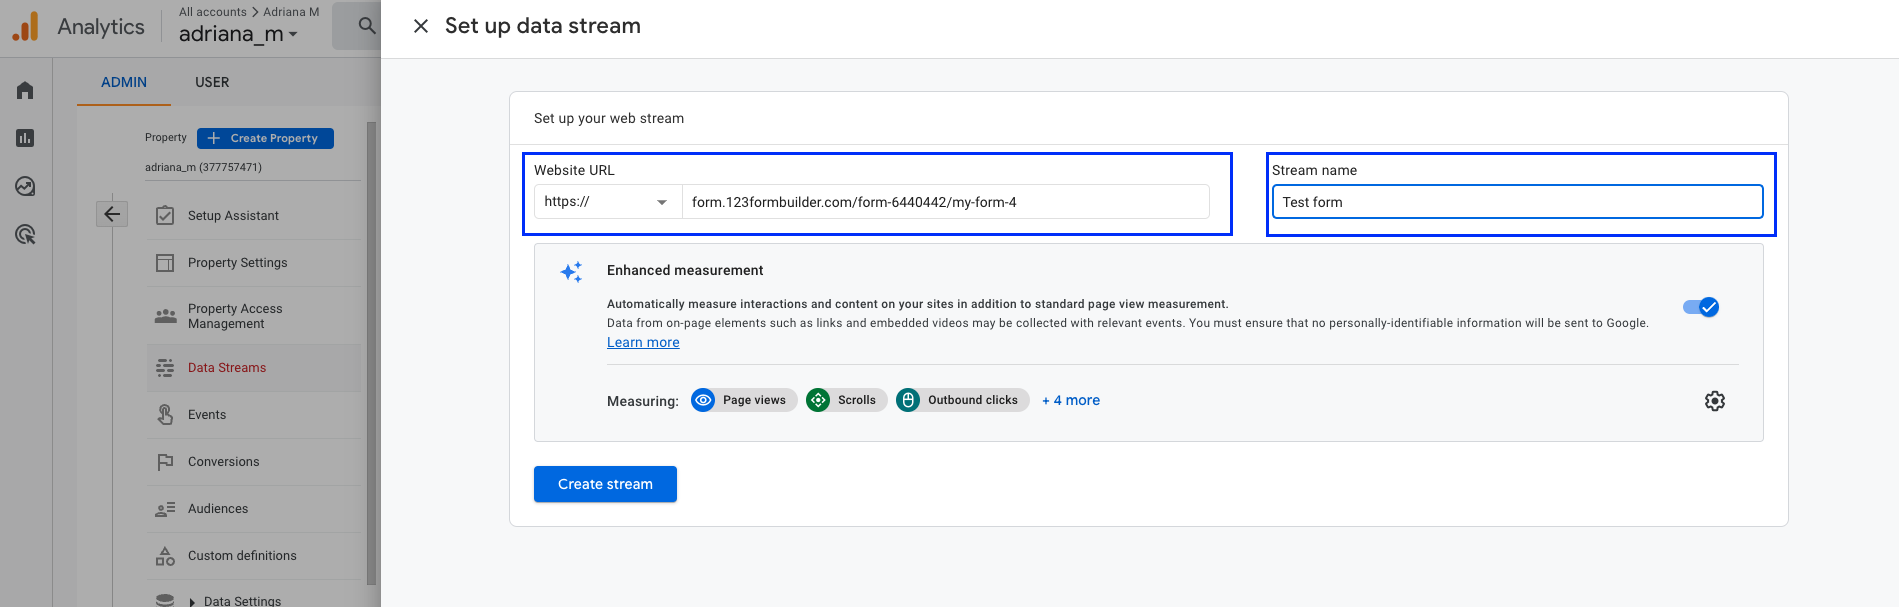
Beforehand, you need to log in to your Google Analytics account. If you don’t have an account, you need to set it up, and also a property and a data stream need to be set up. The form itself needs to have its own data stream, even if the form is embedded on your website.
In order to do this, you need to select Web as the type of stream and enter your form URL. Do not forget to name your stream in order to be easily identifiable. Once this is done, click on Create stream.
After the stream is created, a new pop-up will be shown, like below. From here, you need to take the Measurement ID and copy it.
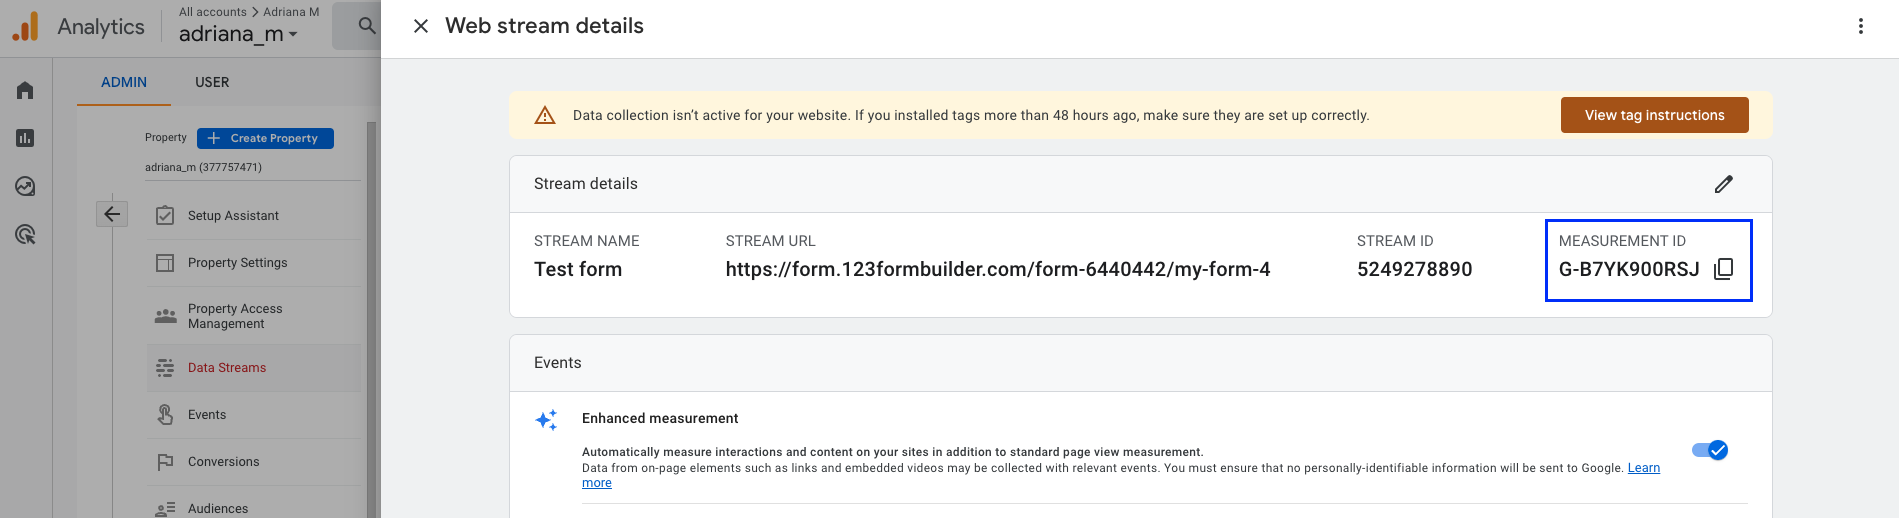
Coming back to Publish section, under Tracking, paste the Measurement ID and click on Save button.

Once saved, it would look like below:
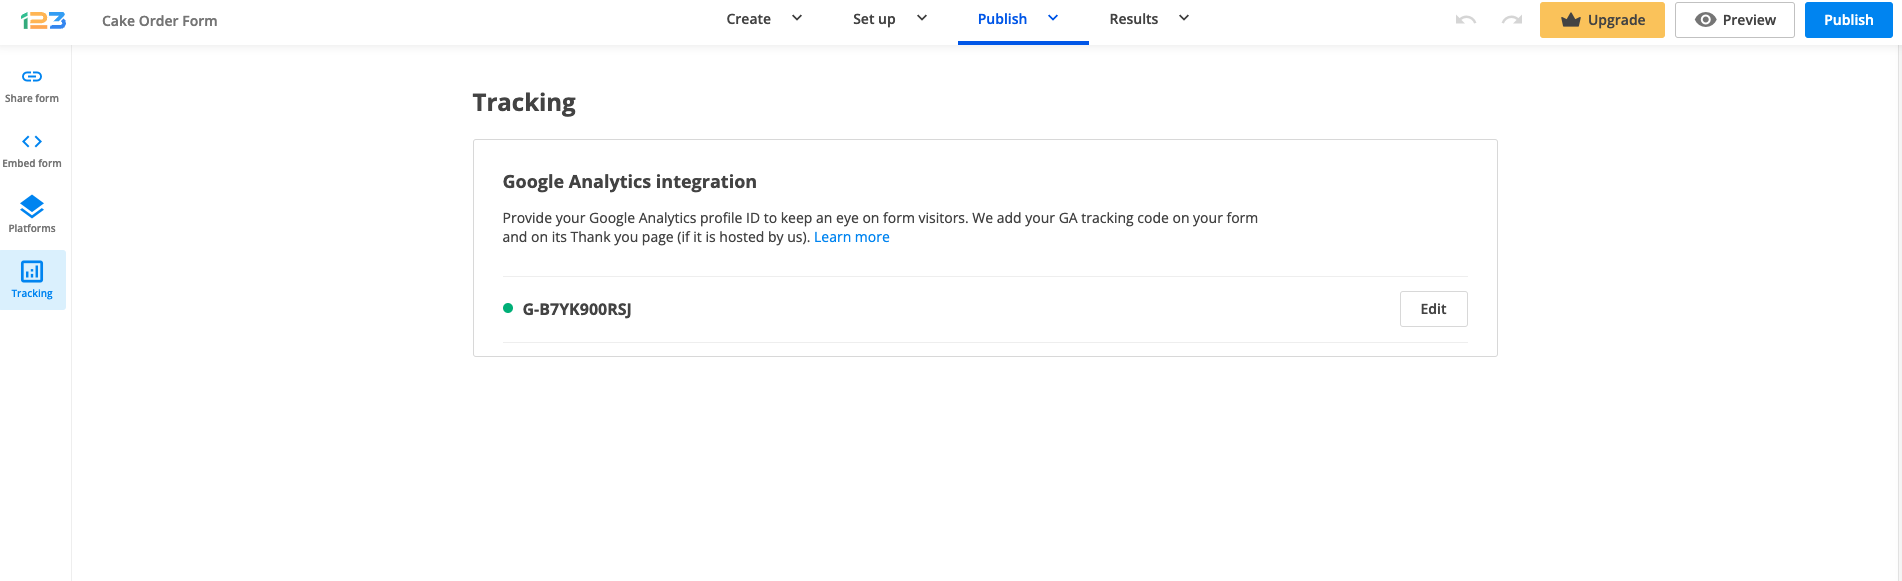
Note: if you want to deactivate the Google Analytics integration, all you have to do is click on Edit and delete the Measurement ID and click on Save.
The setup is ready! Data should be available in your Realtime reports after maximum a half an hour and full analytics for your form will be available after 24 hours.
Events
By default, Google Analytics automatically collects a series of events through enhanced measurement, such as:
a. page_views – each time the page loads
b. scroll – the first time a user reaches the bottom of each page (i.e., when a 90% vertical depth becomes visible)
c. outbound clicks – each time a user clicks a link that leads away from the current domain
d. view_search_results – each time a user performs a site search, indicated by the presence of a URL query parameter.
e. form interaction – capture a form interaction event each time a visitor interacts with a form on your website. (form_start -> the first time a user interacts with a form in a session; form_submit -> when the user submits a form
f. video engagement – capture video play, progress and complete events as visitors view embedded videos on your form (video_complete -> when the video ends; video_progress -> when the video progresses past 10%, 25%, 50%, and 75% duration time; video_start -> when the video starts playing)
g. file downloads – when a user clicks a link leading to a file of the following types (document, text, executable, presentation, compressed file, video, audio)
Custom events
In addition to these standard events, 123FormBuilder automatically sends through custom events for certain actions.
Custom events are events that you define in Google Analytics.
a. SubmittedForm – this is triggered when the form is successfully submitted (on Thank you page)
b. StartedSubmission – this is triggered when the user begins filling out the form
c. ConfirmPayment – this is triggered when the payment checkout is confirmed (also, containing the total amount from the order summary).
According to Google Analytics documentation, custom events should only be created when no other events work for your use case. Custom events do not show up in most standard reports.
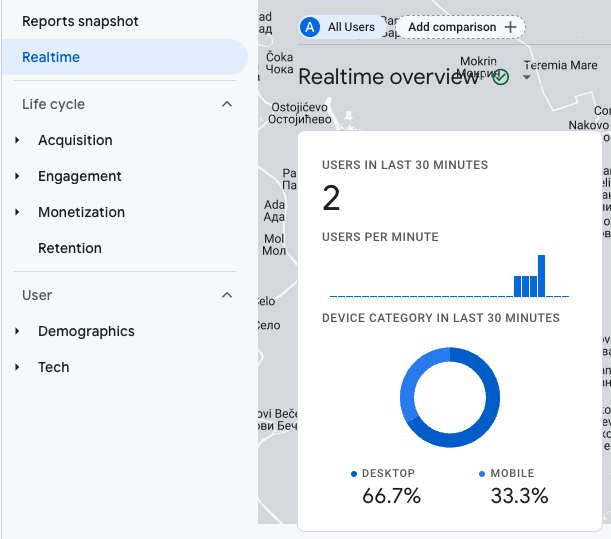
Reports – Realtime
All events appear under Reports – Realtime, around 30 minutes after the setup is ready. The entire data will be available after 24 hours.
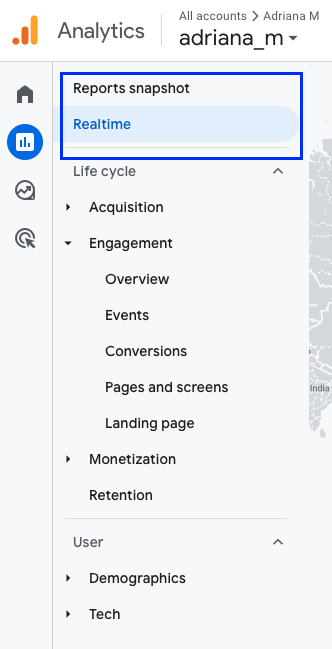
Let’s see how it would look like after making some test submissions. Once you navigate to Realtime, the first thing you will see is a quick overview that has the number of users in the last 30 minutes, how they are split per minute and in which device category they fall off.
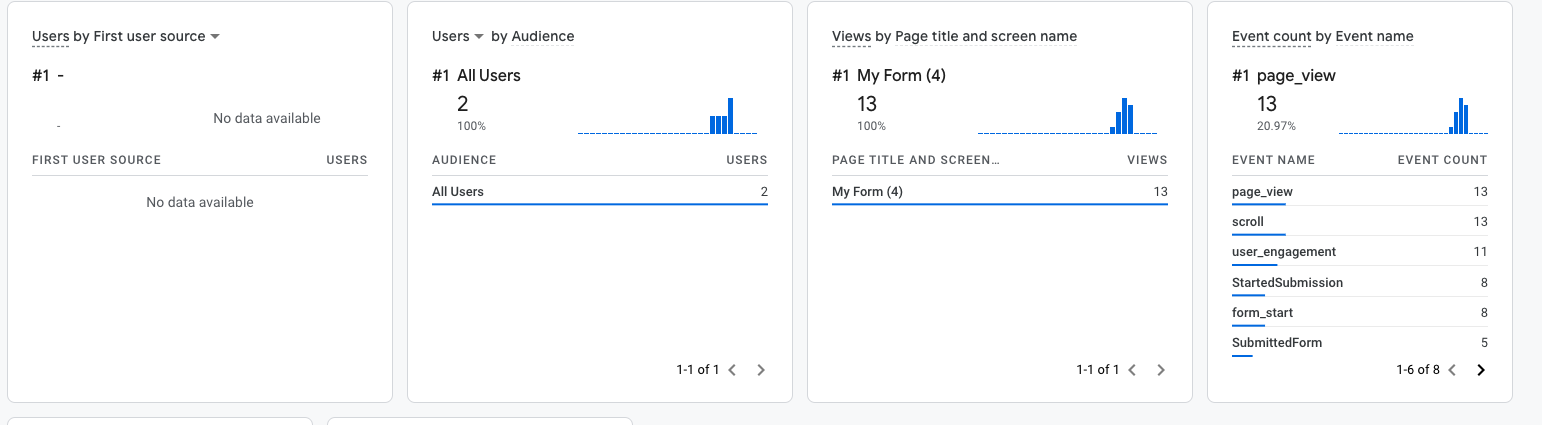
Going further, you can see the users by multiple channels: First user source, First user medium, First user source/medium, First user source platform and First user campaign.
You can split by Audience Users and New users by clicking on the dropdown arrow near Users in the second container.
You have access to the views by page titles and screen name – in our case, the form itself.
And last, but not least, you have an event count by event name – as you can see in the below screenshot, the number 1 event was page_view, followed by scroll and user_engagement.
Also, if you have set up conversions (more information below), then they will appear in the Realtime overview.
Conversions
You can set up certain events to be marked as conversions. This depends on the action that is valuable for your form/business. For example, let’s say that SubmittedForm event is a conversion for you – this means that when your respondents submit the form, this event is marked as a conversion and can be tracked accordingly.
Existing events can be marked as conversions under Admin – Events by simply finding the event and toggle it on for Mark as conversion.
Note: in Universal Analytics, instead of conversions you have been using goals. Here is how you can migrate your goals to conversion events.
Setups made for Universal Analytics need to be redone, following the new format for Google Analytics.
This usually happens when you have edited your spreadsheet after you have integrated your form with Google Sheets within the form builder and received submissions. Once you have received your first submission, a new spreadsheet is created in your Google Sheets account with the name of your form. If you edit the spreadsheet, new entries will no longer be properly displayed in Google Sheets.
To fix this, export your submissions in CSV, copy its content, and paste it into a new spreadsheet in Google Sheets.
In the future, if you want to edit your spreadsheet, you’ll need to follow these steps:
1. First, change the names in the column header (label) and make a submission.
2. Reorder the columns as you want and submit the form again. This will prevent the integration from delivering submissions that are not properly displayed in your Google spreadsheet.
Related articles
The 123FormBuilder – Stripe payment integration provides an extremely easy way to collect payments with your online order form. The best thing about Stripe is that it doesn’t require a merchant account. Funds go directly into your bank account and Stripe’s fee at successful payments is 2.9% + 30¢, with no other setup or monthly fees.
Stripe is primarily aimed at developers, but 123FormBuilder is here to help non-developers out. Like any other of our payment integrations, the integration with Stripe requires just authentication data that allows the applications to communicate. Your order form with Stripe can be set up in minutes!
Setting up your Stripe integration
1. Click New Form from your account dashboard and start creating your payment form.
You can use choice fields (single/multiple choice and dropdown lists) to display the products on sale or, even better, the Product field.
2. In your Form Editor, in the left side panel, you will notice the Payments section. You can also use the search bar to quickly find Stripe.
3. After adding Stripe to your form, you will notice a couple of changes: the Stripe payment processor has a tag near its name and the settings panel opens up to the right side of the page.
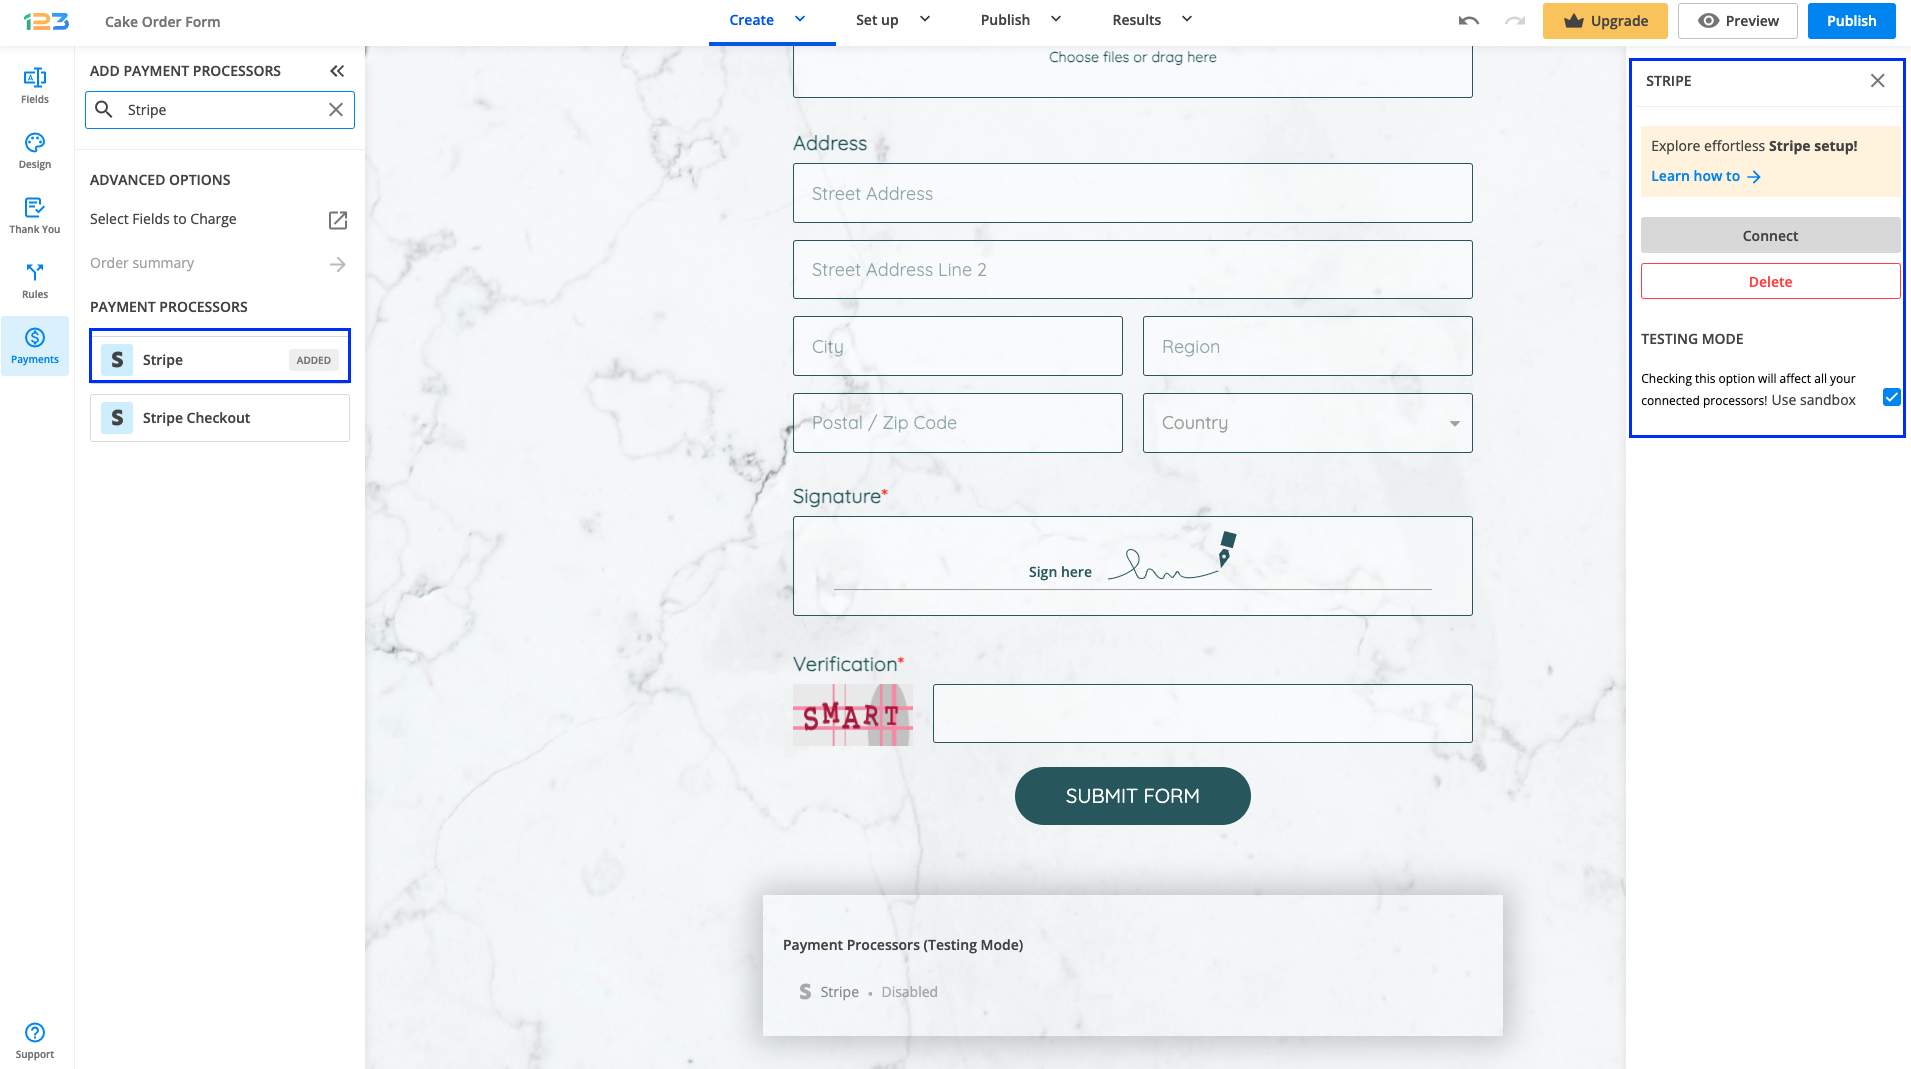
4. In order to set up the Stripe integration, you have to click on Connect and follow the instructions to enable the integration.
5. Back to the Form Editor, you have to provide the connected account. If you want to use recurring billing, tick the option Use recurrent payment and add the necessary data. The shortest billing cycle you can set for your customers is daily.

If you have a donation form, you can also tick the option Payment represents a donation. Please be aware that this option cannot be used with recurring payments.

6. Enable the payment integration by clicking on the Enable button. After you enable Stripe, you will notice a couple of changes on your form.
The Stripe payment processor on the left side panel has an Enabled tag on it so you can easily notice which payment processor is enabled.

Another change is that an Order summary will be displayed on your form. Here will appear all the products your respondents select on the form, together with the price per option, quantity, and the total price. If you want to customize the Order summary, you only have to click on it and the available settings will open on the right side panel.

You’ll also notice a change related to the Submit button. Once your payment integration is enabled, the Submit button is changed to Continue to payment. Below it, we are displaying a disclaimer together with the Stripe logo so that respondents are aware they are proceeding to a payment.
Also, the accepted cards by the Stripe integration are visually displayed so that respondents know from the start what is the accepted payment method.
You can customize the action bar (everything that is related to the submit button, additional buttons, disclaimer, etc) by simply clicking on this area.

You can also make changes to the default settings related to showing the accepted cards and the icon & logo of the payment processor. By default, both of these settings are enabled, but you can disable them by clicking on the payment processor.
If the Reference ID is enabled on your online form, you’ll also find it in your Stripe account, in the Transactions → Payments section, under Description. You may use this workaround to track your transactions.
Important Note
The Reference ID prefix can contain up to 9 characters.Testing payments with Stripe
To test out the integration without having to do real transactions, follow these steps:
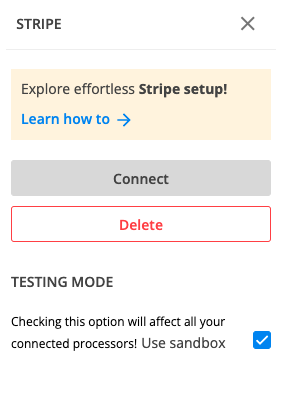
1. Enable the Use sandbox option.
2. Click Connect.
3. On the new tab at the top of the page click on Skip this form.
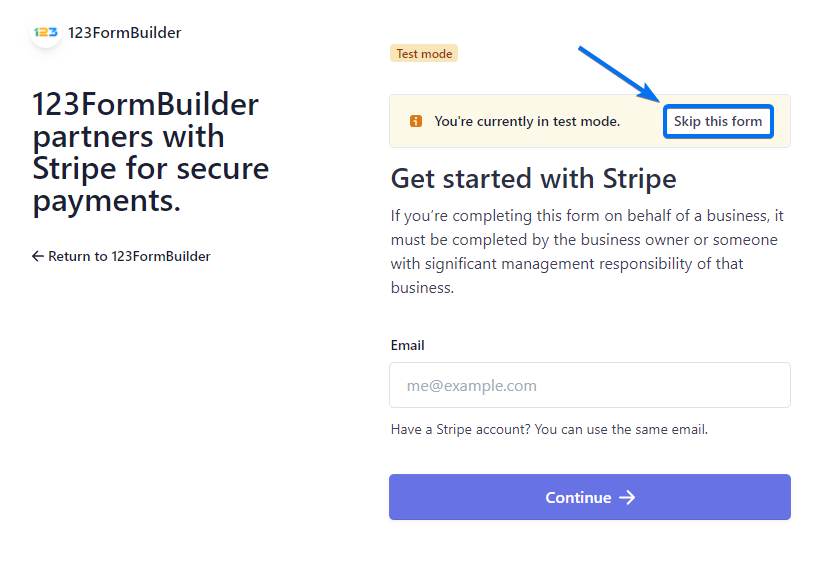
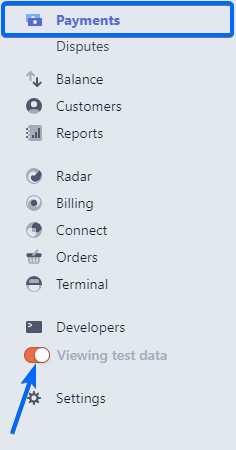
4. Make a test submission and check your Test data information in Stripe.
Now sit back and let the payments begin!
Stripe supports processing payments in over 135 currencies. For a list of all currencies, check out their article.
Related articles
There are various theme options in our online form designer. Basically, you can change just about anything on your web form, from text font and color to the style of the submit button. The settings categories that you can tweak in the theme customization panel are Quick setup, Layout, Background, Fields and Buttons.
Now let’s get right into it and see how you can customize your theme in each category.
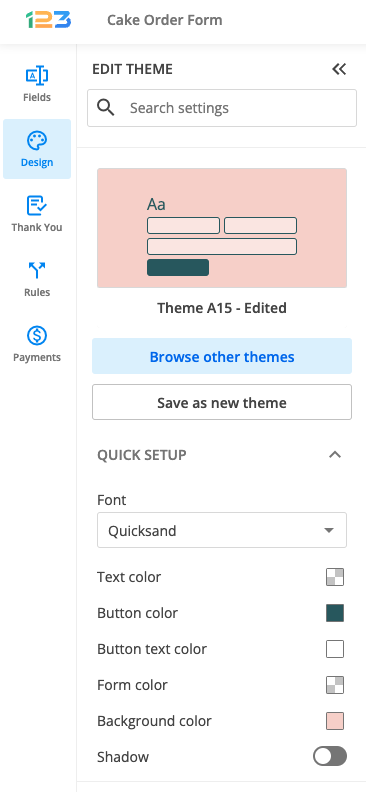
Quick setup
This section is used to make easy and quick changes to your form, being the most used theme settings options.
Here you can specify the font of your form & the text color that applies to your entire form (question text, answering options, instructions). The button color is used to change the color of the Submit button on the form, while Button text color sets its color. Background color is used to change the color of the form. The shadow switcher allows you to have a shadow to your form.
Layout
Layout section is divided into two: Form and Page. Let’s take them one by one.
In the Form subsection, you can modify how the form width is calculated (pixels or percentage) and set the form width accordingly. Also, if you are interested in changing the direction of writing on your form, you have the option to do so by changing the form direction from left to right to right to left. There are some additional settings related to the form, such as changing the padding for header, footer, left and right.
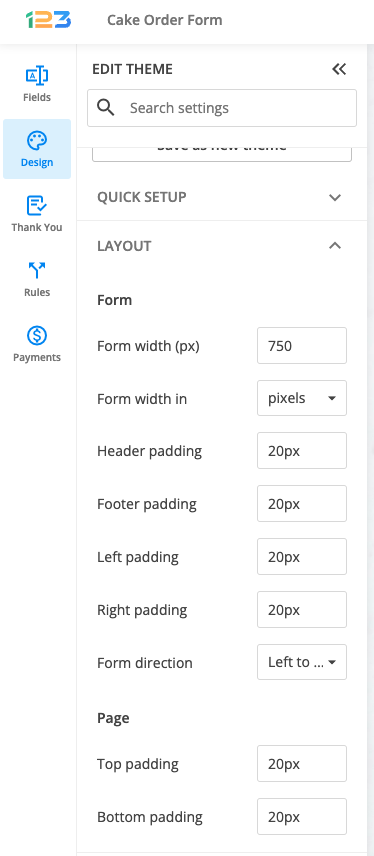
In the Page subsection, you can modify the top and bottom padding.
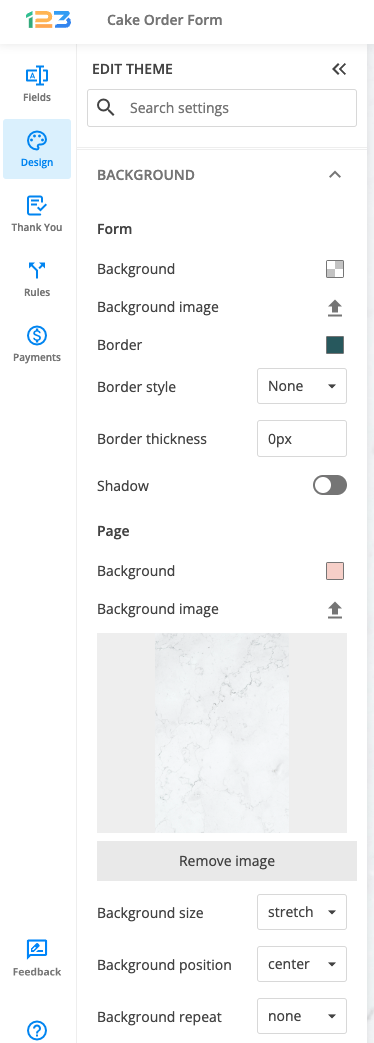
Background
Background section is divided into two subsections: Form and Page. From this section, you have the option of customizing both the background of your form and of the entire page, such as uploading a photo for background, changing the position of the background image and even adding a border to your form with multiple customizations.
Fields
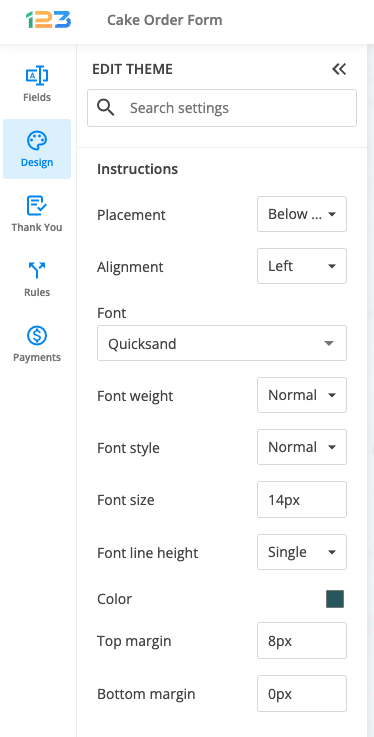
Fields section is divided into multiple subsections: Label, Instructions, Input, Field, Field Hover, Field Focus, Error, Choices
Label – from here you can change the question’s text placement (top, right, left), the alignment & the font. Additional design settings for labels are related to the font style and size, the color and the margin between question text and answer/choices. Also, if you are interested in changing the color of the asterisk when dealing with required fields, you can do that by using the color picker from Required star color.

Instructions – all the design settings available for label/question text are also available for Instructions separately. You can design instructions and label totally different so that your respondents could easily read through the form and understand that they need to follow your instructions when filling up the form.
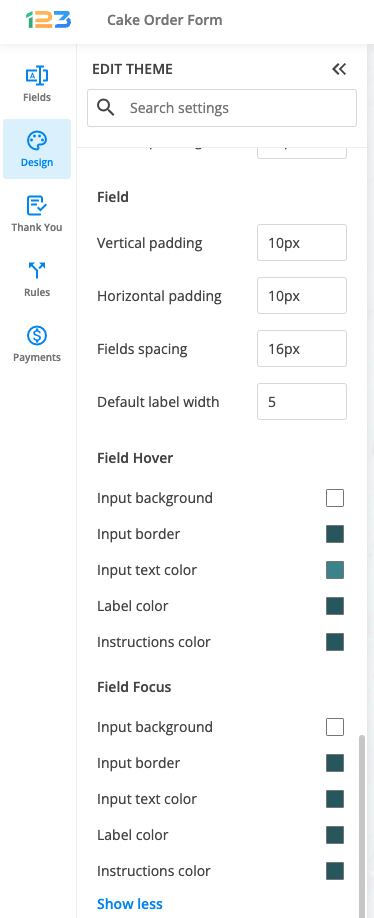
Input – these design settings are related to the input your respondents are providing when filling in your form. You can change the background color of the answering text boxed, the border and its style and also the font of your respondents’ input.

Field – In this section, you can increase or decrease the spacing between your form elements by changing the Vertical padding value. To have your form centered, increase the Horizontal padding value.
Field Hover & Field Focus – You are able to add different colors while focusing and hovering over a field.
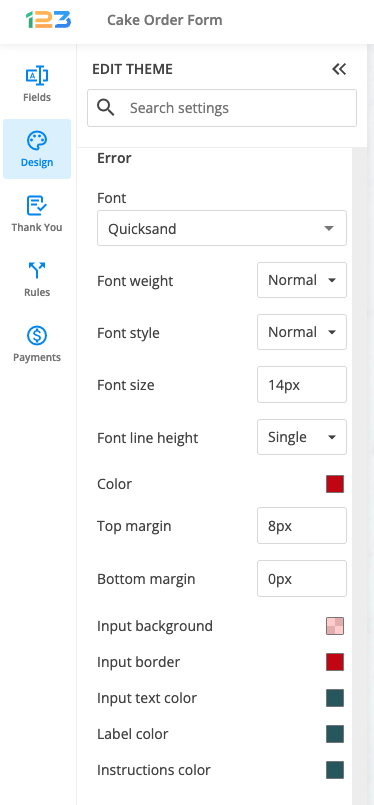
Error – If a field needs to meet certain criteria, an error message will be displayed. You change the design of the error text to match your whole form’s theme, by setting the font, font style, color and more.
Choices – you can create your own custom radio buttons for Single choice fields and check-boxes for Multiple choice fields. Adjust their layout to be a perfect fit for your theme.
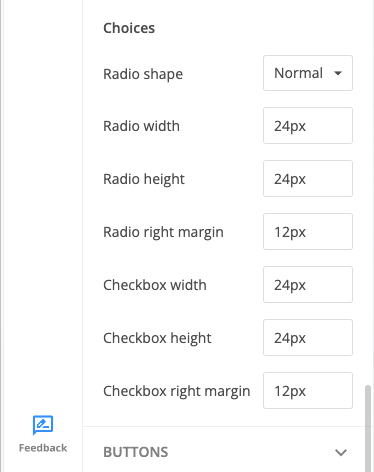
Buttons
Buttons section is divided into multiple subsections: Button, Primary button, Secondary button.
There are several buttons that can appear on your form: Submit, Calculate, Reset, Next, Preview, Previous, and Update. For any of them, you can set colors and change their format.
The Button settings will adjust the visual properties of all the buttons enabled on your form (border parameters, font options, and padding).
The Primary button options are referring to the Submit button.
The Secondary button section will change the design of all the remaining buttons.

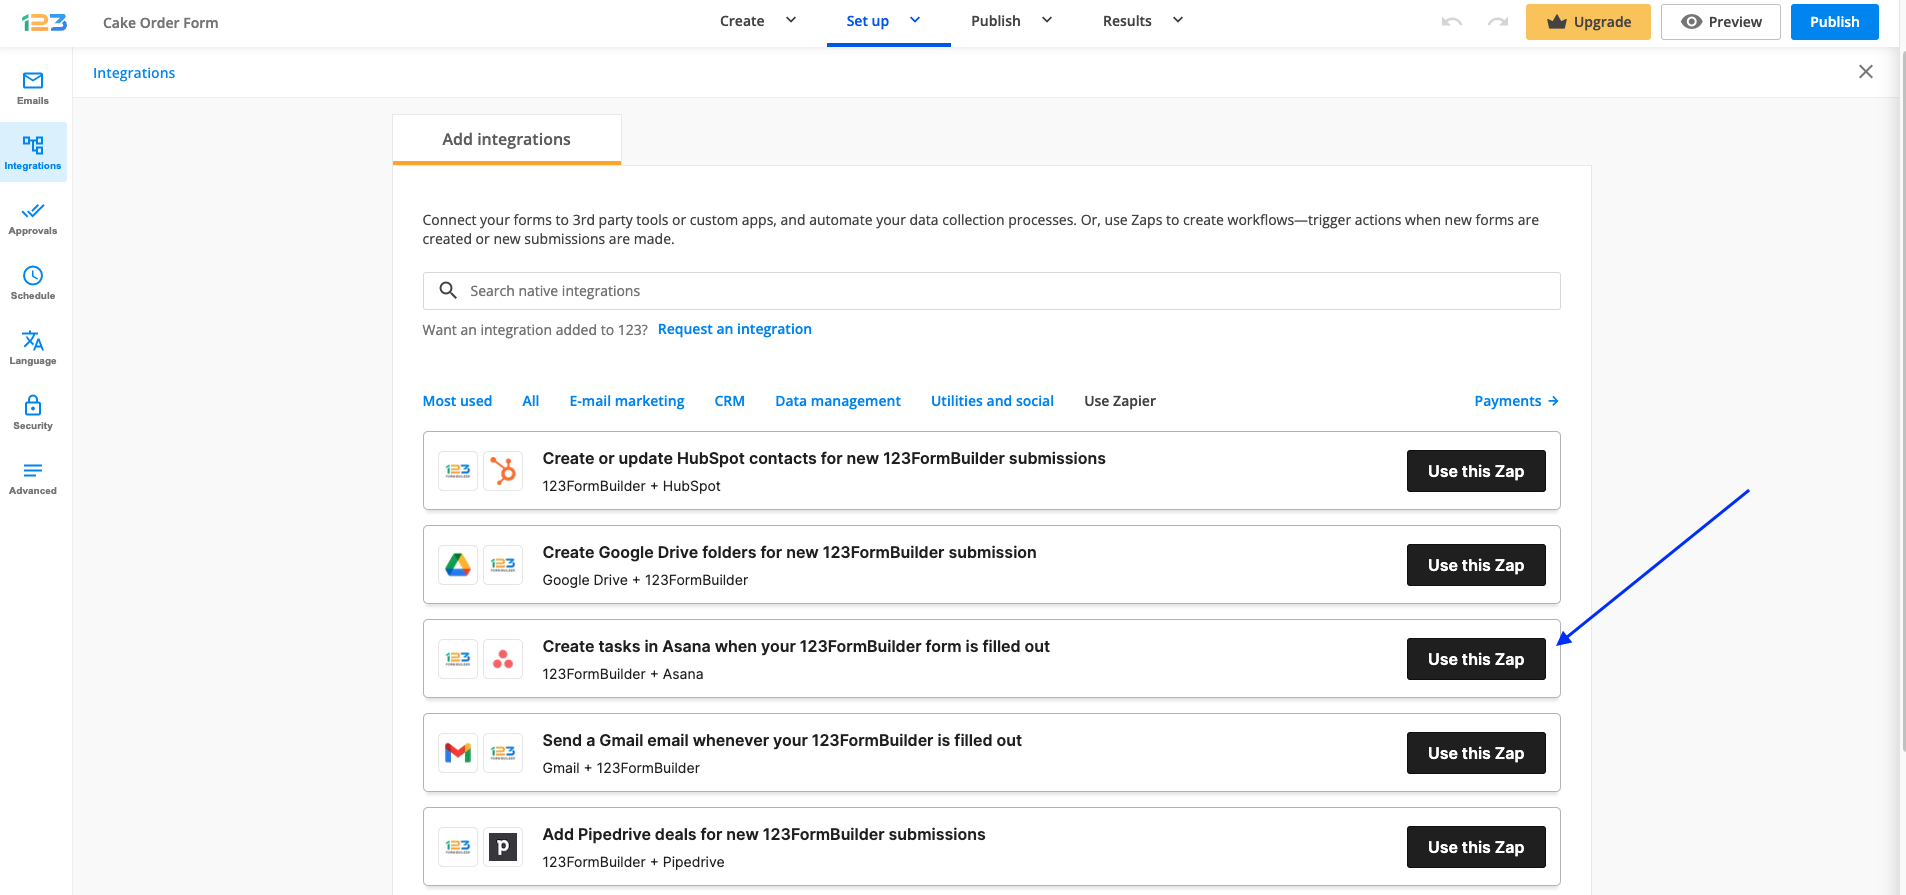
Asana is a great tool to organize your team and track their work. 123FormBuilder submissions can integrate with this great task management tool. You can achieve this connection by creating a zap.
To enable the integration with Asana and send tasks straight to your Asana workspace, go to the Integrations → Use Zapier section in your 123FormBuilder form.
Click on Use this Zap next to the Asana application.
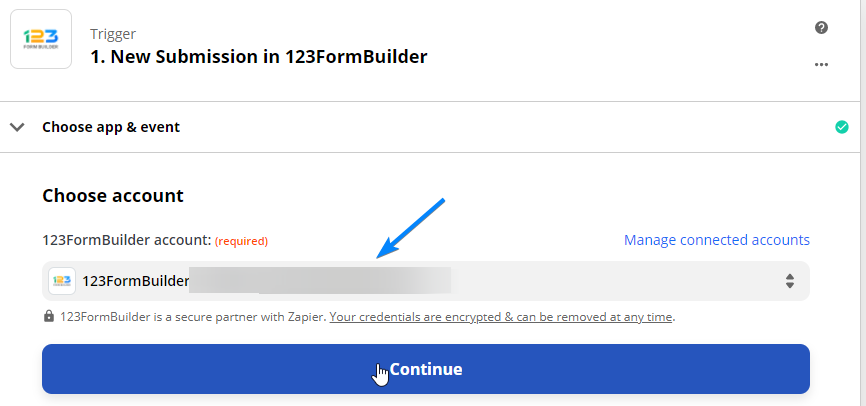
In the pop-up window choose your 123FormBuilder account.
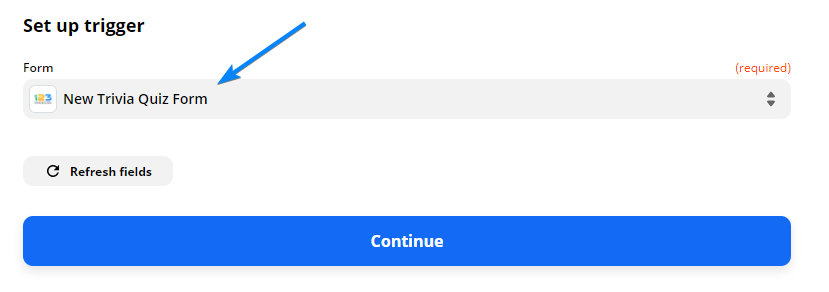
Next, select your form.
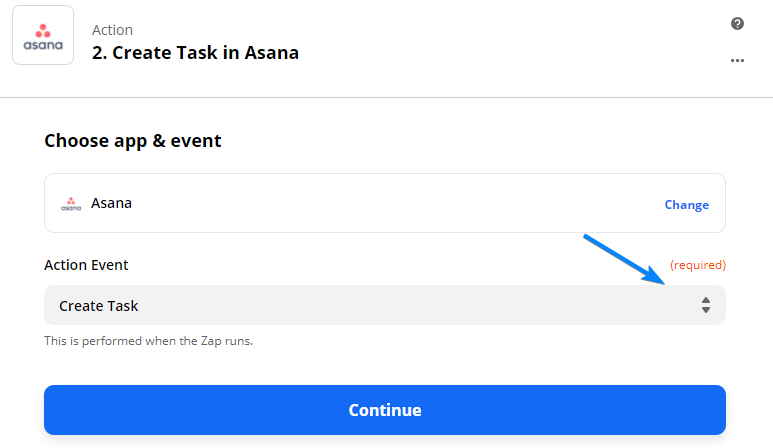
At the second part of the zap, choose the action to create tasks in Asana.
Afterward, sign in to Asana.

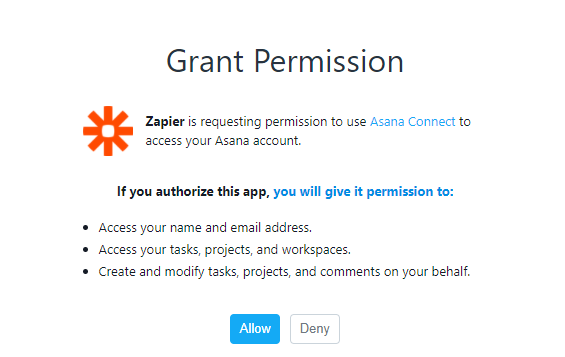
Authorize Zapier to access your Asana account details.
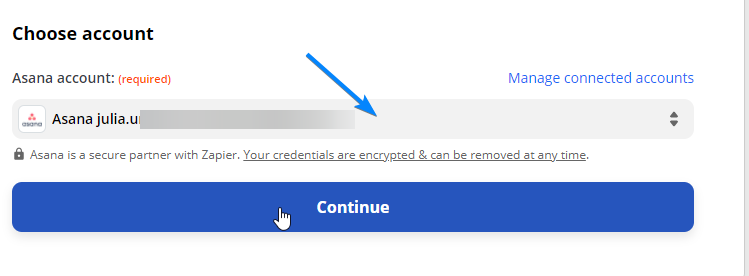
Choose from the dropdown menu your Asana account.
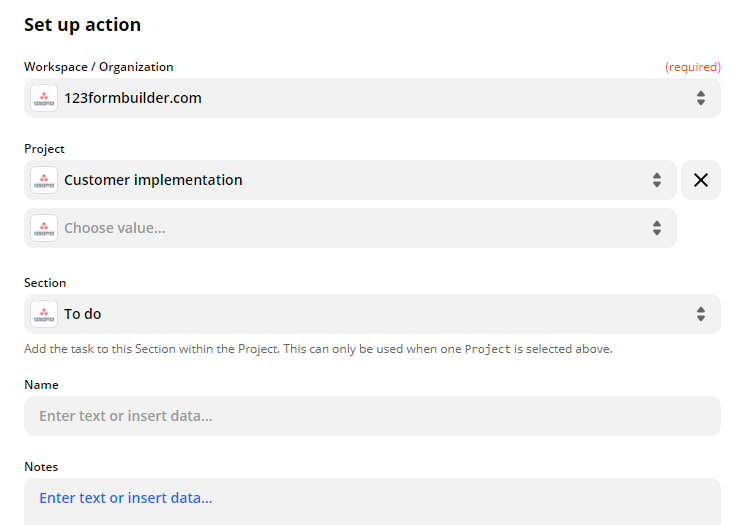
Complete the setup by choosing your organization, project, section and add additional information about the task.
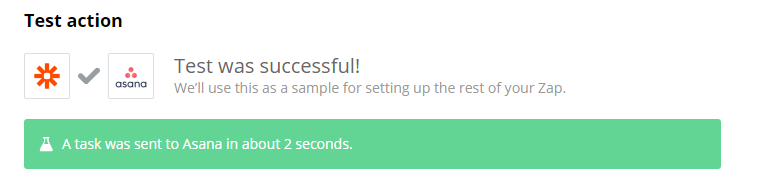
Finally, click to make a test task. In your Asana account, the task will be created within seconds.
The only account limit that is reset monthly is the submissions limit. Unfortunately, other limits such as the file storage do not get reset after a period of time.
If you have reached the maximum number of forms allowed per your form builder account, you can either delete some of your existing forms or upgrade your plan. Consult our Features Matrix to see what are your account limits and what plan suits your needs best.
The submissions limit is reset on the first day of each month. Each time a form user fills out your form, you receive a form submission.
Important Note
The number of submissions is calculated for all of the forms within an account, not separately.Once you have upgraded your account, you will be able to build more forms, receive more submissions, store more files, and many more.
Most Popular
Frequently Asked Questions
Here is a list of the most frequently asked questions. For more FAQs, please browse through the FAQs page.