123FormBuilder Knowledge Base
Search our documentation platform for answers, service specifications and 3rd-party integrations.
Knowledge Base
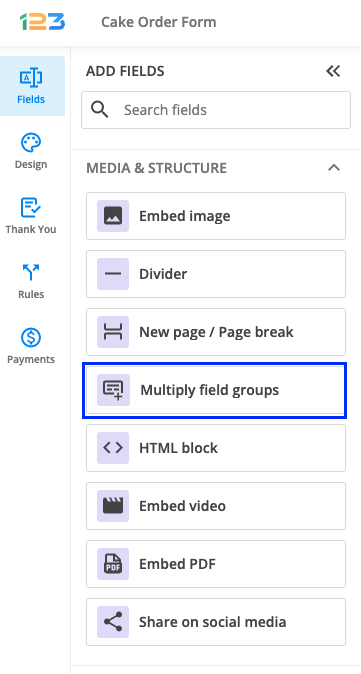
Multiply field groups field is used to group a set of fields that repeats as needed, allowing respondents to input multiple instances. Respondents will be able to click on a button to generate an additional set of those grouped fields.
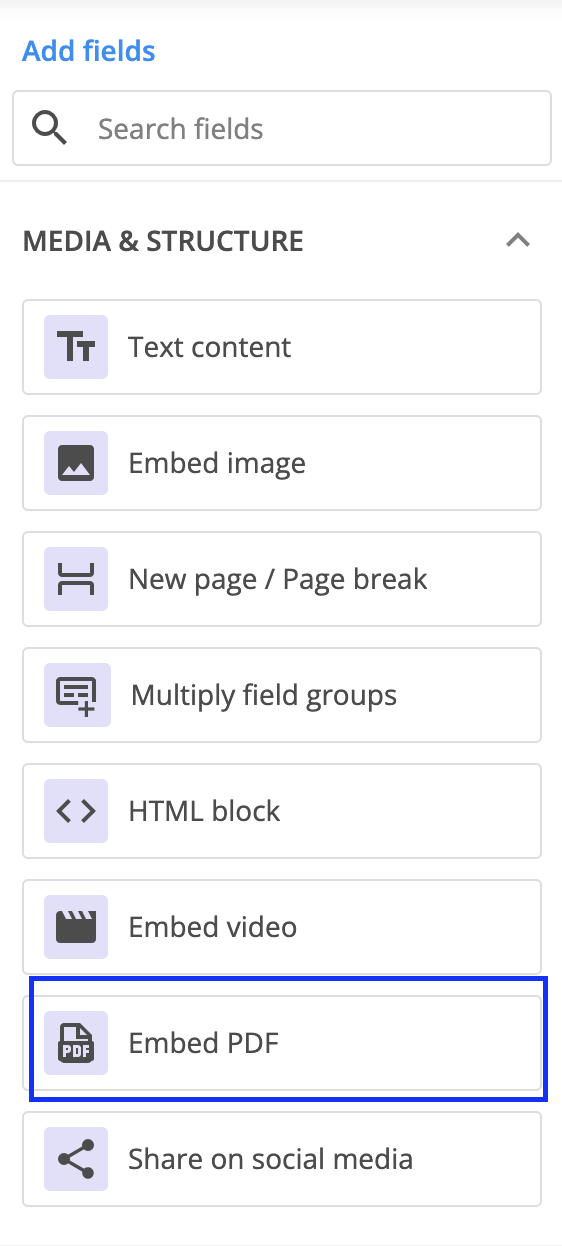
You can find this field under the Media & Structure section.
Once you have added it to your form, it will look like below. Now what you have to do is to add the fields that you want to be part of this field group, one by one, by dragging and dropping them within the container.
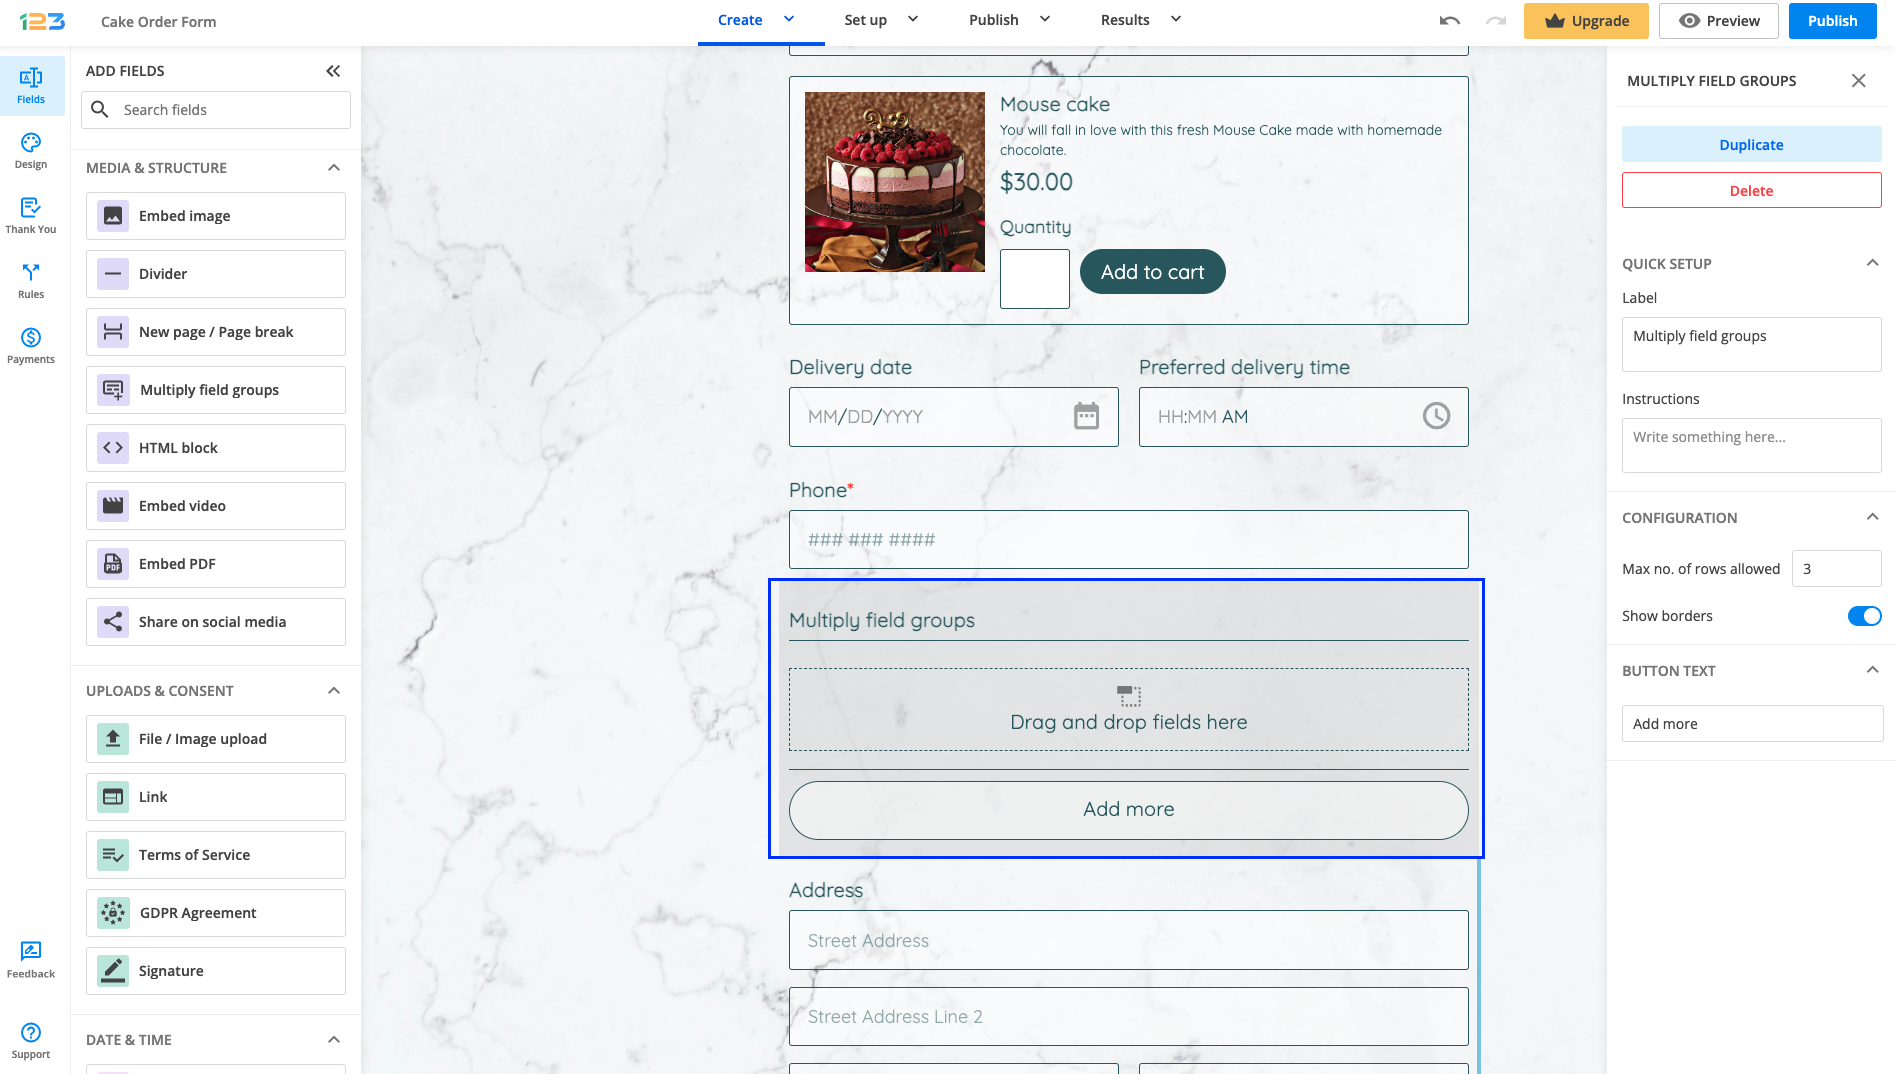
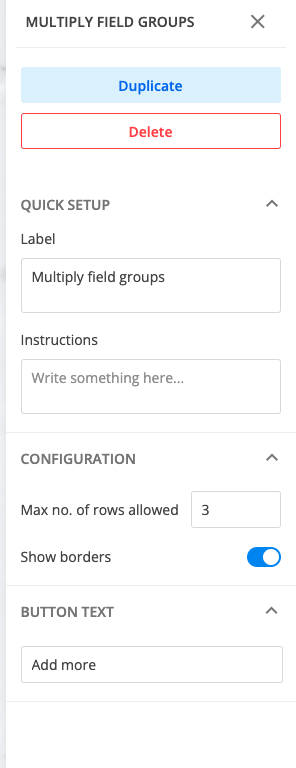
In the right side panel, you can customize the Multiply field groups field.
You can set the maximum number of rows allowed, meaning how many times should the group of fields repeat itself when respondents click on the Add more button. Show borders is enabled by default, but if you don’t want to have the fields separated by a divider you can untick this option.
The button text can also be changed → you can rename it as you wish to be more suggestive for your respondents.
When used in Rules, please make sure to select the Multiply field group element as well as all the fields included in it. Otherwise, your rule will not work as expected.
The following fields can not be added in a Multiply field groups field:
– File/Image upload
– Embed video
– Share on social media
– Embed PDF
– Embed image
– Location on Google Maps.
Related articles
This integration has been deprecated.
The 123FormBuilder – Worldpay integration allows you to accept payments directly on your online order form, without redirecting away from the page. Users will enter their payment details in the same tab on the Thank You Page and credit card fields will be just regular fields in your form.
To enable the Worldpay integration, follow the simple steps below:
1. Navigate to your Form Editor and E-Commerce section. From the list choose Worldpay.
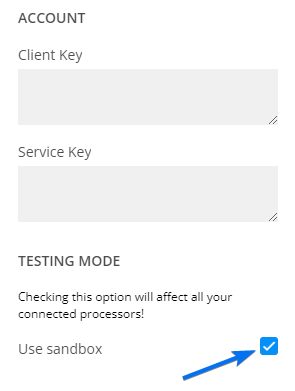
2. You will be asked to provide your Worldpay account credentials.
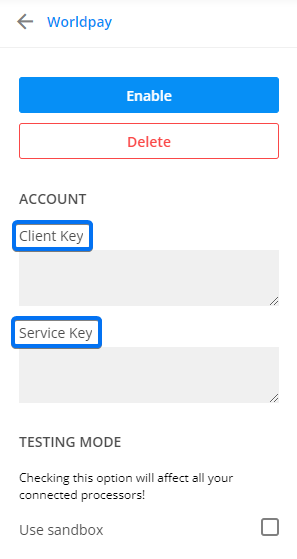
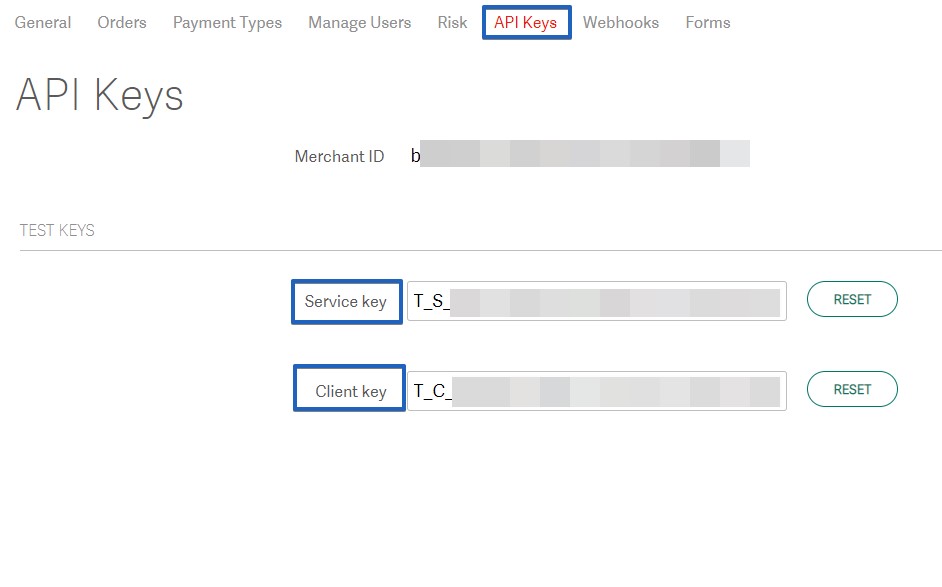
To retrieve the Client Key and Service Key, log in to your Worldpay account. Then, go to the Settings → API Keys section.
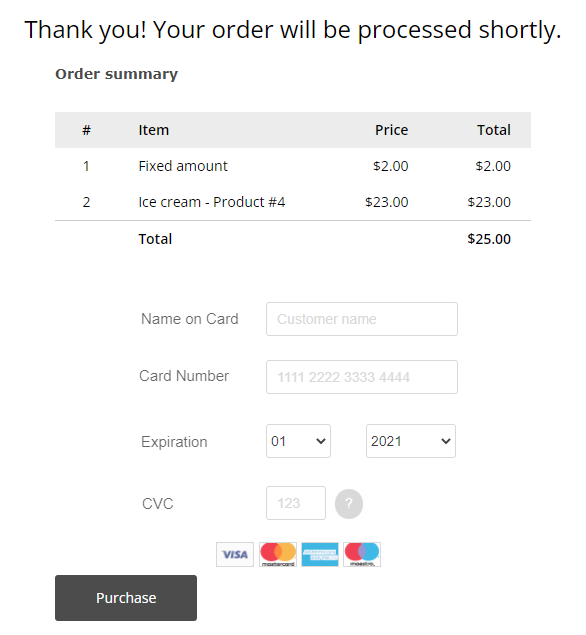
Finally, click the Enable button to finish connecting Worldpay to your form. After sending the submission, the user will see the following checkout page:
To test the integration, enable payments in sandbox mode, and you are done. You can start testing your 123FormBuilder – Worldpay payment processor and simulate a transaction.
Your form submissions are stored on our form builder servers and are available to you in the Submissions section. You are able to import submissions on your form from an external CSV file or use the CSV file exported from another form.
Before starting, it is important that the columns of your CSV file are named the same as your form fields. Also, the field types from your file (e.g numeric, alpha, alphanumeric) that you choose should be the same as your form fields. Matching different types of fields will not import the data.
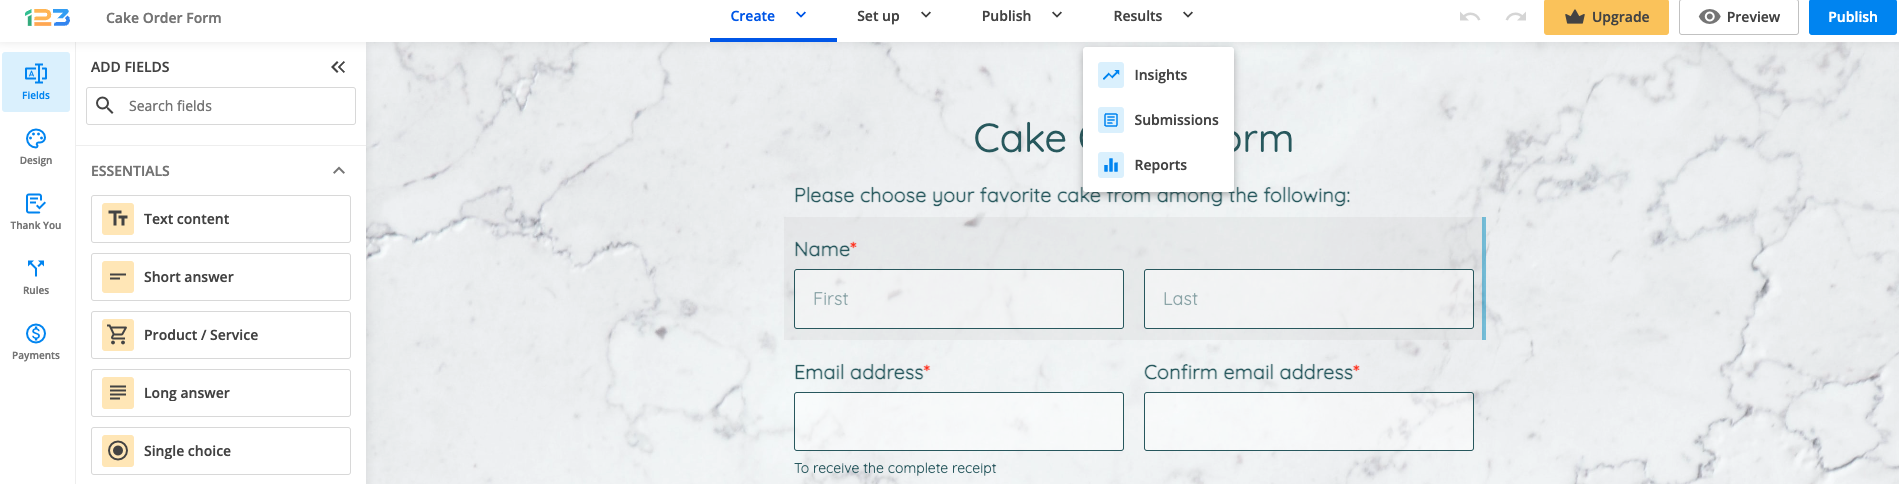
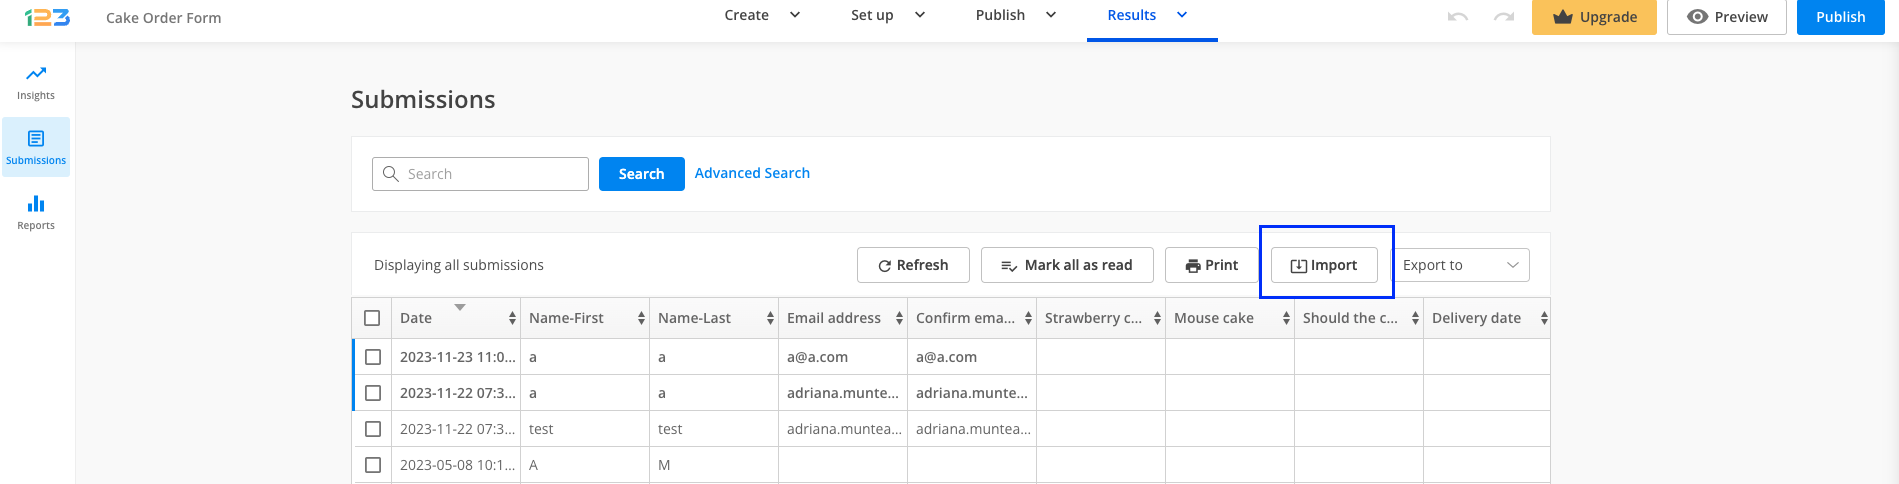
In order to do this, click on Results and navigate to Submissions tab.
In order to import submissions on your form, click on Import button.
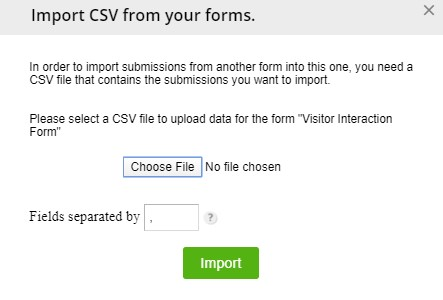
In the lightbox that appears, click on Choose File and select a CSV file to upload data for the form. Hit Import.
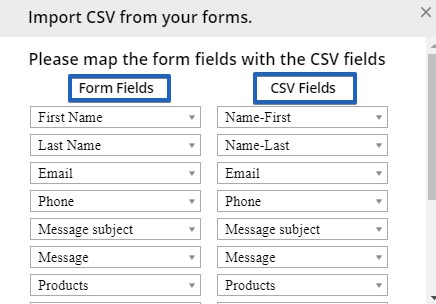
Map the form fields on the right side with your CSV fields on the left side. Once you finished mapping them click Ready and you’re done.
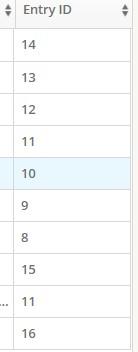
Importing form submission will disorganize the Entry ID numeration. To keep track of your submissions, enable the Reference ID option.
Related articles
- How to export form submissions to excel?
- How to export all of my submissions to CSV?
- Fixing CSV export in Microsoft Excel
The Embed PDF field allows you to incorporate PDF files into the form so that your respondents can scroll through it while completing your form. This is a great way to share with your users a copy of your Terms and Conditions that they can also download to their devices to revisit at a later time.
You can find the field under the Media & Structure section.
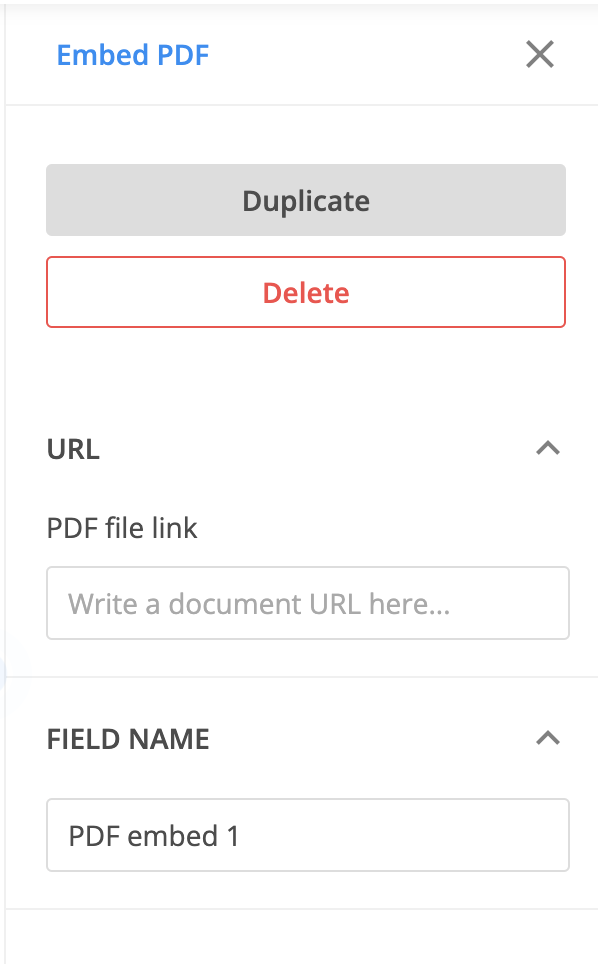
Once the field has been added to your form, you can find different inputs on the right side panel. You will have to provide the URL for the PDF file. Please keep in mind that the link has to be secure (https format), and it needs to end in the format of the file (.pdf).
Also, you can change the field name to easily recognize it if you want to show/hide the PDF Embed field using conditional logic.
Respondents can perform the following actions on the embedded PDF file:
a) Zoom out
b) Zoom in
c) Fit to width/page
d) Rotate counterclockwise
e) Download the file on their device
f) Print PDF
e) View the Document properties
Important Note
If you embed a fillable PDF, keep in mind that the information will not be delivered along with the submission entry, since the PDF is an external file.Related articles
Clearing your browser’s cache and cookies is an important step for almost any internet browsing issue. The reason why we recommend this step is because the browser’s cache saves files to speed up the website’s loading time. However, when a website is updated, the cache files (since it has previous data) will interfere with the new version of the website.
Follow these easy steps on how clear the cache and cookies from your browser.
Google Chrome
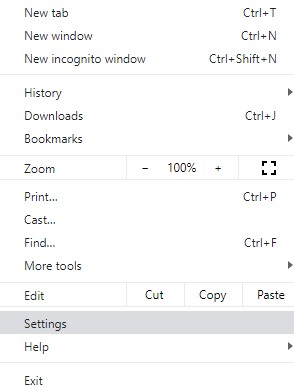
1. Navigate to your Settings from the three-dot menu located on the top right.
2. From the left side panel, select Privacy and security.
3. Afterward, select the option to Clear browsing data.

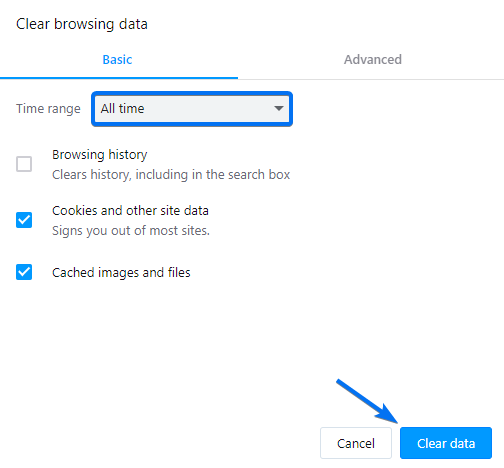
4. Make sure to check the following options: Cookies and other site data and Cached images and files.
5. Finally, hit the Clear data button.
Opera
1. Navigate to your Settings.
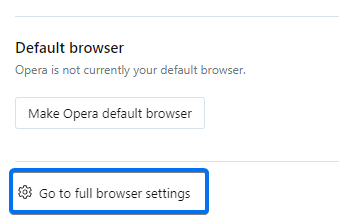
2. Scroll down to the Privacy and security section then select Clear browsing data.
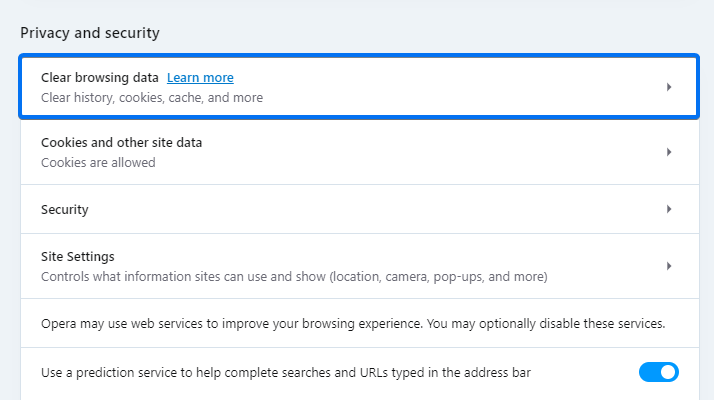
3. Set the Time range to All time.
4. Make sure to check the following: Cookies and other site data and Cached images and files.
5. Hit the Clear data button.

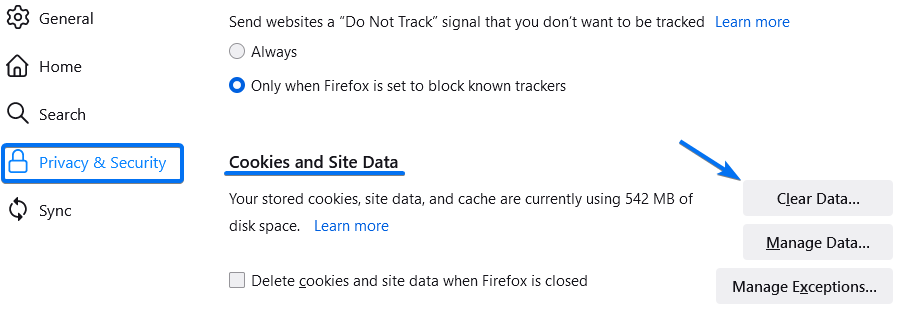
Mozilla Firefox
1. Navigate to your browser’s Settings in the top right corner.
2. Open the Privacy & Security section and under Cookies and Site Data click the Clear Data button.
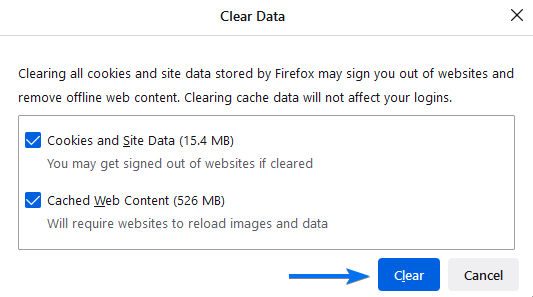
3. In the pop-up window, tick the check boxes named Cookies and Site Data and Cached Web Content. Finally, press the Clear button.
Internet Explorer
1. In the top right corner click on the gear icon and choose Internet options.
2. In the General tab click on the Delete button.
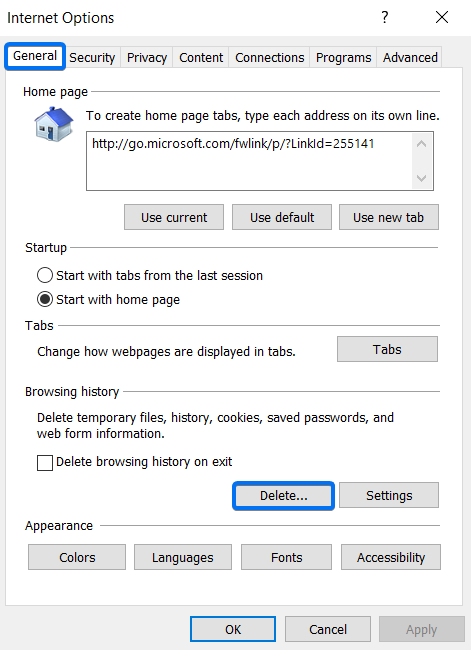
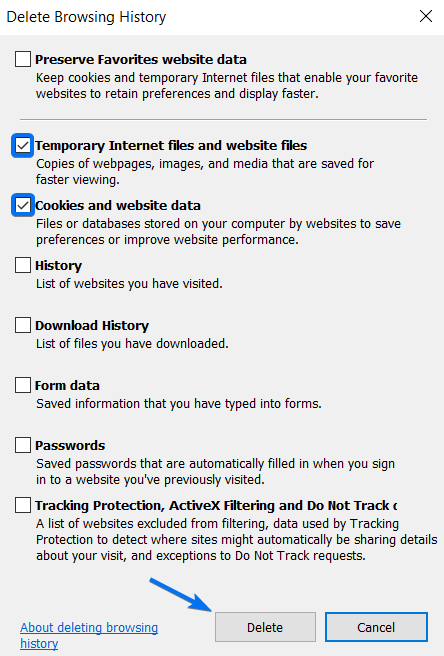
3. Check the options Temporary Internet Files and website files and Cookies and website data then press Delete.
Microsoft Edge
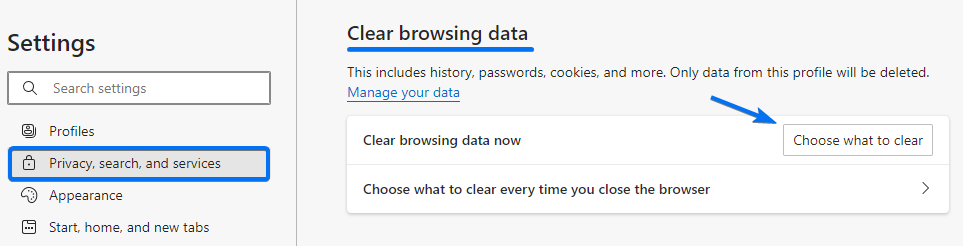
1. Go to the menu icon and select Settings.
2. Choose the Privacy, search, and services category and scroll down to Clear browsing data.
3. Next, click on the Choose what to clear button.
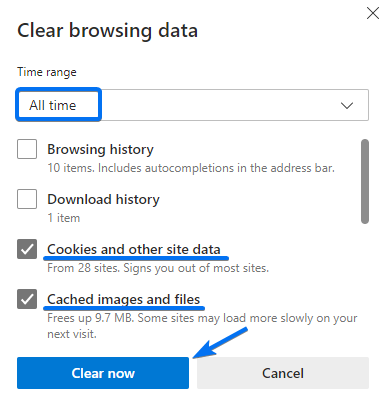
4. Set the Time range to All time.
5. Tick the options Cookies and other site data and Cached images and files. Finally, hit the Clear now button.
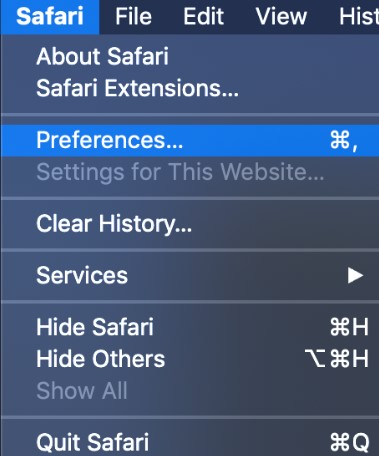
Safari
1. Click on Safari and choose Preferences.
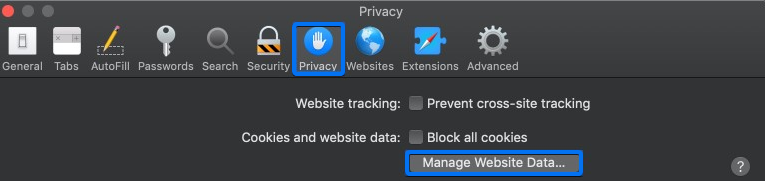
2. Switch to the Privacy tab and select Manage Website Data.
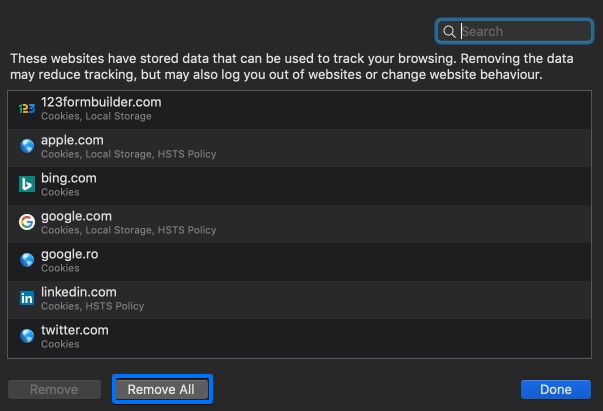
3. Finally, hit the Remove All button.
Related articles
Wix Code allows you to create your own database, a MySQL database. It’s a great tool to store information from your website and it looks like an Excel spreadsheet.
123FormBuilder web forms can populate a new database with each submission entry. This way you have easy access to your form submissions. The database will be read-only and all fields will create a new column.
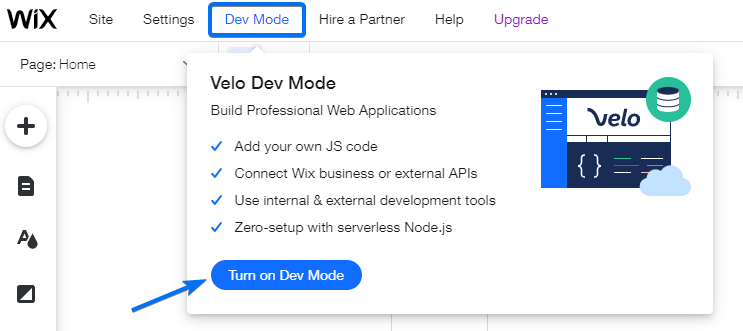
Before creating the database you need to install 123FormBuilder on your Wix website and Turn on Dev Mode from your website editor.
Setting up the integration
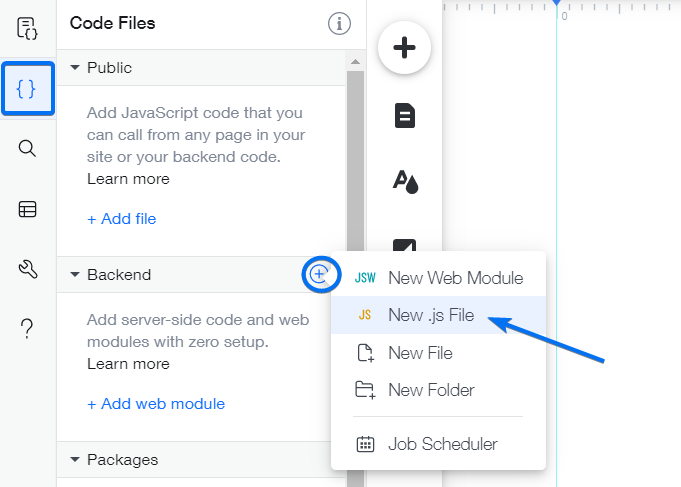
1. From the left panel of your Wix Editor, select Code Files and go to Backend. Click the plus sign and select New .js File.
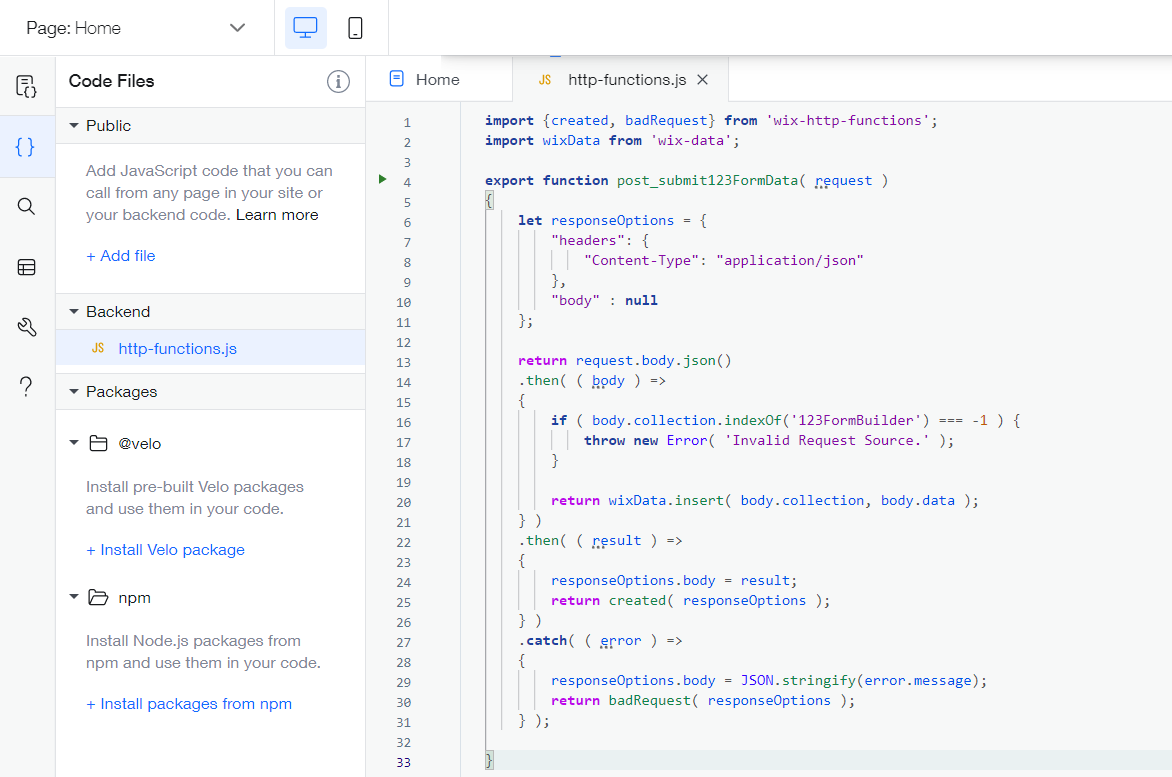
2. Next, name your file http-functions.js.
3. In the new JS file (http-functions.js) paste the 123FormBuilder Wix Code Javascript Snippet.
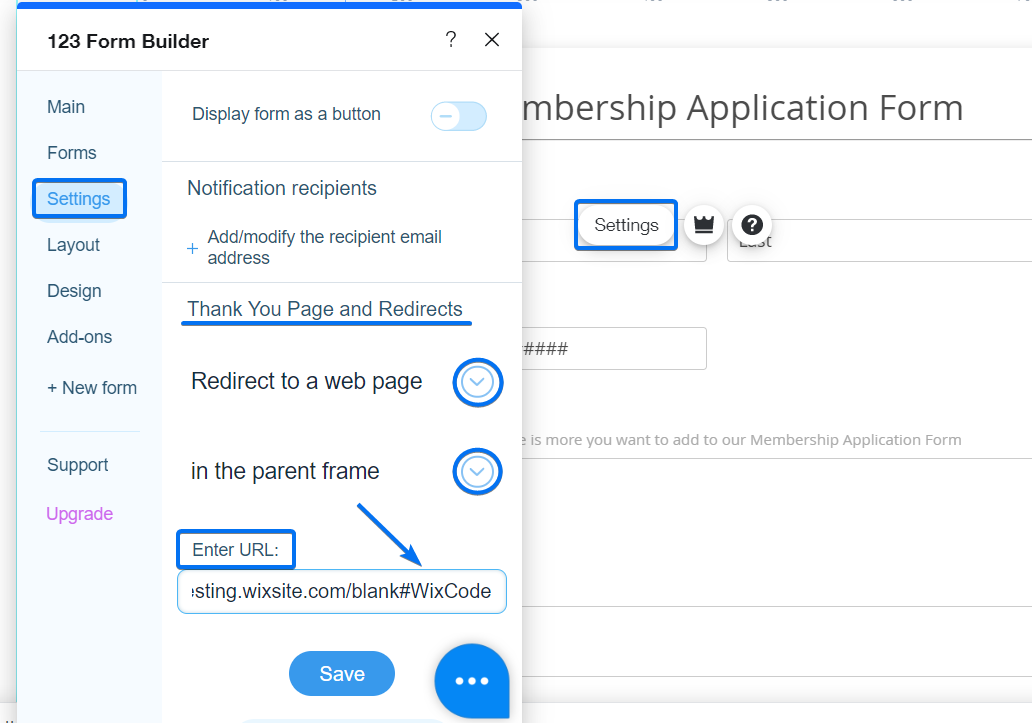
4. Now, click on your form to open our form builder App for Wix. Go to Settings → Redirect to a web page (choose in the parent frame) and specify the URL where you want to redirect your users after submitting the form.
After that, at the end of the URL add the following text #WixCode.
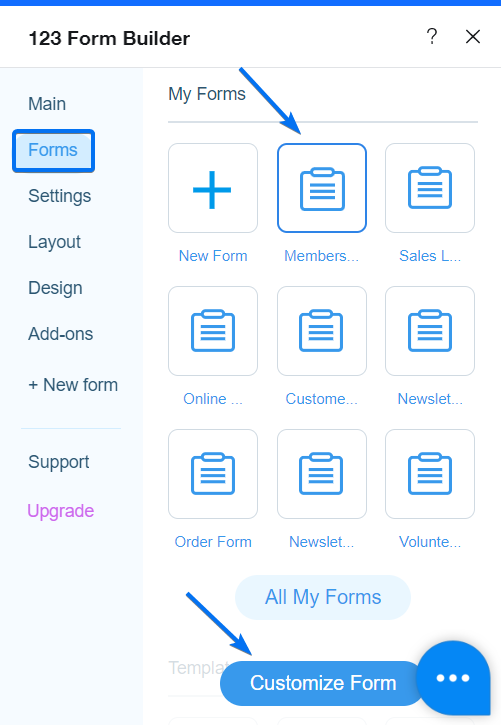
5. While still on our Wix App, go to the Forms tab, select your form, and click the Customize Form button.
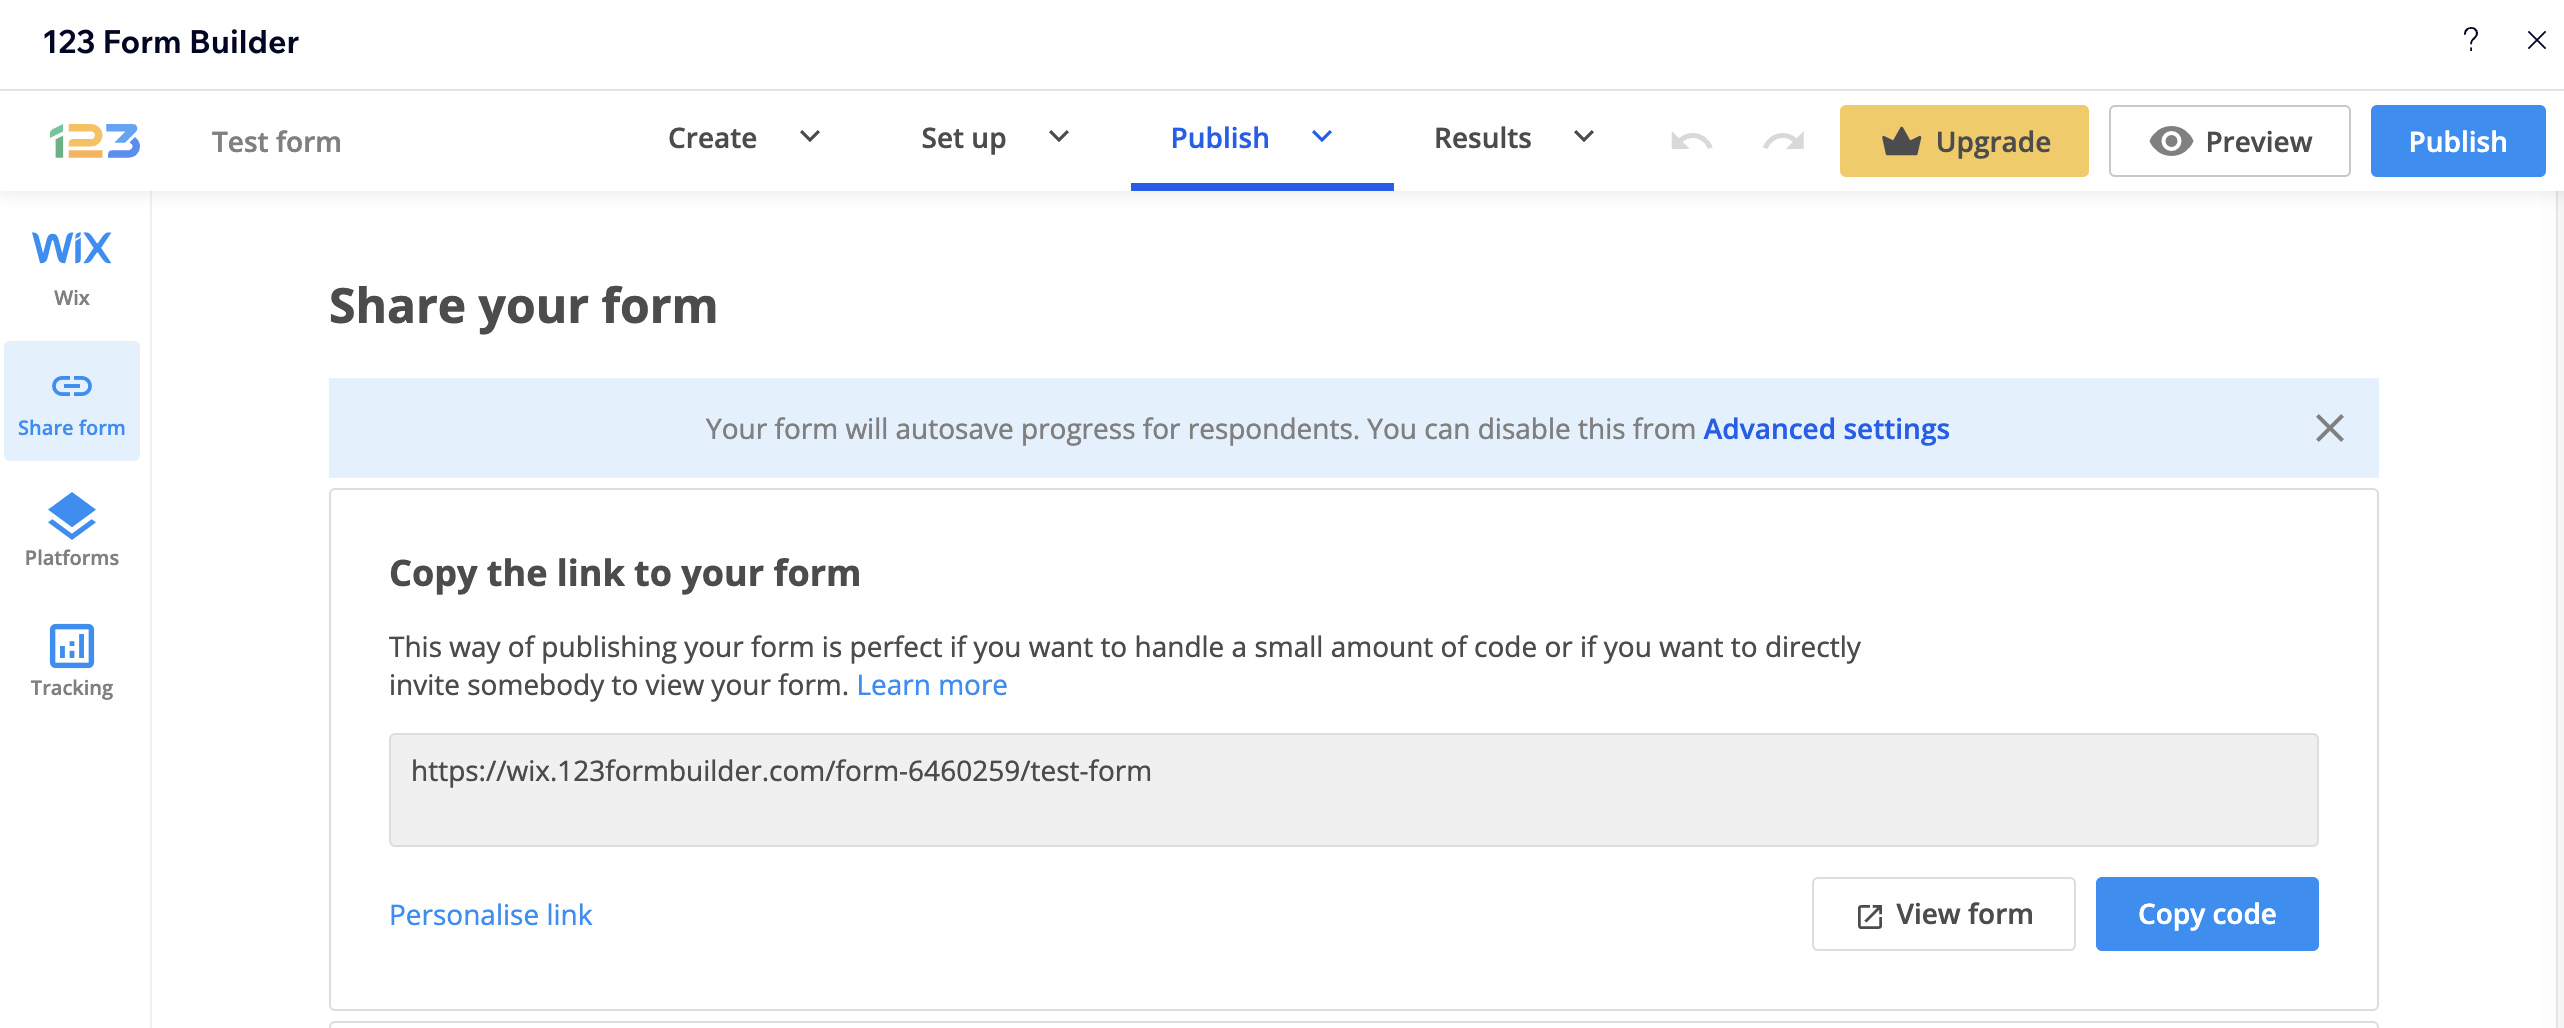
6. From your Form Editor click the Publish icon and choose Share form. Identify your Form ID in the form URL, which is numerical, and copy it.
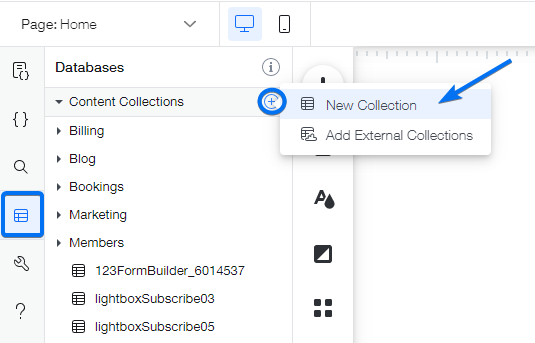
7. Go back to the Wix Editor and select Databases from the left panel. From Content Collections, click on the plus sign and choose New Collection.
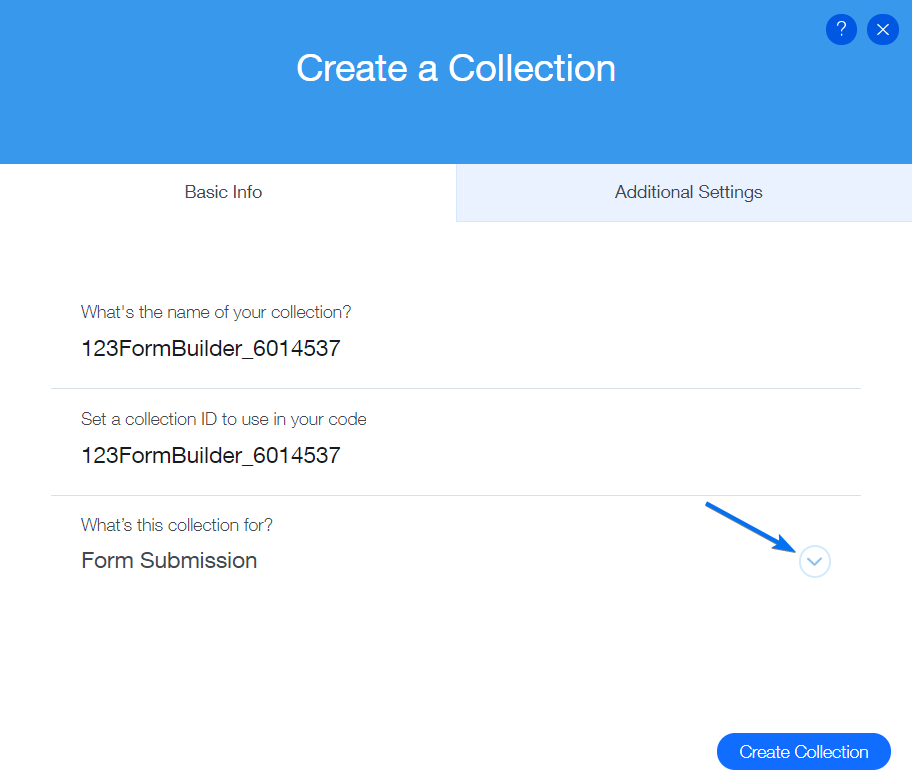
8. In the lightbox that appears choose the option Start Creating. Name your database like this: 123FormBuilder_6014537 (instead of 6014537 you will paste your own Form ID, step explained at point nr. 6).
Choose Form Submission at the What’s this collection for? question.
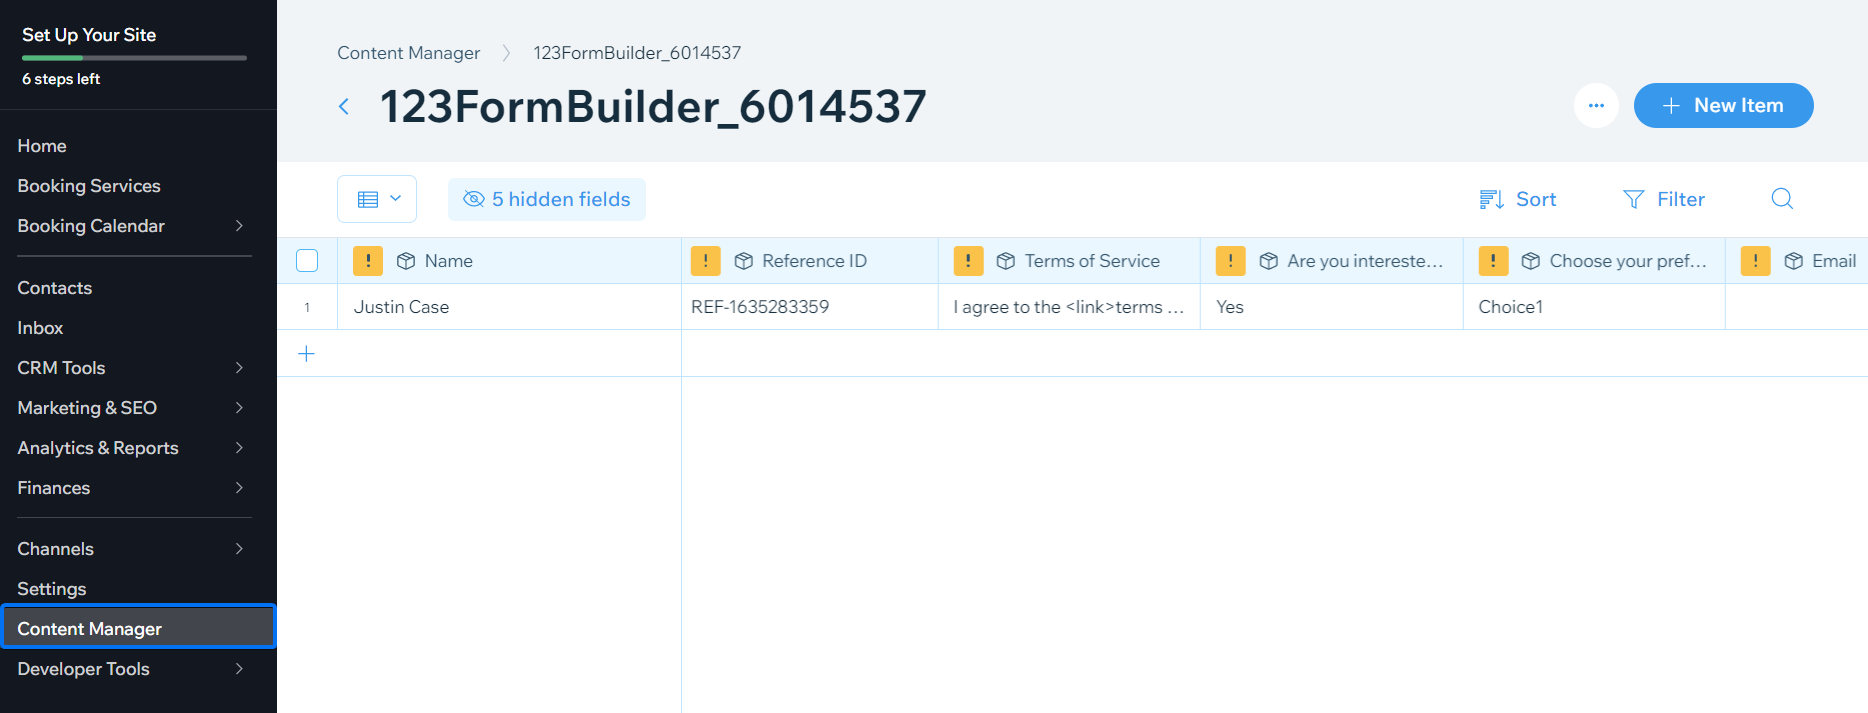
9. All set! Now go to your webpage and fill out the form. You’ll find the spreadsheet containing your entries in the Content Manager section of your Wix website.
If you’re new to our form builder, learn more about our Shopify form integration.
Every time a new customer places an order on your Shopify store, their name and other details are added to your customer list. 123FormBuilder developed an integration to create customer profiles in Shopify based on your form submissions.
How to enable the Shopify integration
1. Open our app, select your form, and navigate to Integrations. You can search for Shopify using the search bar.
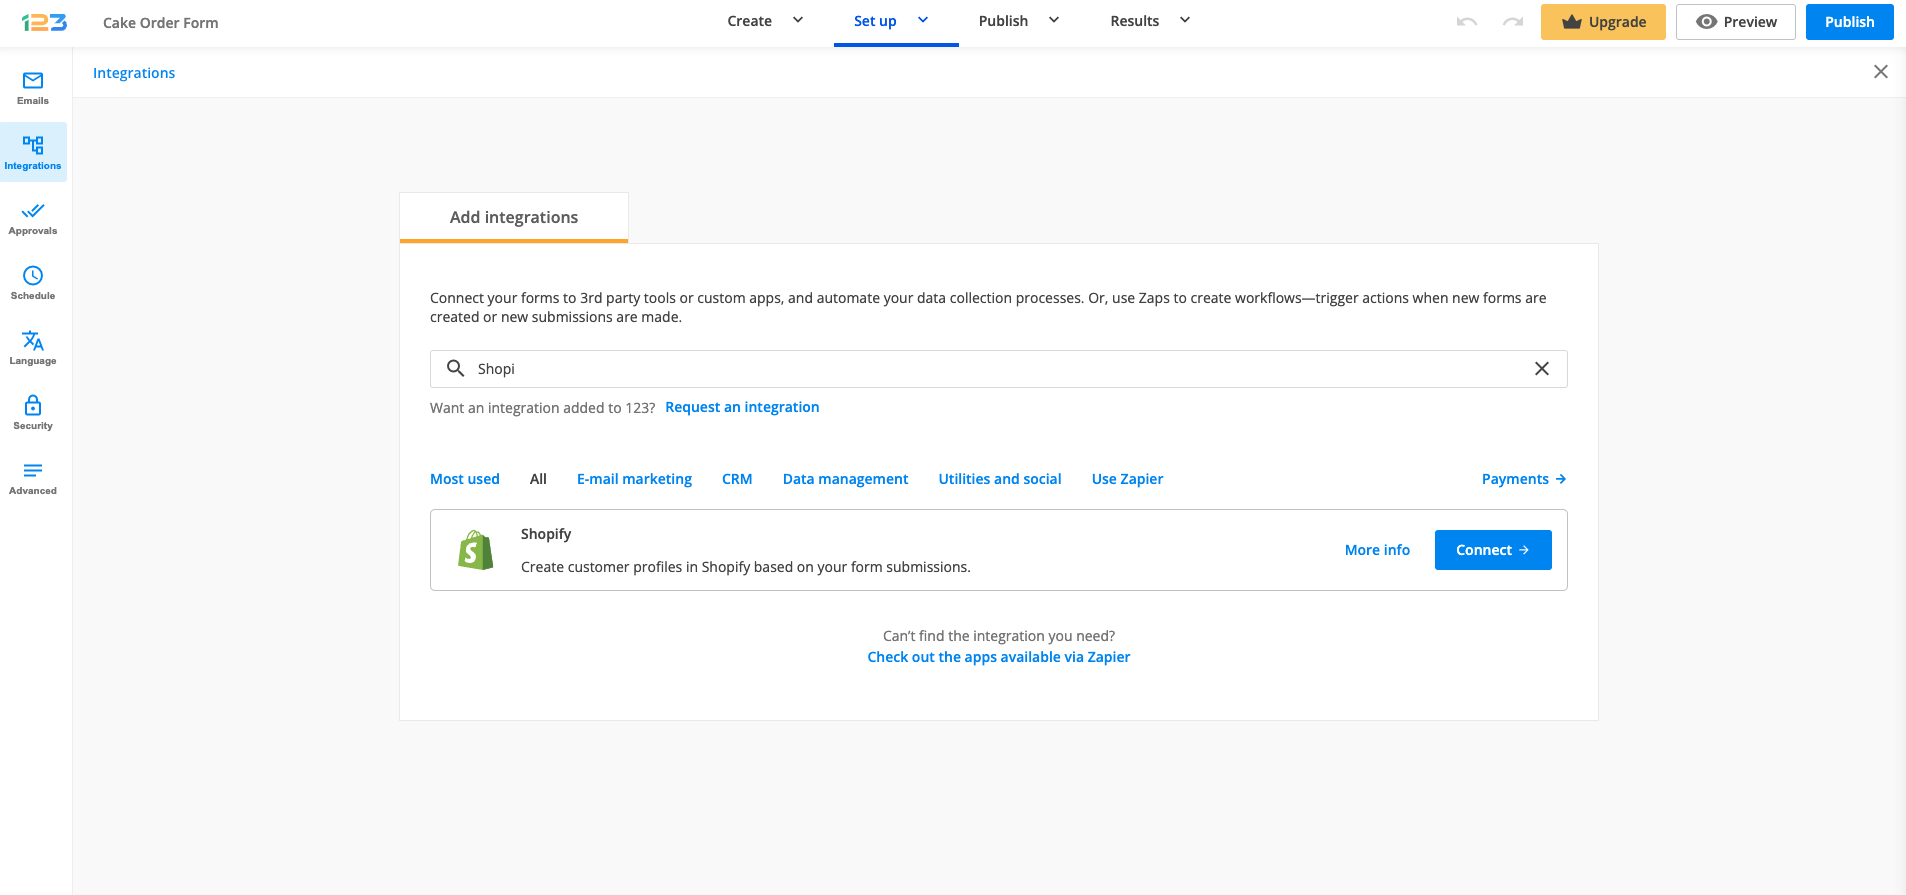
2. Your store domain will be automatically populated.
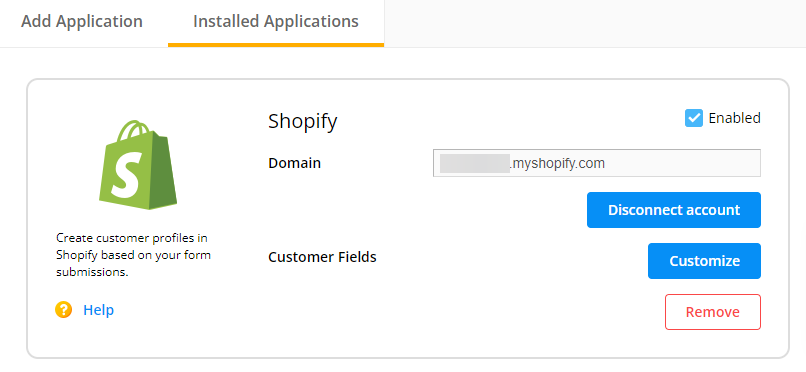
How to customize the integration
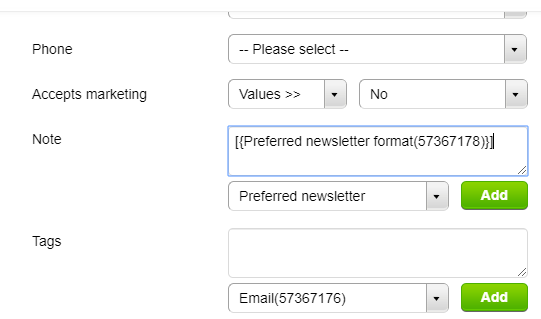
Hit the Customize button and match form fields with Shopify fields in the lightbox that appears on the screen.
The Note and Tags sections allow you to add your own text and select other form fields. The field variable from the dropdown list will be replaced with the user input.
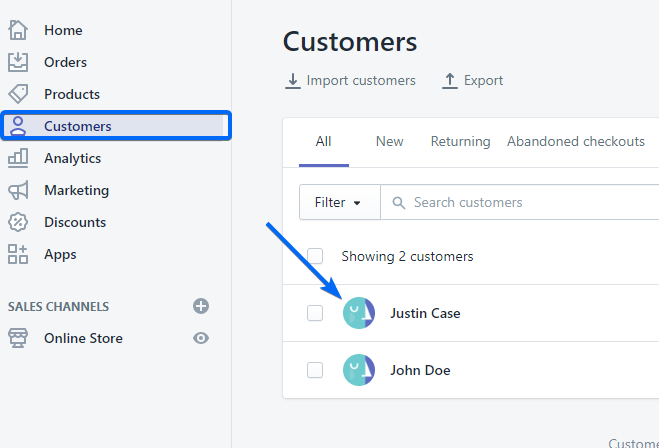
Important Note
The integration works only when the online form is submitted on a Shopify webpage.In your Shopify dashboard go to Customers to check the new customer profile created with the submission entry.
PayPal Express Checkout is using the shipping and billing information from your client’s PayPal account. This will make the payment process an easy experience. A big advantage is that Paypal Express Checkout allows you to accept payments directly on your online order form, without redirecting away from the page.
Setting up your PayPal Express Checkout integration
1. Click New Form from your account dashboard and start creating your payment form.
You can use choice fields (single/multiple choice and dropdown lists) to display the products on sale or, even better, Product field.
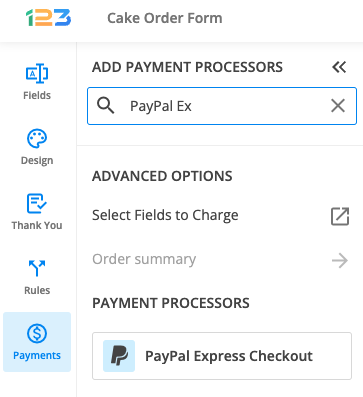
2. In your Form Editor, in the left side panel, you will notice the Payments section. By using the search bar, you can quickly find PayPal Express Checkout.
3. After adding PayPal Express Checkout on your form, you will notice a couple of changes: the PayPal Express Checkout payment processor has a tag near its name & the settings panel opens up to the right side of the page.
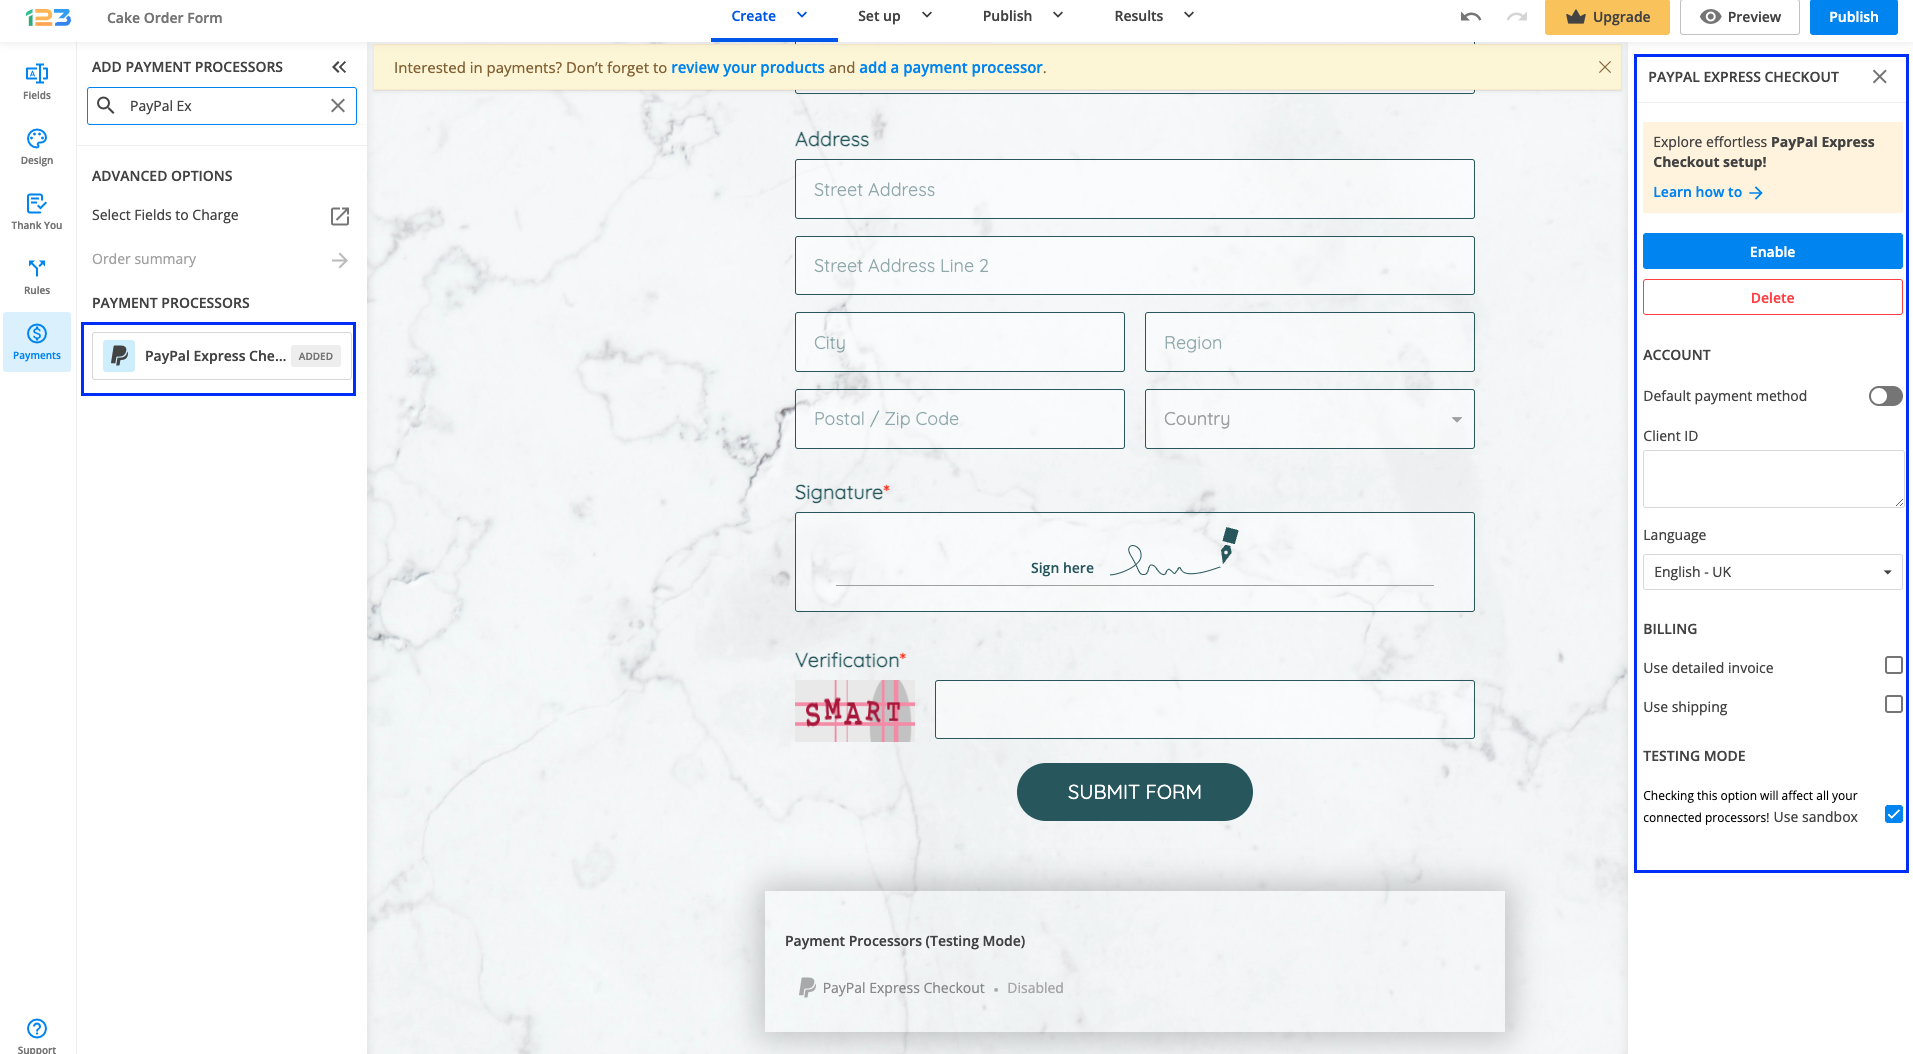
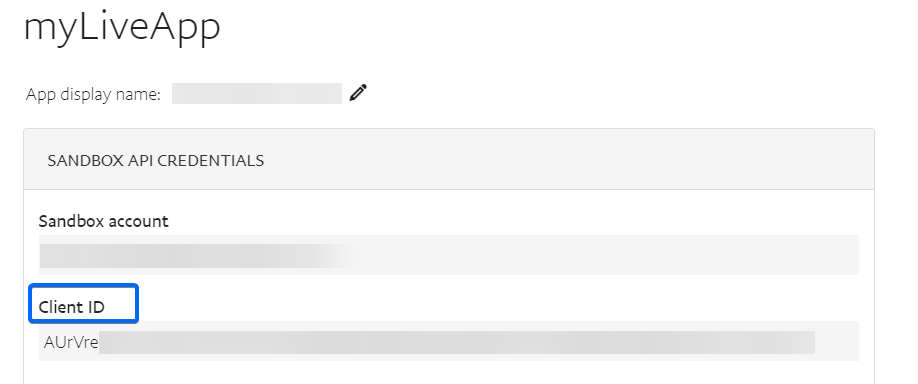
4. In order to set up your PayPal Express Checkout integration, you have to provide your PayPal Checkout Client ID.
To test your PayPal integration with 123FormBuilder, you’ll need a sandbox account on PayPal.
If you do not have one, go to https://www.sandbox.paypal.com to create one. Type in the credentials of your sandbox account in the payment integration panel and tick the Use sandbox option.
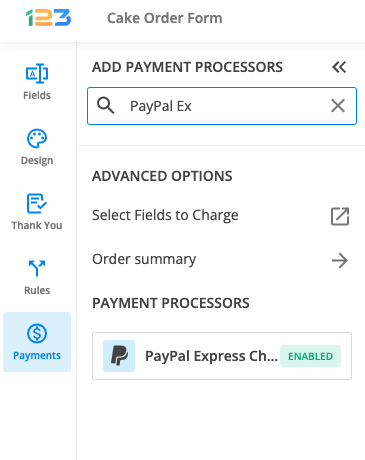
5. Enable the payment integration by clicking on Enable button. By enabling PayPal Express Checkout, you will notice a couple of changes on your form.
The PayPal Express Checkout payment processor on the left side panel has an Enabled tag on it so you could easily scan which payment processor is enabled.
Another change is that on your form it will be displayed an Order summary. Here will appear all the products your respondents select on the form, together with the price per option, quantity and the total price. If you want to customize the order summary, all you have to do is click on it and the available settings appear on the right side panel.
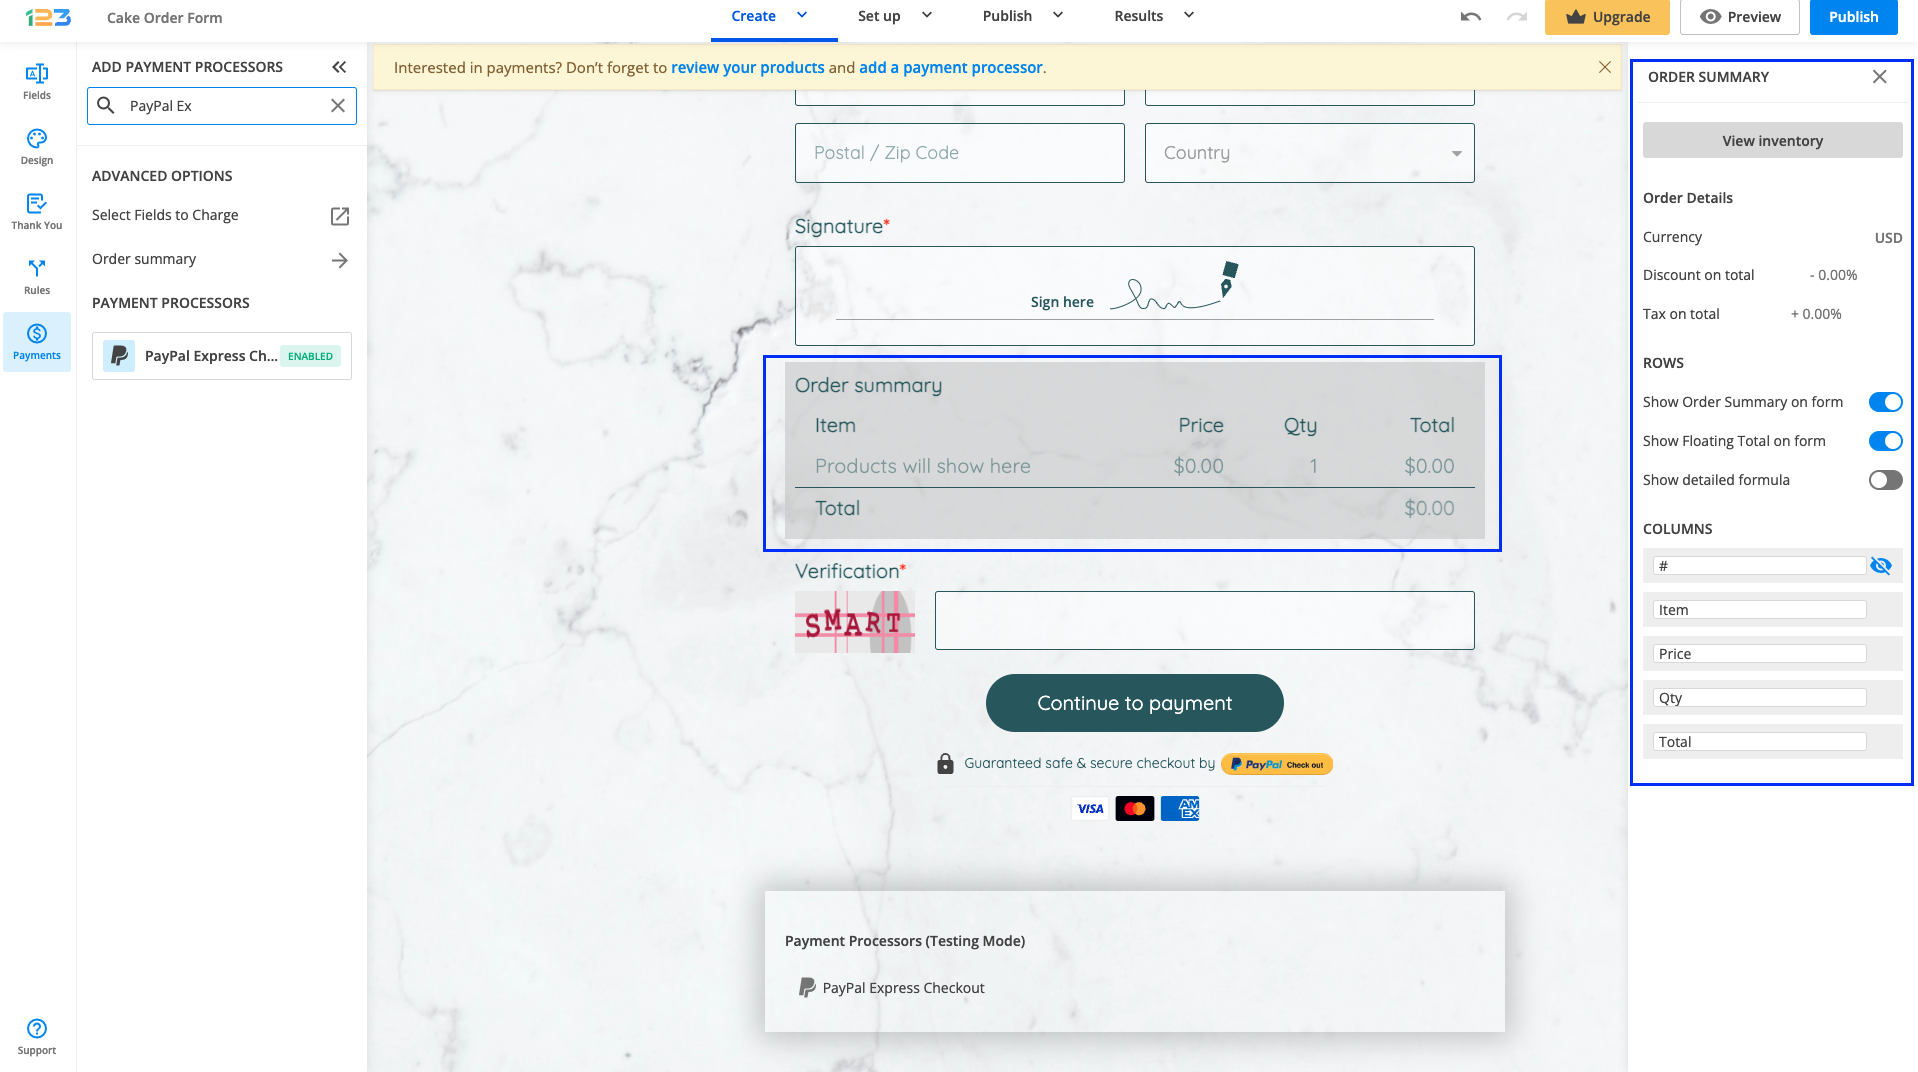
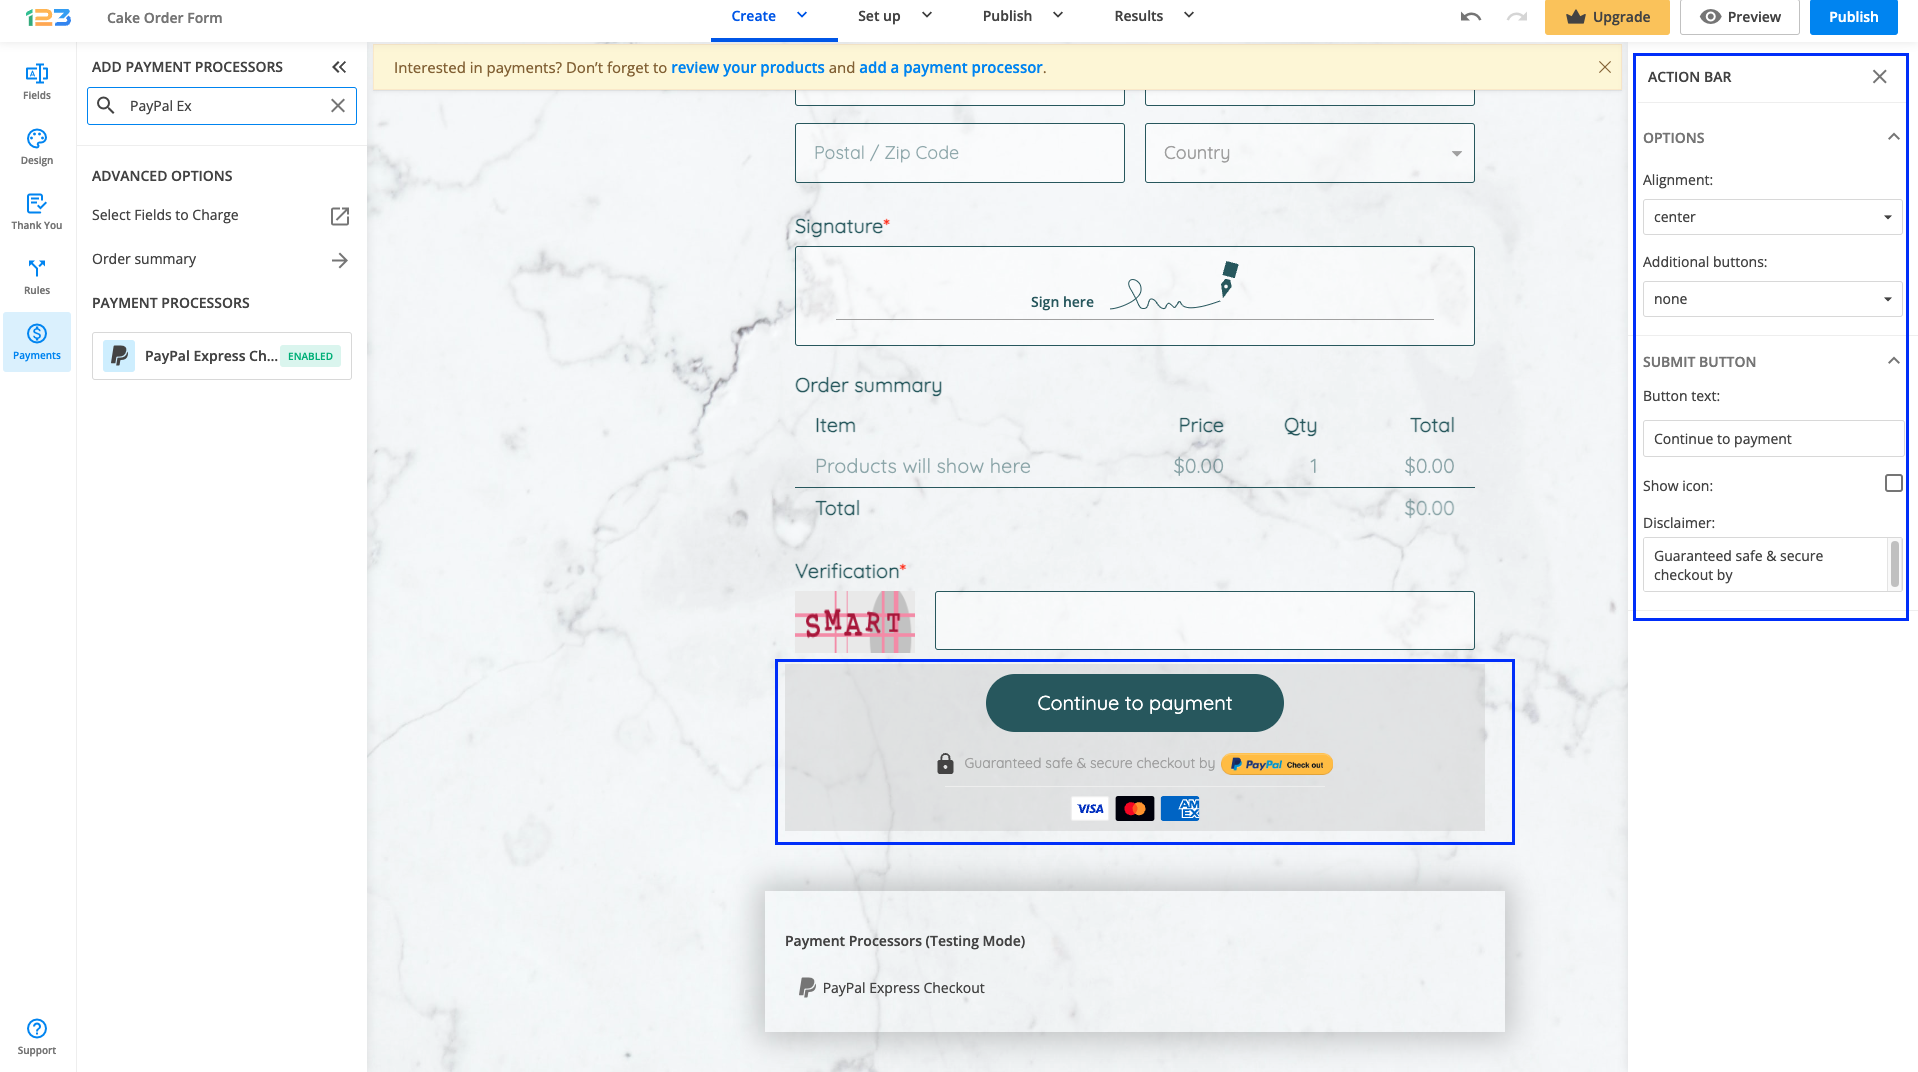
Another change is related to the Submit button. Once your payment integration is enabled, the Submit button is changed to Continue to payment. Below it, we are displaying a disclaimer together with the PayPal logo so that respondents are aware they are proceeding to a payment.
Also, the accepted cards by the PayPal Express Checkout integration are visually displayed so that respondents know from the start what is the accepted payment method.
You can customize the action bar (everything that is related to the submit button, additional buttons, disclaimer, etc) by simply clicking on this area.
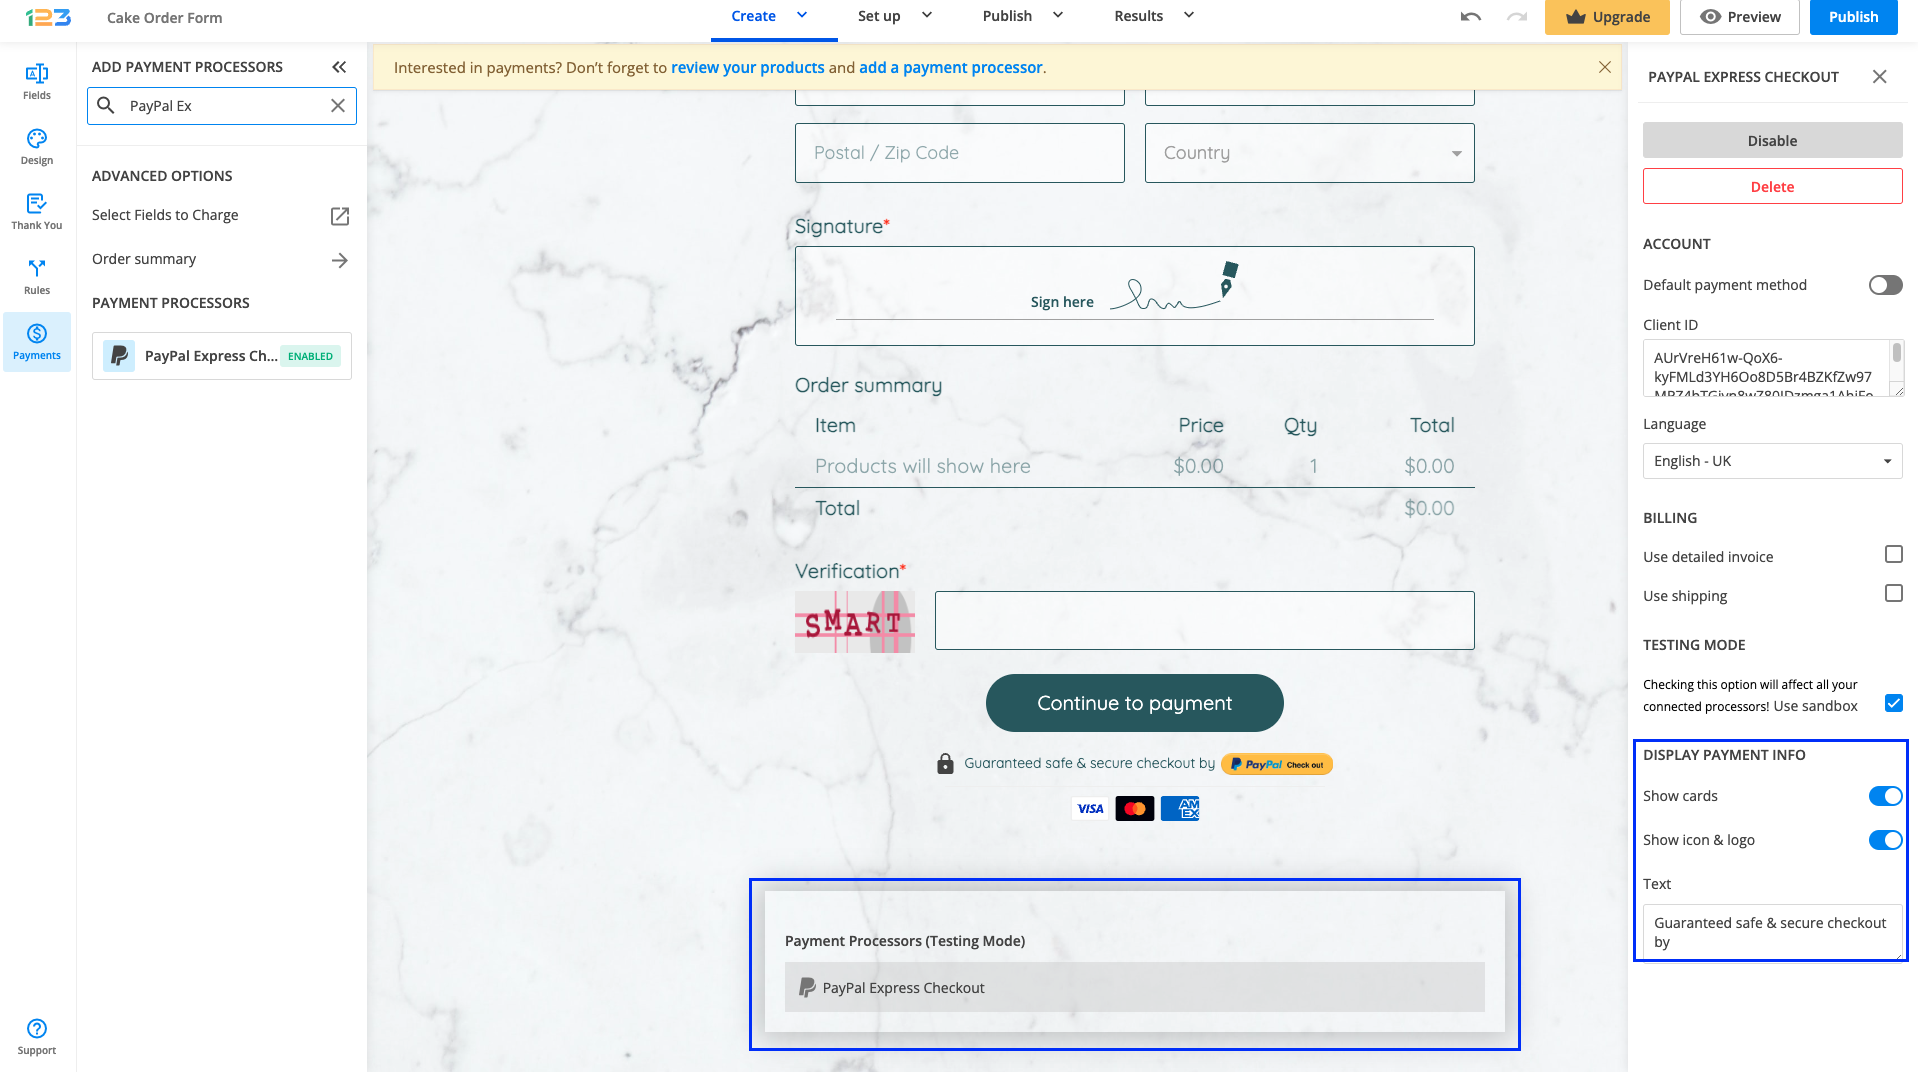
Under the Continue to payment button, we are displaying a disclaimer text together with the logo of the payment processor and the accepted cards. If you want to make changes to this, all you have to do is click on the payment processor and on the right side you can disable these settings from Display payment info.
Errors & what you need to pay attention to
1. PayPal live used as sandbox (or vice versa) without having them both working on live and sandbox
If your account is working only in sandbox and you are using it for live payments (meaning you do not check the Use sandbox box), your respondents will be seeing an error page when they try to make the payment with the text Things don’t look to be working at the moment
2. Currencies not accepted by PayPal
You need attention to what currency you have set up in Inventory/Order summary. If the currency set up in Inventory/Order summary is not accepted by PayPal, your respondents will be seeing an error message when trying to make the payment with the text Things don’t appear to be working at the moment. You can see the currency list accepted by PayPal here https://developer.paypal.com/api/nvp-soap/currency-codes/#paypal
3. Amount is sent as 2 decimals for currencies that do not accept 2 decimals
You need to pay attention to the number of decimals set to the inventory amount. There are currencies like Taiwan New Dollar who do not accept decimals. If your inventory amount has 2 decimals, but the currency does not accept 2 decimals, when your respondents try to make a payment, they will be seeing an error message with the text Things don’t appear to be working at the moment.
4. Incorrect setup of Client ID
If you set up the incorrect Client ID, when your respondents try to make a payment, they will be seeing an error message with the text Things don’t appear to be working at the moment.
Where to find your PayPal Client ID?
- First, log in here.
- Access your applications page on PayPal.
- In the My Apps & Credentials section click on your app. If you do not have one, click on Create App.
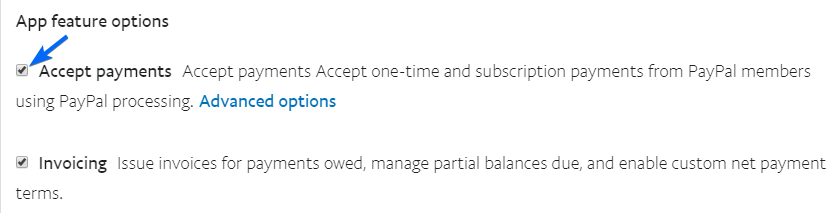
- Click on your app and you will see the API credentials listed. Copy the Client ID ( it is 80 characters long). At Settings from the bottom, you should have ticked the Accept payments option.
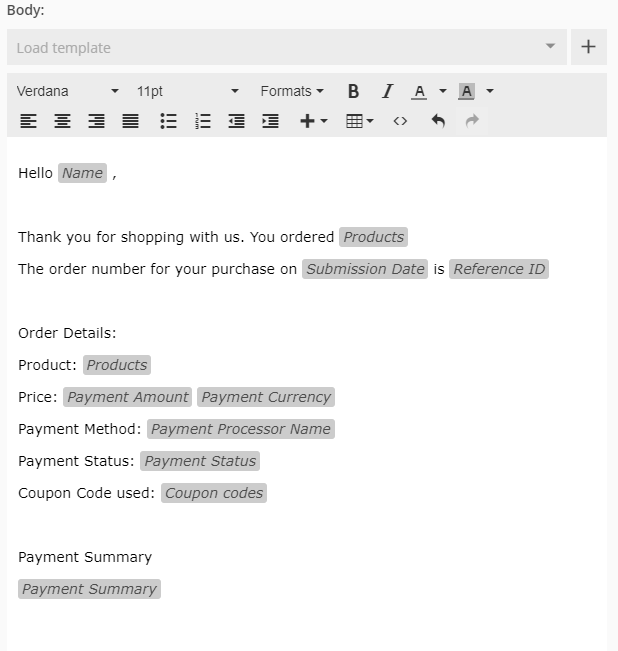
In this post, we’ll take a look at all the email template variables that our form builder has to offer. Using custom templates as your foundation, you can design a unique email and make it look more professional.
The default email template contains an HTML table that renders user input. However, you can add additional information and recipients can receive all the necessary details about submission entries.
In order to add variables in your template click the plus sign near the Body section. This will open a dropdown list with all the available options.

You can add information about the user’s session: IP, Country, Browser, Device type, Referrer, Form Host.
If you have an order web form you can add variables related to their transaction details such as Payment Link, Payment Amount, Payment Currency, Payment Status (complete or incomplete), Payment Processor Name, Coupon codes. Along with the Form Summary you can choose to incorporate the Payment Summary.
Custom links such as the edit submission or approval link can also be placed in the email body. Add the Quiz summary or the Quiz score if you have built a quiz form.
We made the following template for an order form as an example:
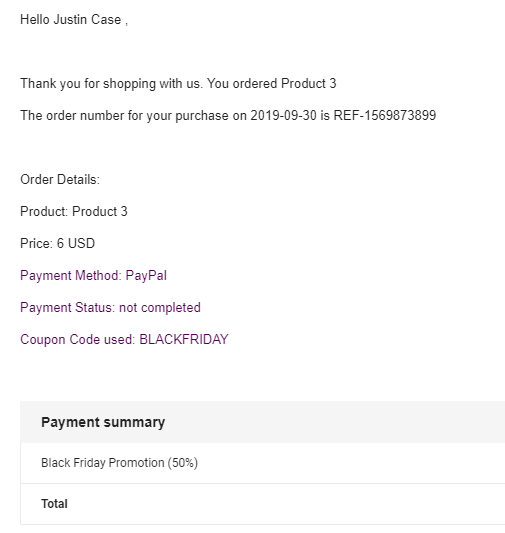
All variables will be replaced. A variable will be empty when a user does not fill out a field. Mark fields as required so that you can collect the most important information from your users.
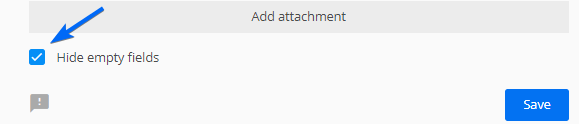
Hide empty fields: If you enable this option, the fields that haven’t been filled will no longer be included in the notification email.
The hide empty fields option works with both custom and default email templates.
Here is how the email template arrives in the inbox:
Email templates save you time when you want to send the same email on multiple occasions. You can create different templates for your forms, or just use one on all.
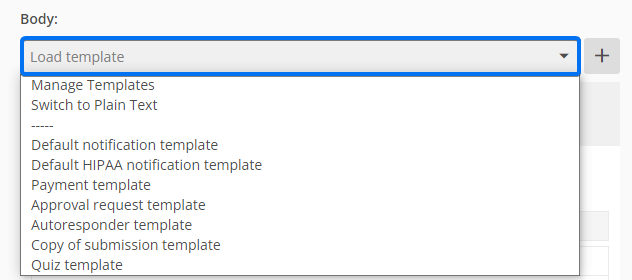
Depending on your needs, there are seven default templates that can be customized in our form builder:
- Default notification template
- Default HIPAA notification template
- Payment template
- Approval request template
- Autoresponder template
- Copy of submission template
- Quiz template
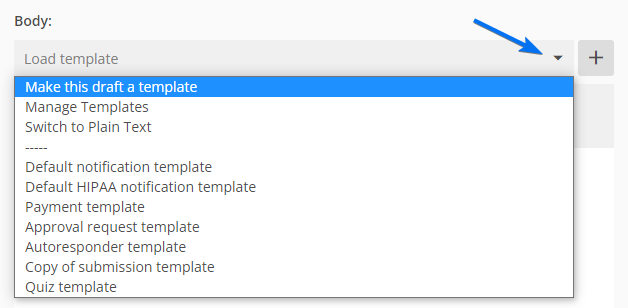
Click where it says Load template and choose the template you want to use.
Customize the template and once you are done and satisfied with the result, click again on Load template. From the list, select Make this draft a template.
A pop-up window will appear where you can name your new template. Hit save and the custom template will appear in your template list.
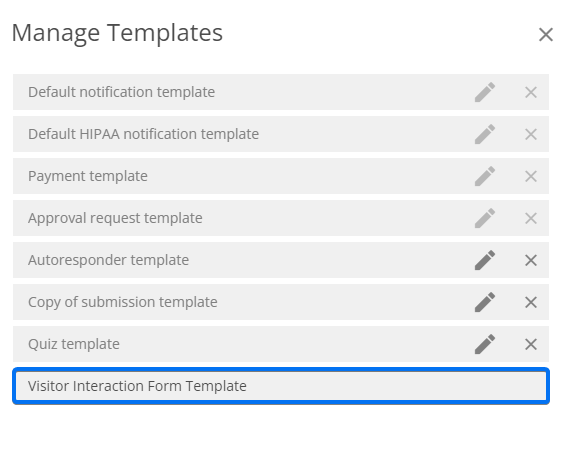
In order to delete or rename a template, head back to the Body dropdown list and select Manage Templates.
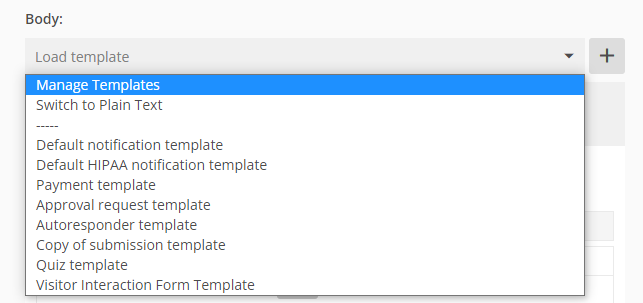
The templates are saved within your account and can be enabled on any form.
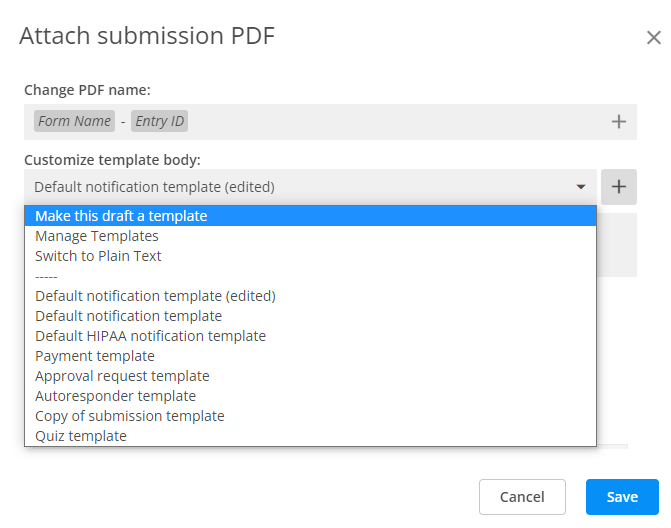
PDF templates can also be saved as drafts and used on other forms.
Yes, you can delay emails. In the form builder, choose your form and go to the Emails section of your form. There, you will notice that you have the option When.

By default, it’s set on Form is submitted, meaning the email will be sent right after your respondents hit the Submit button.
Select Form is submitted + Delay if you want to take into consideration when your respondents hit the Submit button and an additional delay or Payment is processed + Delay if you want to set a delay for the email to be sent after the payment is processed.
You can delay emails on your form by minutes, hours, days, weeks, and months. Once you have selected one of these options, a box will be displayed on the left where you’ll need to add an input. For example, if you have selected the option Minutes and added the input 5, the email will be sent 5 minutes after the form has been submitted.

In this article, you will learn how to create minimalistic input fields using our form builder. Start improving your form’s design by incorporating CSS codes into your forms to enhance the user experience.
CSS allows you to match the design of your forms with your webpage theme. If you aim for a minimalist design, this simple and easy CSS trick will achieve that using our CSS form generator.
With this CSS code, the input fields will have only the bottom line.
To get started, from the Form Editor go to the Design section. Next, click on the Add custom CSS button.
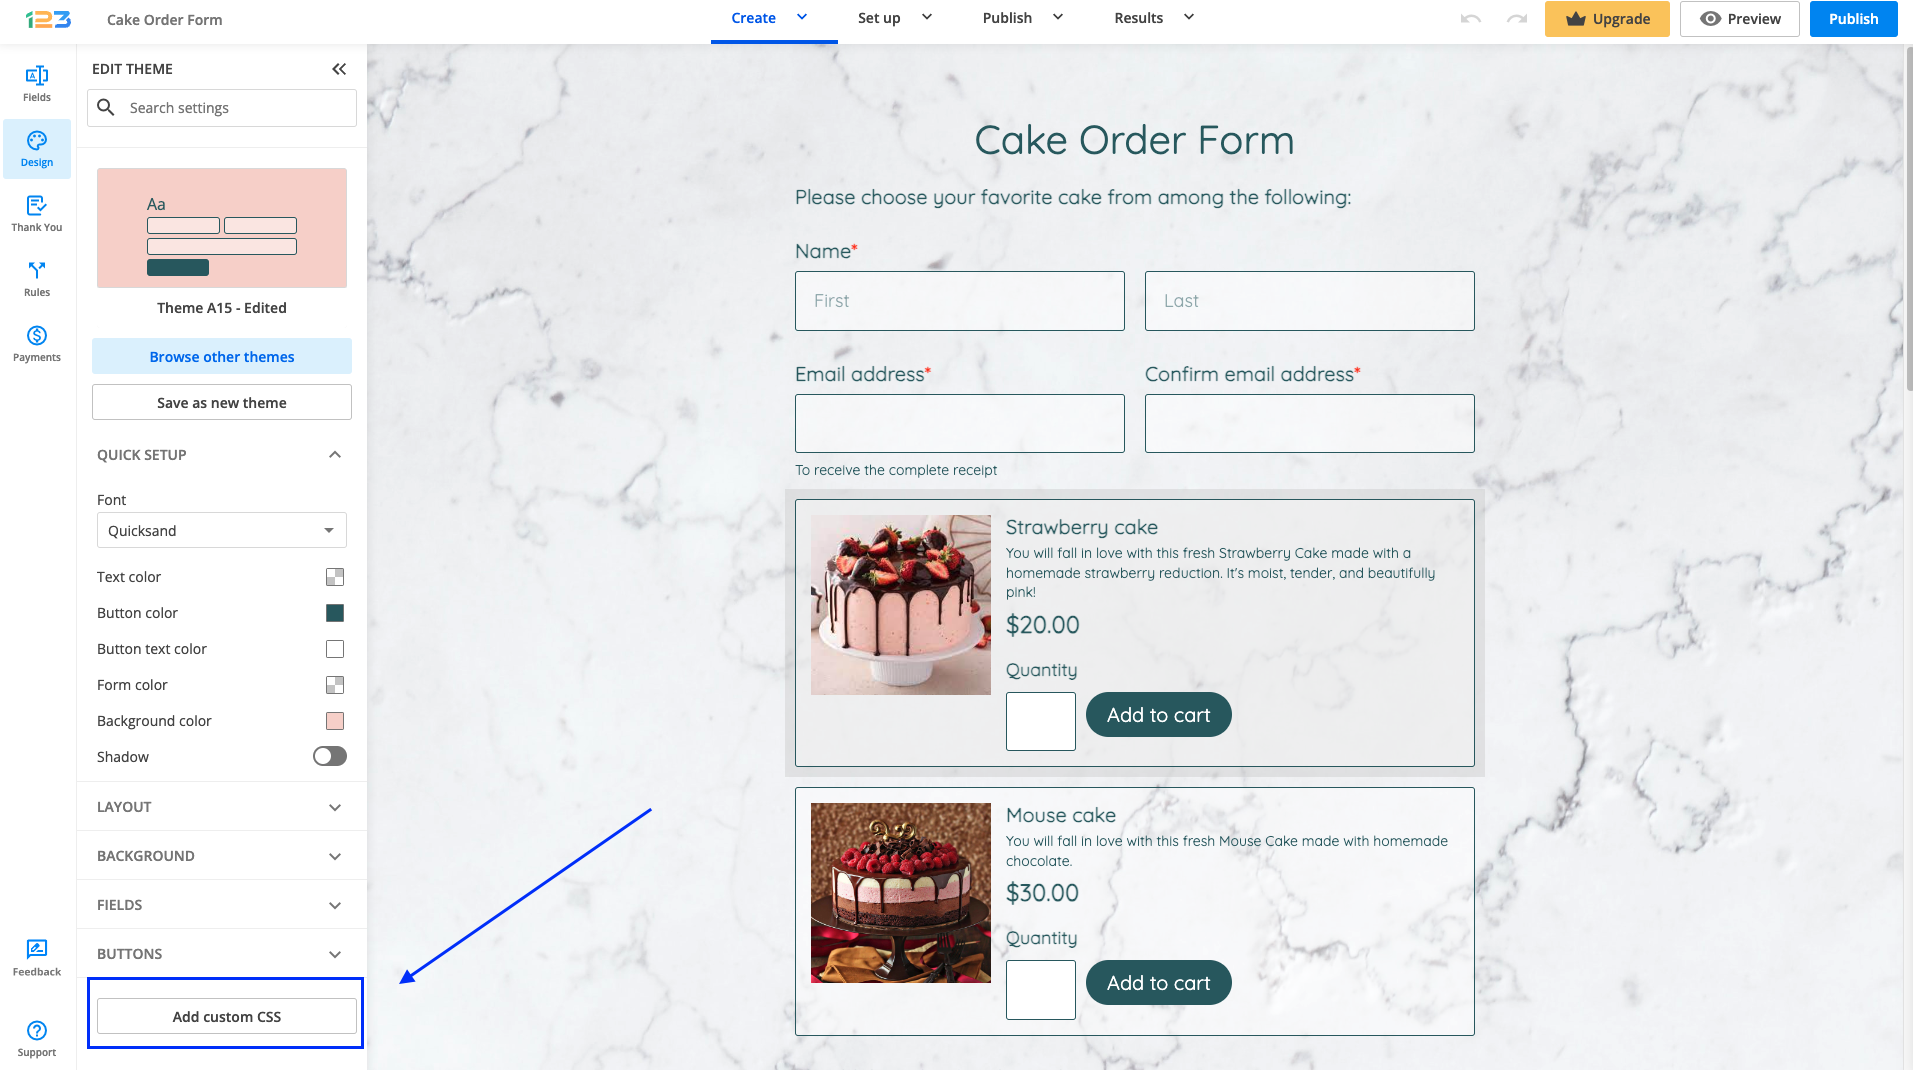
Here you will be placing the following CSS code:
#form div[data-role="control"] input[data-role="i123-input"]:not([type=radio]):not([type=checkbox]):not([type=reset]):not([type=hidden]):not([data-no-theme]), #form div[data-role="control"] select[data-role="i123-input"], #form div[data-role="control"] textarea[data-role="i123-input"], #form div[data-role="control"] div[data-role="i123-input"]:not([data-type="file"]), #form div[data-role="control"] div[data-role="i123-input"][data-type="file"] > div[data-role="upload-overlay"], #form div[data-role="control"] div[data-role="i123-input"][data-type="file"] > div[data-role="abort-all-uploads"], #form div[data-role="control"][data-type="check-box"] input[data-role="other"], #form div[data-role="control"][data-type="radio"] input[data-role="other"], #form div[data-role="control"] div[data-role="price-container"], #form div[data-role="control"] div[data-role="price-container"] > input, #form div[data-role="control"] div[data-role="input-container"], #form div[data-role="control"] div[data-role="input-container"] > input
{
     border-width: 0px 0px 1px 0px!important;
}
This will change the input box’s layout to all your fields.
That’s it! Here is the final result:

Most Popular
Frequently Asked Questions
Here is a list of the most frequently asked questions. For more FAQs, please browse through the FAQs page.