123FormBuilder Knowledge Base
Search our documentation platform for answers, service specifications and 3rd-party integrations.
Knowledge Base
You may use the 123FormBuilder – Big Contacts integration to create new contacts in your Big Contacts account upon form submissions. Follow our step-by-step guide below to learn how you can integrate your online forms with the Big Contacts application.
To enable the 123FormBuilder – Big Contacts integration on your web form, go to the Integrations section and hover your mouse over the Big Contacts logo. This will bring up the Add button that you will need to push for the Big Contacts application box to drop below.
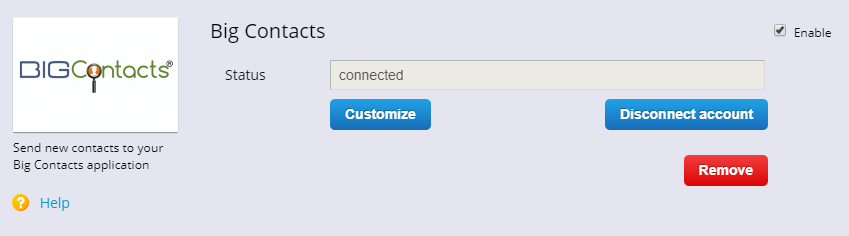
Make sure you are logged in to your Big Contacts account in the same browser before enabling this integration on your online form. Click on the Connect button and press Allow to return to the settings of the 123FormBuilder – Big Contacts integration.
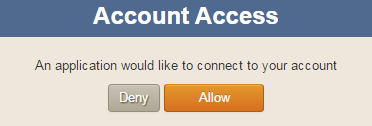
In the customization lightbox of the 123FormBuilder – Big Contacts integration, follow these steps:
1. Use the Assign to dropdown to select the Big Contacts user (if your Big Contacts account has more than one).
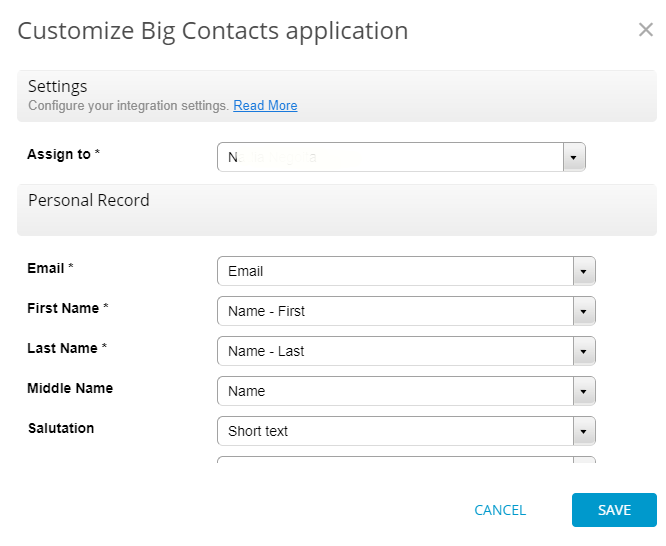
2. Map the fields Email, First Name, and Last Name with your form fields that are displayed in the dropdown to the right. Set those fields as required on your form, otherwise, the integration will fail if the form visitors leave them blank.
3. The fields that follow are optional, so feel free to map them only if you require them. You can map fields for the following records: Personal Record, Business Record, Spouse, and Family.
4. Use the Error Handling section to type in the email address that will receive an error. If a form visitor encounters connectivity problems while submitting the form, the integration could fail and you will be notified by email. By default, the email address associated with the 123FormBuilder account is displayed in this section.
Now that all the steps have been followed, hit Save and you are done. From now on, all form submissions will create a new contact in your Big Contacts account.
To add Google Analytics conversion tracking on the Thank You page of your online form, follow the steps below:
1. Follow our step-by-step guide on how to track form activity with Google Analytics. Ensure that you enable this option for the tracking process to work.
2. Create a JavaScript file that contains your Global Site tracking code from your Google Analytics account.
The Global Site Tag tracking code is located in the Admin area. Select the account under the Account dropdown and choose the Property you want to get the tracking code for.
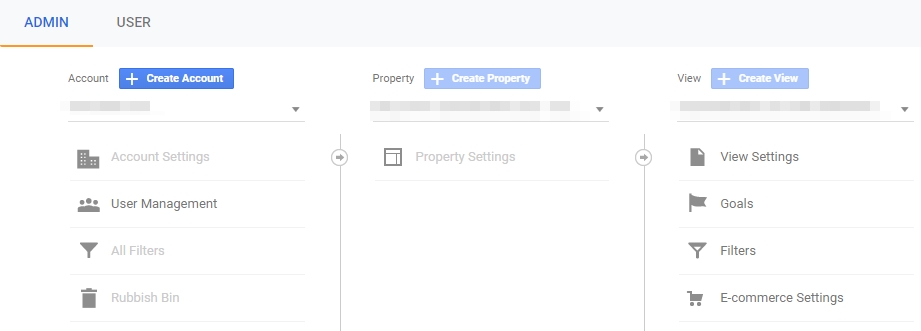
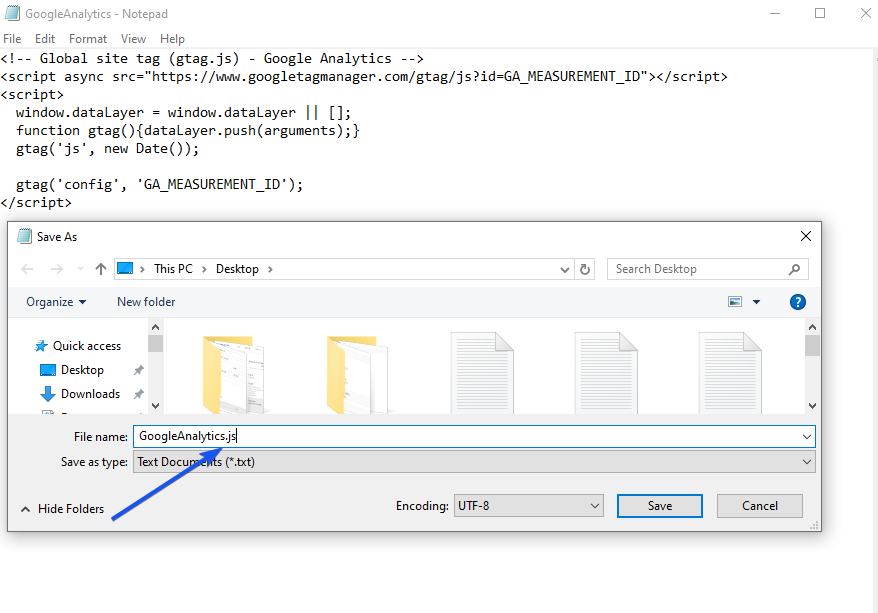
3. Select Tracking Code and copy the Global Site Tag script and paste it in a text editor, such as Notepad.
![]()
![]()
4. Save the file with the extension .js
5. Load the file on a server from the Web. You will need it’s URL in the next step. The script URL needs to be hosted online and public. Choose a secured and trusted hosting service.
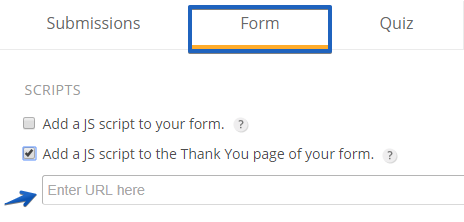
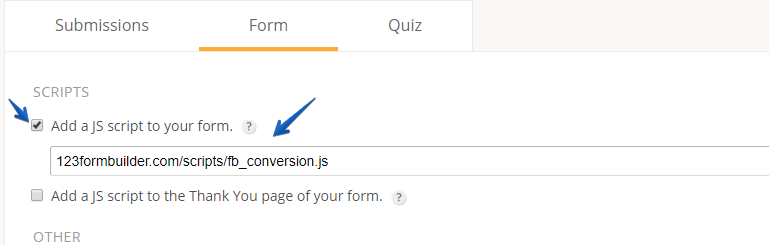
6. Go to the Advanced section of your form, check the box Add a JS script to the Thank You page of your form, and paste the URL of the JavaScript file (.js) where your Google Analytics conversion tracking code is saved.
7. In the Thank You page section, make sure to select one of these options: Show text OR Show text,
You can use social login to sign up and sign in to your 123FormBuilder account with your Google, Facebook, or Microsoft open ID.
The way to associate an open ID to your 123FormBuilder account is described in our documentation here, but there are some things you should know if you choose to sign up to our service through your Google, Facebook, or Microsoft open ID, as follows:
- If you sign up through an open ID (Google, Facebook, or Microsoft), you will be automatically redirected to your newly created 123FormBuilder account, but only if you are logged in to the respective social network account (in the same browser). If not, you will be first requested to add the credentials of your social network account. Only then will the 123FormBuilder account be created with your email address as the username.
- If you sign up with an open ID whose email address is already associated with a 123FormBuilder account, you’ll be signed in to that account instead of signing up to a new account.
- Google. If you sign up with your Google open ID, the username of your 123FormBuilder account will be your Gmail address and the password will be sent to you by email.
- Facebook. If you sign up with your Facebook ID, your username will be the email address associated with your Facebook account (e.g. john@email.com). The password will be sent to you by email.
123FormBuilder provides a dedicated app for Wix users, making it easier for them to manage their online forms directly through their Wix website. We also have a special subscription, the Wix Starter plan, which comes with certain restrictions.
If you have a 123FormBuilder free account on your Wix website and you choose to upgrade the website to a premium plan, the 123FormBuilder account will be upgraded to the Wix Starter plan.
You can also purchase the Wix Starter plan directly from our app.
The main restriction of the Wix Starter plan is that it can be used only on Wix, and on a single Wix website. If you log into your 123FormBuilder account on our platform or another Wix website, your account will be downgraded to the Basic free plan. However, your Wix Starter subscription will remain active. The subscription can be canceled/downgraded as explained in this article.
Therefore, always make sure which 123FormBuilder account you are using on the Wix website that you are working on. If your account is downgraded, you can reinstate your subscription by returning to the Wix website for which you have purchased it.
To use the same 123FormBuilder account on multiple Wix websites you will need one of our native paid plans. Check out our features list for more details.
Reports can be duplicated with all their content and data. To duplicate a report, go to the Reports section and follow the steps below:
1. Press the New Report button, located on the top left side of the Reports section. Wait for a lightbox to pop up on screen.

2. In the lightbox, click on the Duplicate Report tab, located on top.
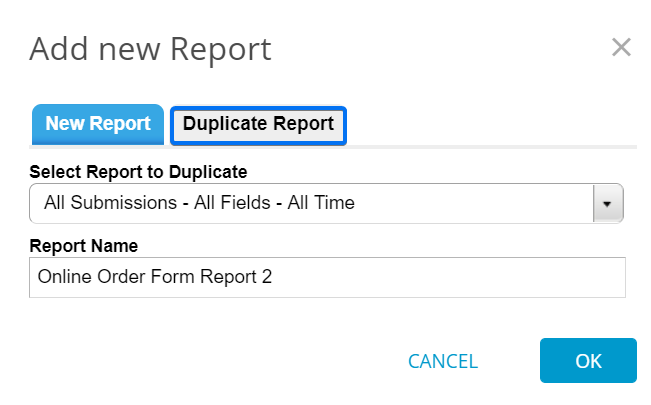
3. Next, click on the drop down and select the report you want to duplicate. All reports can be duplicated, the default one included.
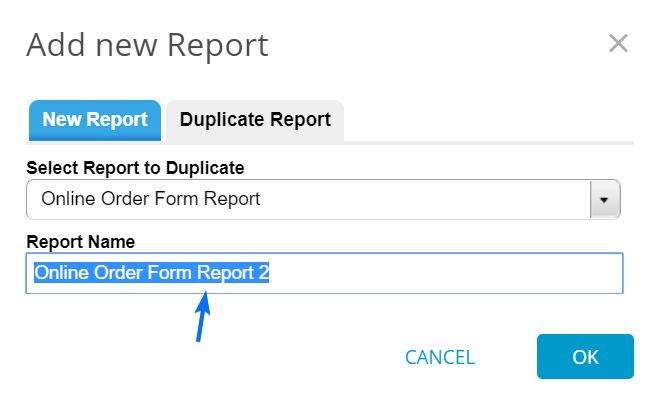
4. Type in a name for the duplicated report, in the text box displayed below.
5. Press Ok and you should see the duplicated report displayed on screen. Click Finished on the top-right side and you are done.

Yes, you can add the option to charge your form users only when their submissions have been approved. What is it good for? Well, let’s imagine a training program that has a preselection phase. Candidates will fill out a registration form that will be sent for approval. If the submission is approved, the submitter will receive an email with a link that leads to the payment of the event.
To achieve this setup, follow the steps below within the form builder:
1. In the Form Editor, make sure the Email field is required, so the submitter will not leave it blank.
2. Afterward, go to the Approvals section, click on New Approver and type in the email address of the person who will review each submission.
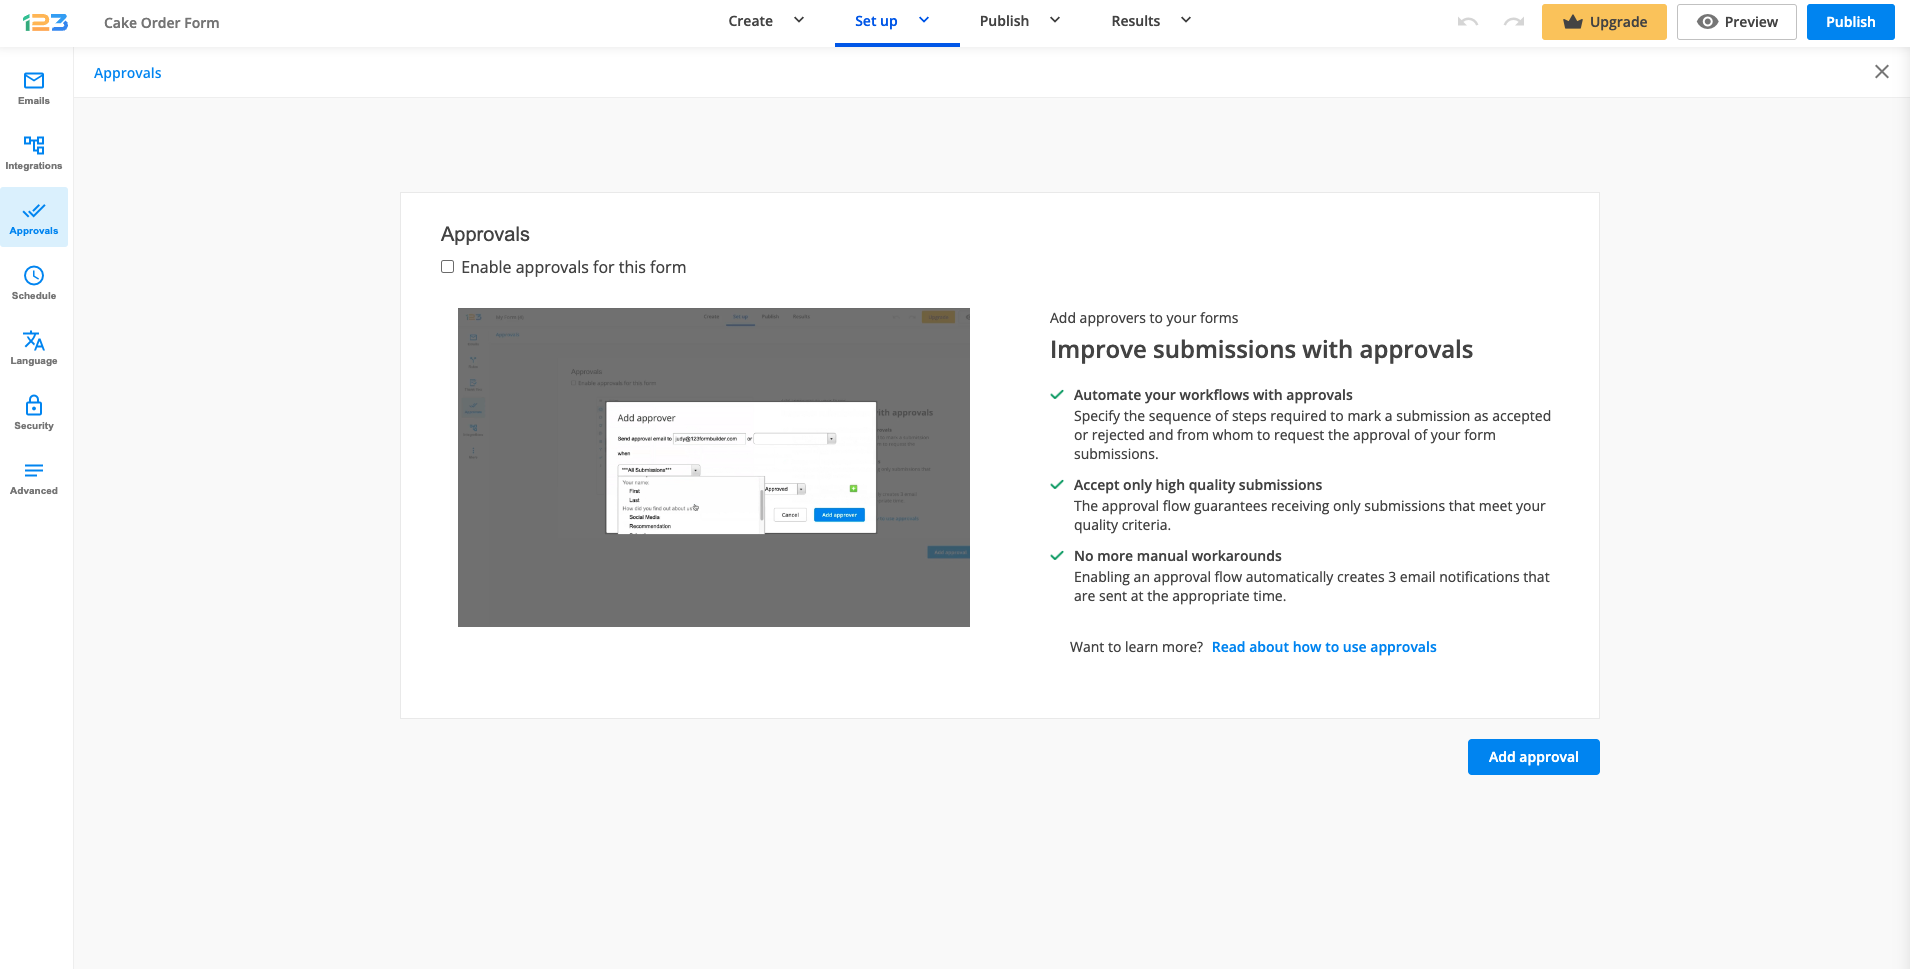
3. There are two options available in this step: to email the approver when all submissions are sent or to establish some branching rules. For more details, check out our Approvals article.
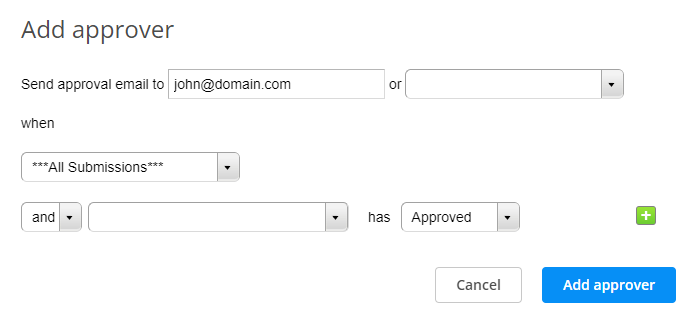
4. After adding your approver, don’t forget to Enable approvals for this form. This will automatically create 3 new email templates.
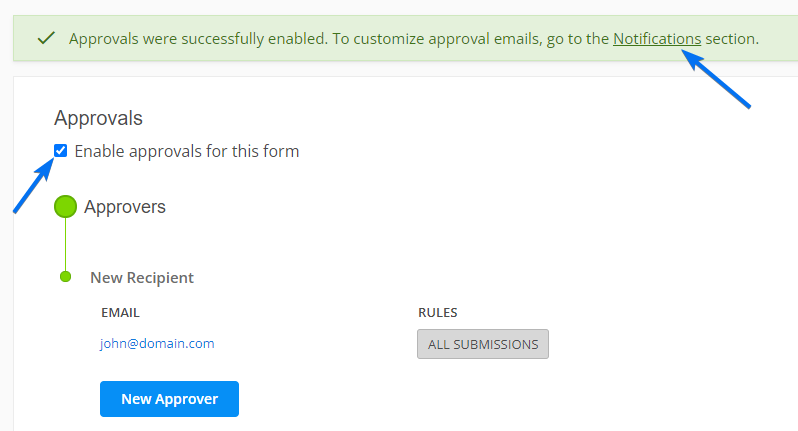
5. Next, go to the Emails section to customize the approval emails. You can edit each approval email to your liking, but in this case, we will focus on the Submission was approved template.
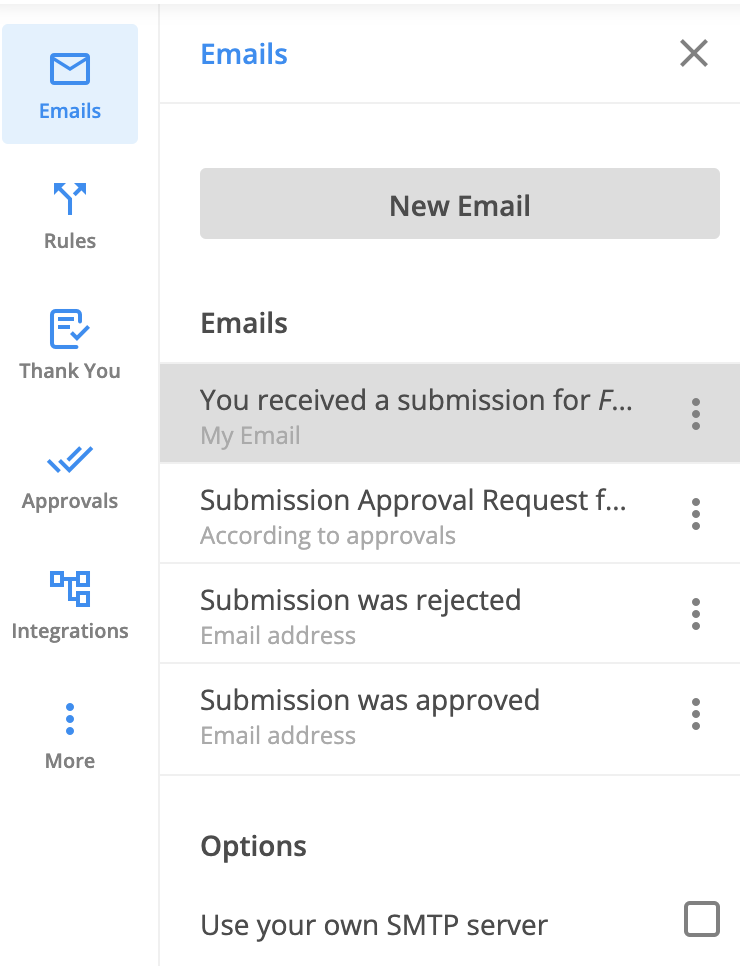
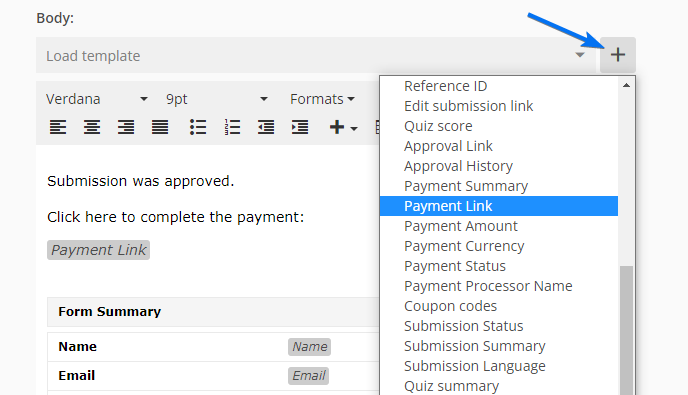
6. After selecting the template from the left-side panel, click on the plus sign next to the Body dropdown and select the Payment Link variable from the list.
7. Save your email template and that’s it! Test your registration form in sandbox to see how it works.
Each approved submission will trigger an email with the link that redirects the submitter to the payment page.
These steps may be followed whenever you encounter other NationBuilder errors (such as 400, 402 or 403).
If your 123FormBuilder – NationBuilder integration returned a 401 error code with the message: You are not authorized to access this content. Your access token may be missing. The resource owner also may not have a permission level sufficient to grant access, here’s how you can fix it:
1. In your NationBuilder account, go to Settings → Apps. Afterward, look for the 123FormBuilder application and click Uninstall.

2. Next, return to your 123FormBuilder account and disconnect the NationBuilder application from your online form (My Forms → Your Form → Edit form → Integrations).
3. Once the app has been disconnected from your form, connect it again to restart the integration. This will solve the problem so that you will no longer receive the 401 error code and the integration will work properly.
If you want to add Facebook conversion tracking to your online form, but couldn’t figure out how to do this, simply follow our guide.
You have two options of tracking:
- the form’s submissions ( the script is added on the Thank You Page)
- the form’s activity ( the script is added on the form)
Track Form Submissions
1. Generate your pixel code in your Events Manager on Facebook.
2. Go to Facebook Pixel in Events Manager, select to install Pixel, and copy the entire pixel code from point number 2.
![]()
![]()
3. Paste it in a text editor like Notepad.
4. As you can see the base code of the script has HTML Tags.
![]()
![]()
5. In order to incorporate those HTML elements on our side, please go to Settings – Thank you Page – Show HTML Block. Add the highlighted text, as in the above image, in the source code of the HTML block option (the <> button on the top right side of the editor):
![]()
![]()
Now you have added the HTML. Next, let’s see how to add the actual script.
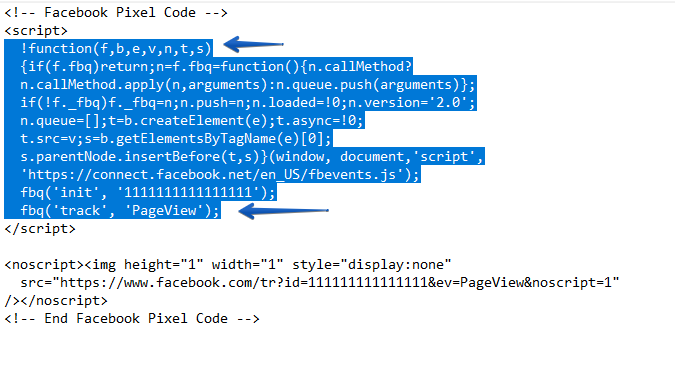
6. Copy the script part in another Notepad, without the comment line and the HTML tags.
So the code should start with:
!function(f,b,e,v,n,t,s)
And end with:
fbq('track', 'PageView');
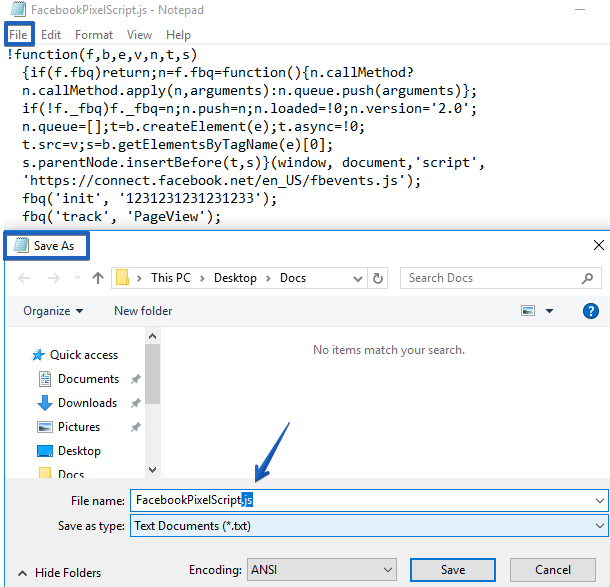
7. Save the Notepad document with the extension ‘.js‘.
8. Upload the file (document) on a trusted web server (yours recommended).
9. In your 123FormBuilder account, go to My Forms, select your form and go to the Settings – Advanced section.
10. Enable the option Add a JS script to the Thank You page of your form and paste the URL where your .js file is located.
Track Form Activity
The steps are the same as explained above. Two steps are different. The HTML and the script’s placement will change. Since we are tracking the form’s activity, both will be added directly to the form.
Therefore, at point number 5, incorporate the HTML elements from Facebook pixel into a HTML block field or the Form Header.
At point number 10, enable the option Add a JS script to your form and paste the URL where your .js file is located.
If the steps have been followed correctly, your online form should be already tracked on Facebook.
When using our HTML form generator, you can add electronic signature fields to your forms. The signature field is delimited by a box-shaped canvas.
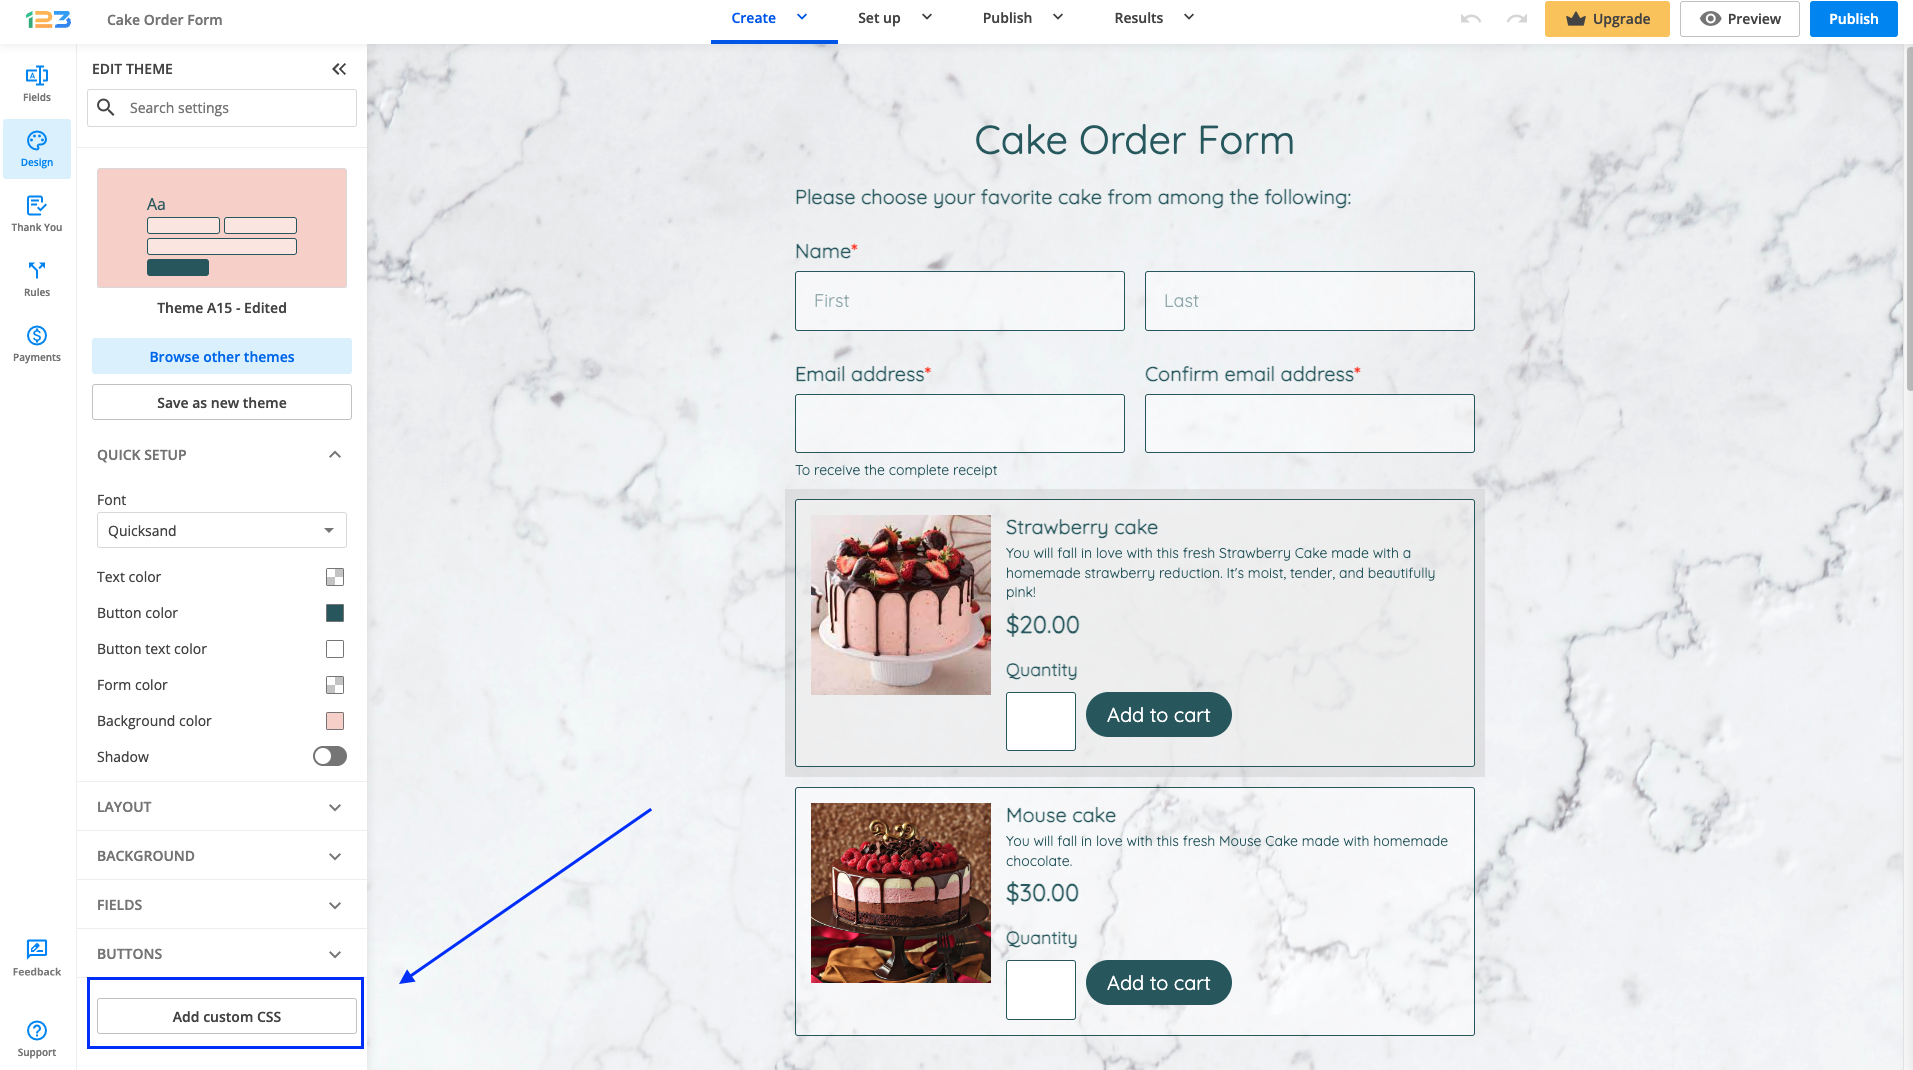
To customize the digital signature box on your form, you’ll need to use Inspect Element in your browser to locate its ID. By applying custom CSS codes to the field you can customize its appearance using our CSS form generator. Add your own CSS code in the forms Design → Add custom CSS section to override the default styles of our theme.
How to locate the ID
You’ll need to open the form in view mode and right-click the digital signature box. Next, hit Inspect element. This will open the browser’s console.
The below ID is the one that will change the design of all signature fields.
#form div[data-role=control][data-type=signature] div[data-role=signature-container]>canvas
How to add attributes
Paste the ID and continue by opening curly braces { }. Inside the curly braces place the CSS attributes, followed by a semicolon.
Here are a few examples that you can use to customize your Signature field.
1. Change the background color of the signature field.
#form div[data-role=control][data-type=signature] div[data-role=signature-container]>canvas
{
background-color:#bcd9f5;
}

2. Remove the Sign here placeholder and icon.
#form [data-type=signature] [data-role=signature-container] .signature__placeholder-container
{
display: none!important;
}

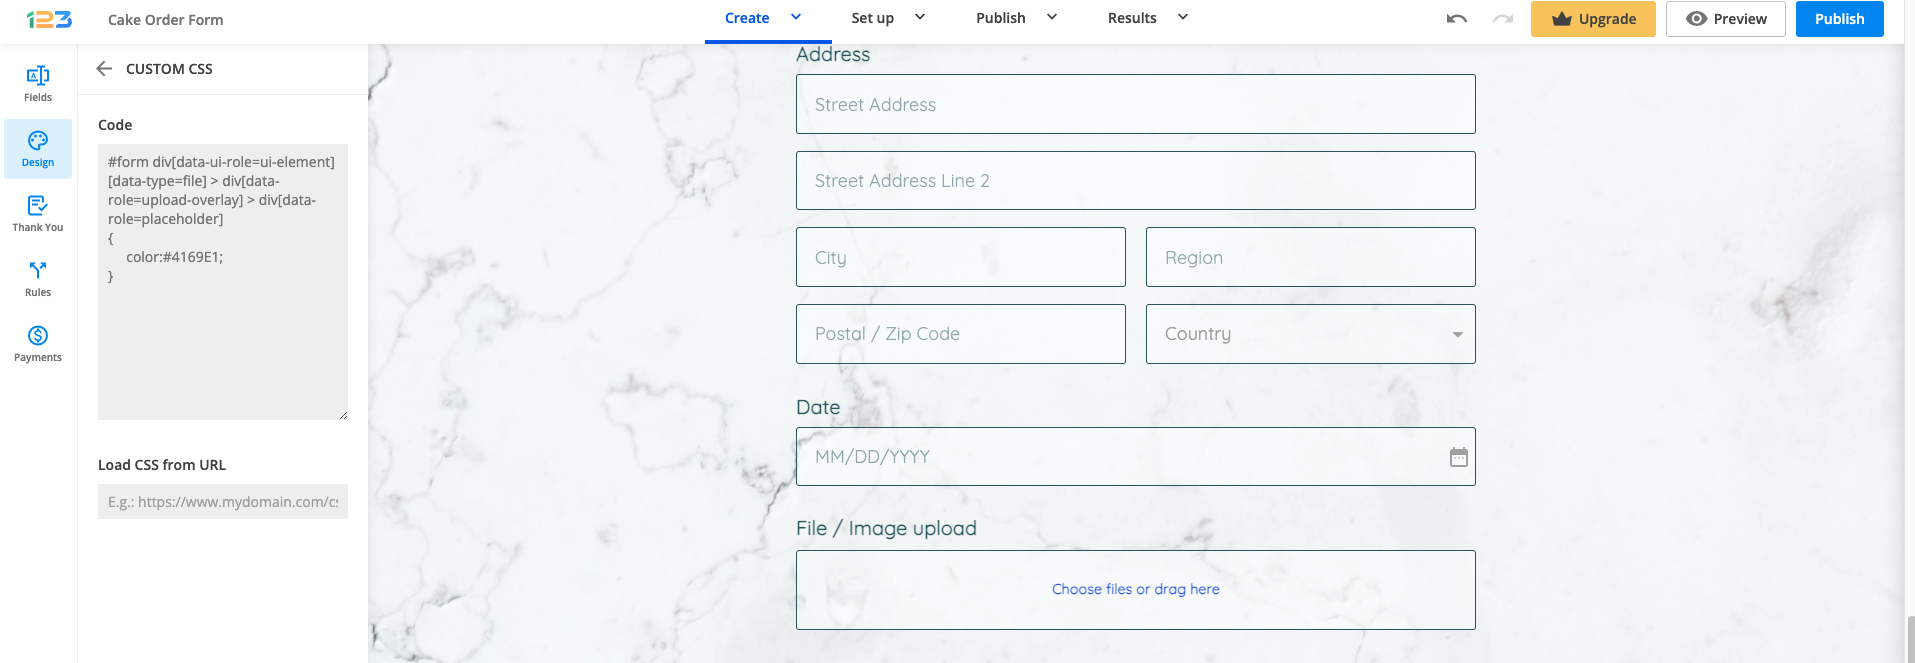
To style file upload buttons on your online form, access the Form Editor and go to the Design section. Afterward, click on Add custom CSS and paste this ID to style the file upload default text:
#form div[data-ui-role=ui-element][data-type=file] > div[data-role=upload-overlay] > div[data-role=placeholder]

Below are some examples:
1. To change the color of the Choose files or drag here text:
#form div[data-ui-role=ui-element][data-type=file] > div[data-role=upload-overlay] > div[data-role=placeholder]
{
     color:#4169E1;
}
Replace #4169E1 with the hex code corresponding to the color you want.
2. To change the file upload text with another image from an URL:
#form div[data-ui-role=ui-element][data-type=file] > div[data-role=upload-overlay] > div[data-role=placeholder]
{
      content: url('//mydomain.com/upload.png');
}
Replace //mydomain.com/upload.png with the URL where your image is located.

If you have received the 409 error code, it means someone submitted the form with an email address that has already been registered in your nation’s contact list.
To solve this issue in the form builder, go to Integrations and hit Customize on the NationBuilder app. Next, tick the option Update information if the person already exists. This way, if an end-user submits an email address that has already been registered in your nation’s contact list, the respective contact will be updated and the error will not occur again.

123FormBuilder provides conditional logic functionality, allowing its users to change the behavior of their web forms based on the input provided by their respondents.
With conditional logic, you can make your online forms more dynamic. In the form creator, you can create complex and advanced rules to control how your online forms behave. There are three types of rules you can create:
- Field Rules
- Form Rules
- Email Rules
The first two types of rules (Field rules/Form rules) are located in the Rules section of your form, under separated tabs.
Email Rules are located in the Emails section. You can learn more on how to set up email rules here.
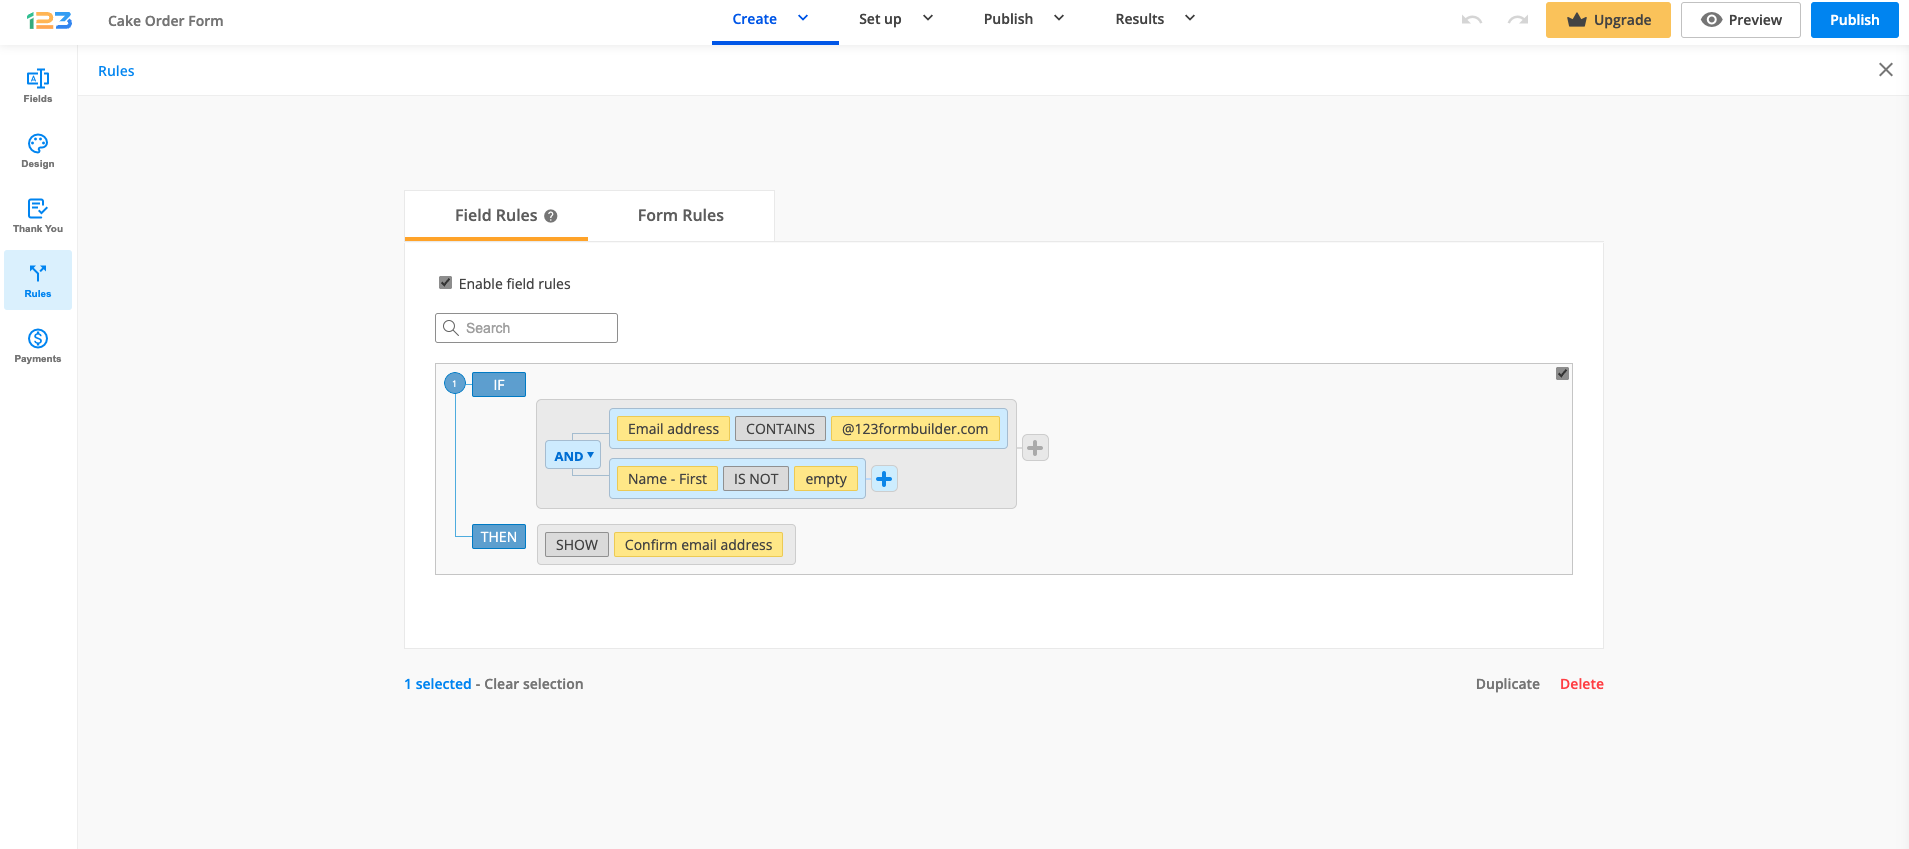
Field Rules
Field Rules affect the behavior of your online form while it is being used. Here you can show or hide certain fields based on the input given by your submitters. These types of rules are applied in real-time, while your respondents are filling in the online form.
Important Note
Separate rules that use the same field will not work on the form. After the condition Then you can’t show/hide the same fields in two separate rules. This is due to a conflict issue. We recommend you create advanced rules with several conditions and subrules in the same rule if needed.Form Rules
Form Rules redirect end-users to a certain web page that you have provided when some specific conditions are met. For example, you can use this option to redirect users to a different version of your website depending on the language they have selected on the form. Form rules are triggered after the form is submitted.
Important Note
If you have your form integrated with a payment processor, the form rule redirect has priority over the redirect to the payment page. You can use this as a workaround to make online payments optional.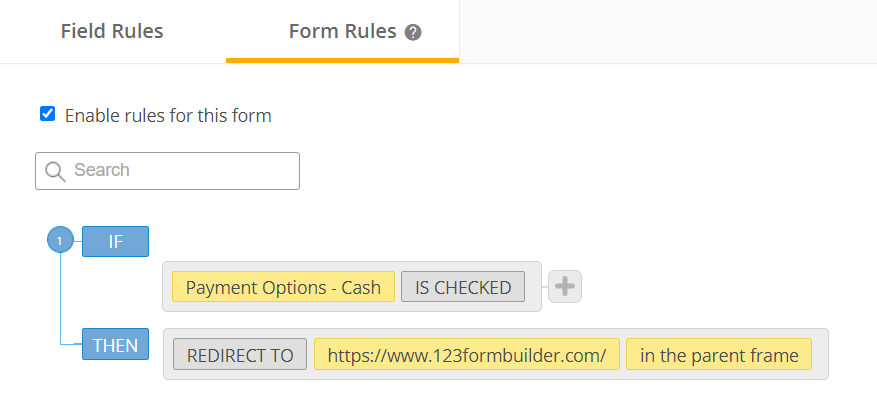
Email Rules
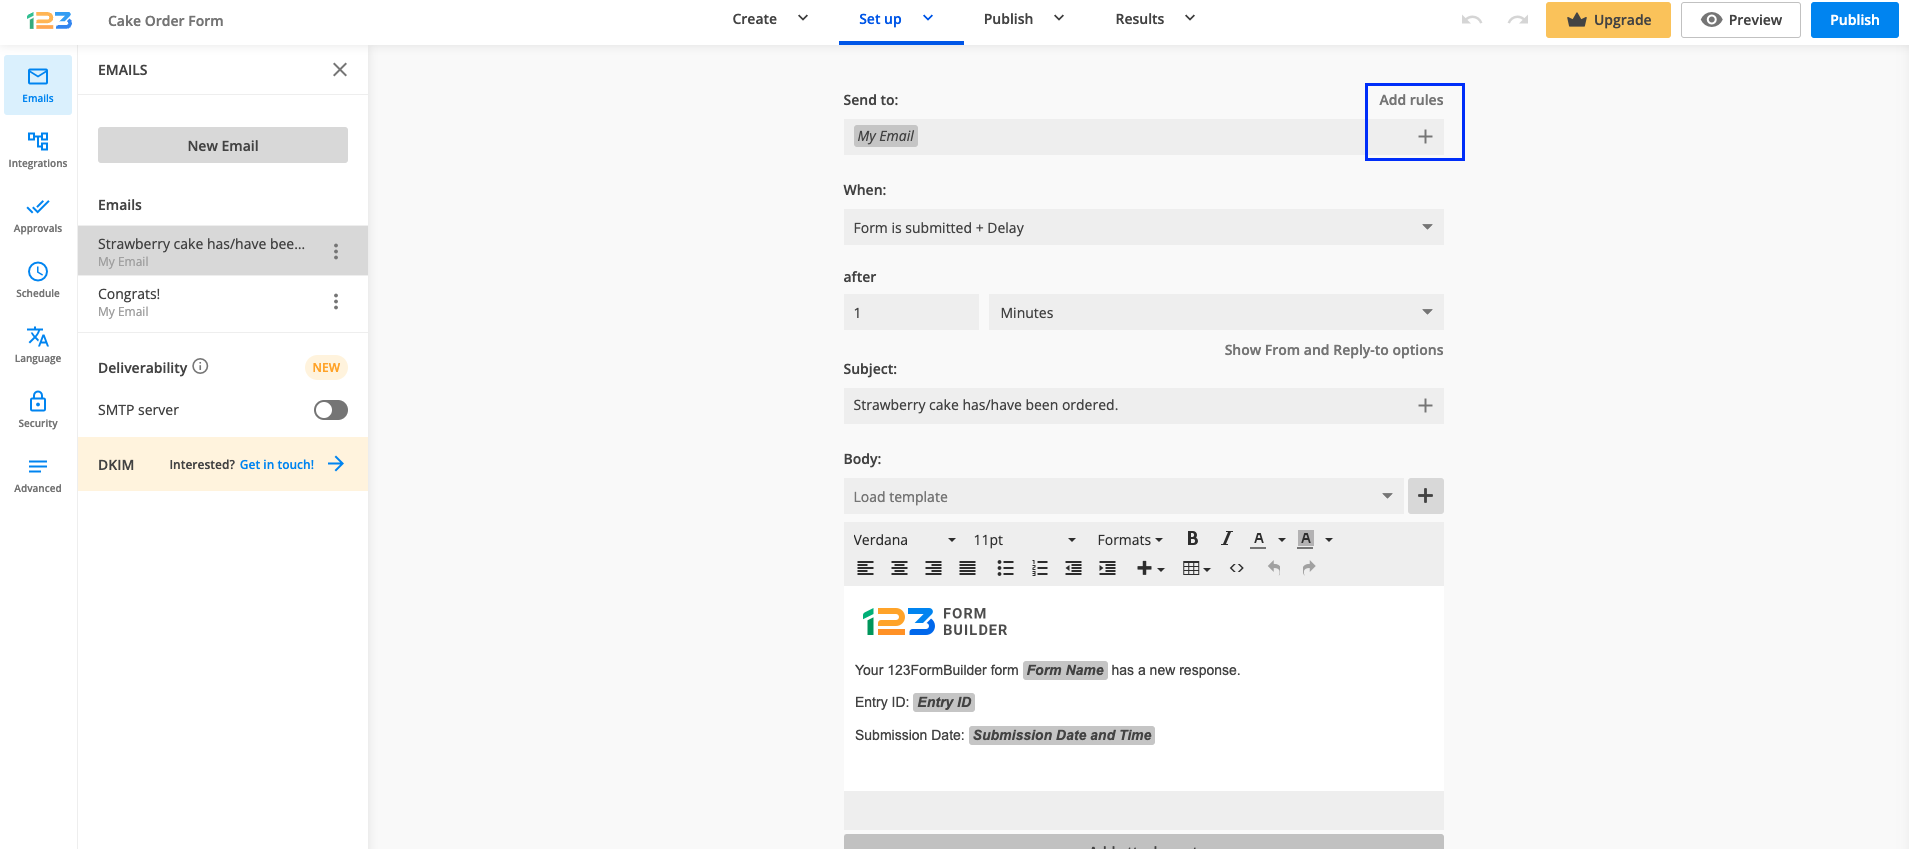
Email Rules can be added to each email notification. They will trigger the email to be sent to the specified recipients when one or more conditions are met. These types of rules apply after the end-user submits the form.
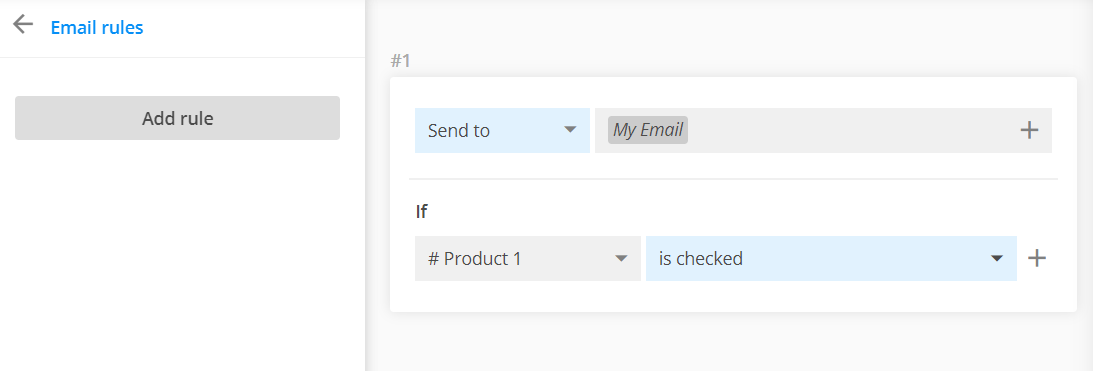
Besides form fields, you can also include the language field (if using translations) and the quiz score (for quiz forms) in any type of rule.
For more details on how to set up email notification rules, check out our step by step tutorial:
How to use Field Rules
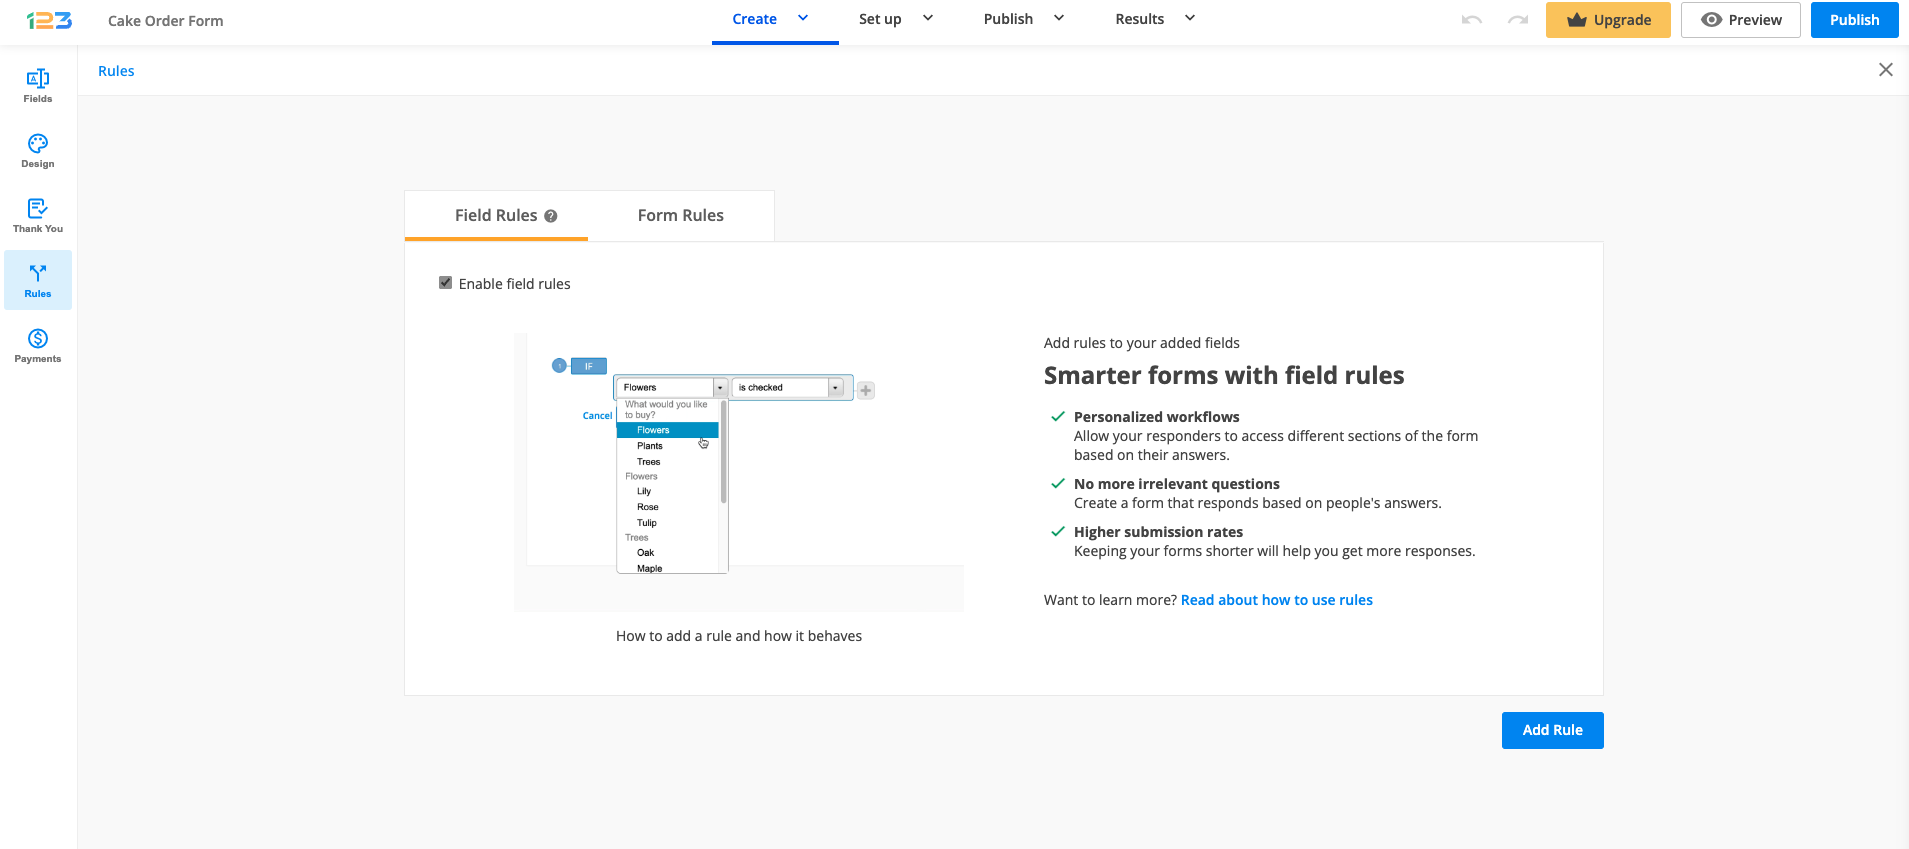
To create a field rule, you can first enable field rules and then click on the Add rule button. You can also first set up the field rules and then enable them if you want to. Just keep in mind that you have to tick Enable field rules if you want them to have an effect on your form.
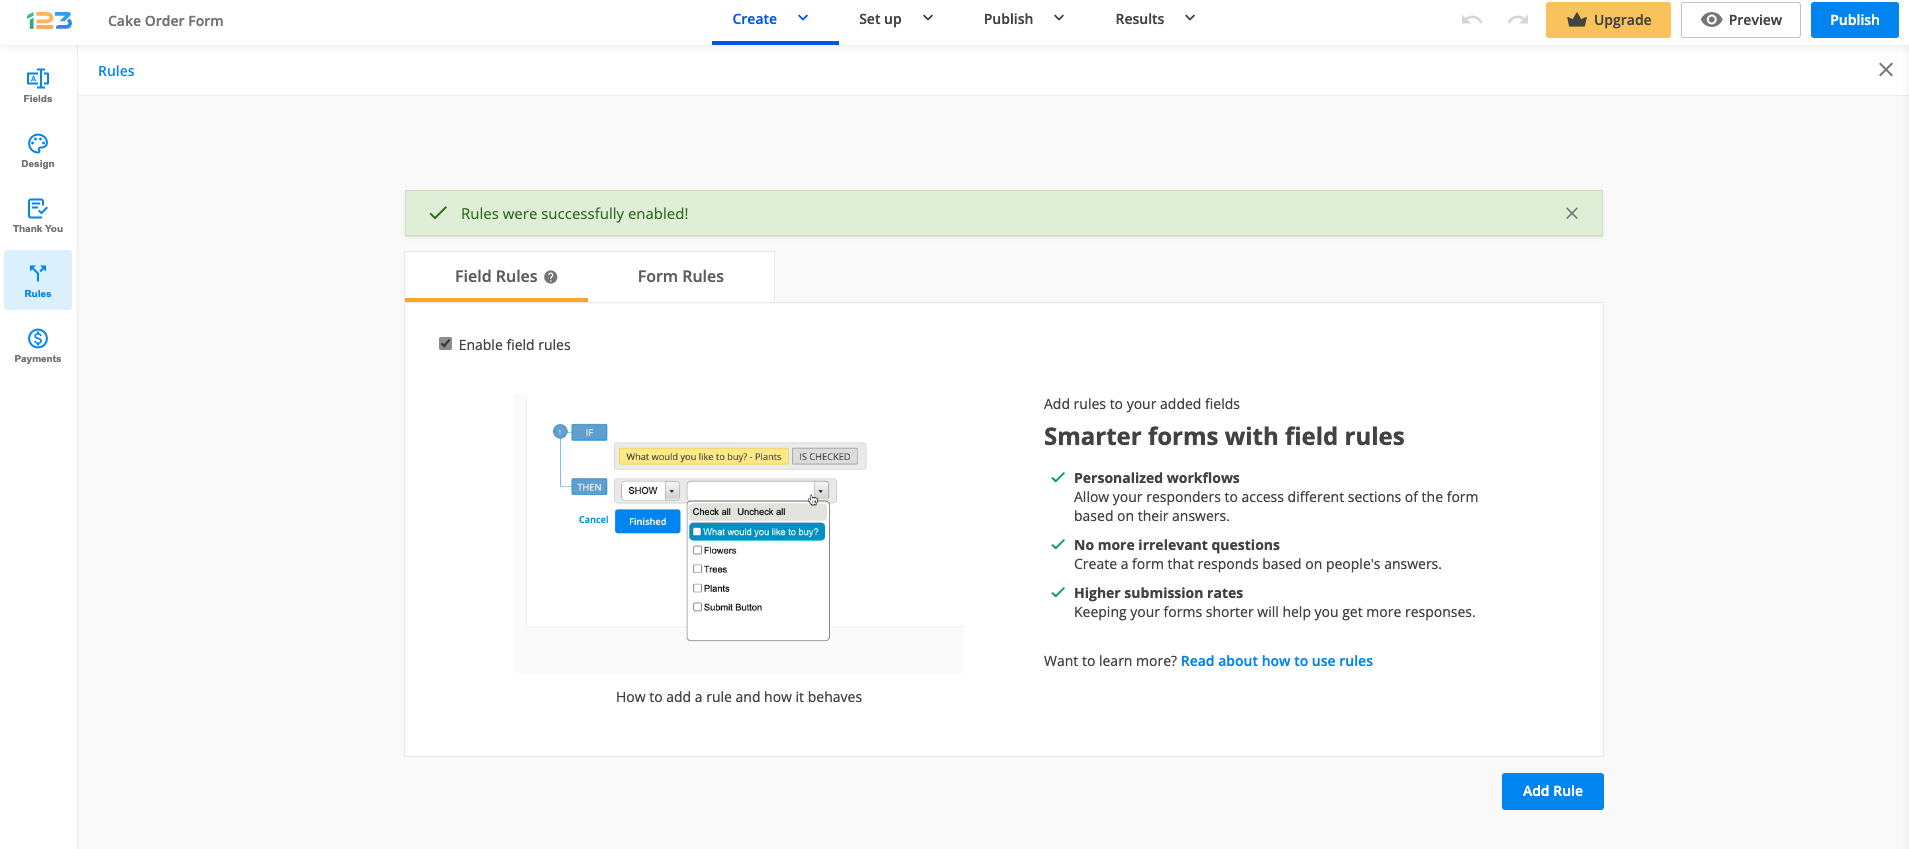
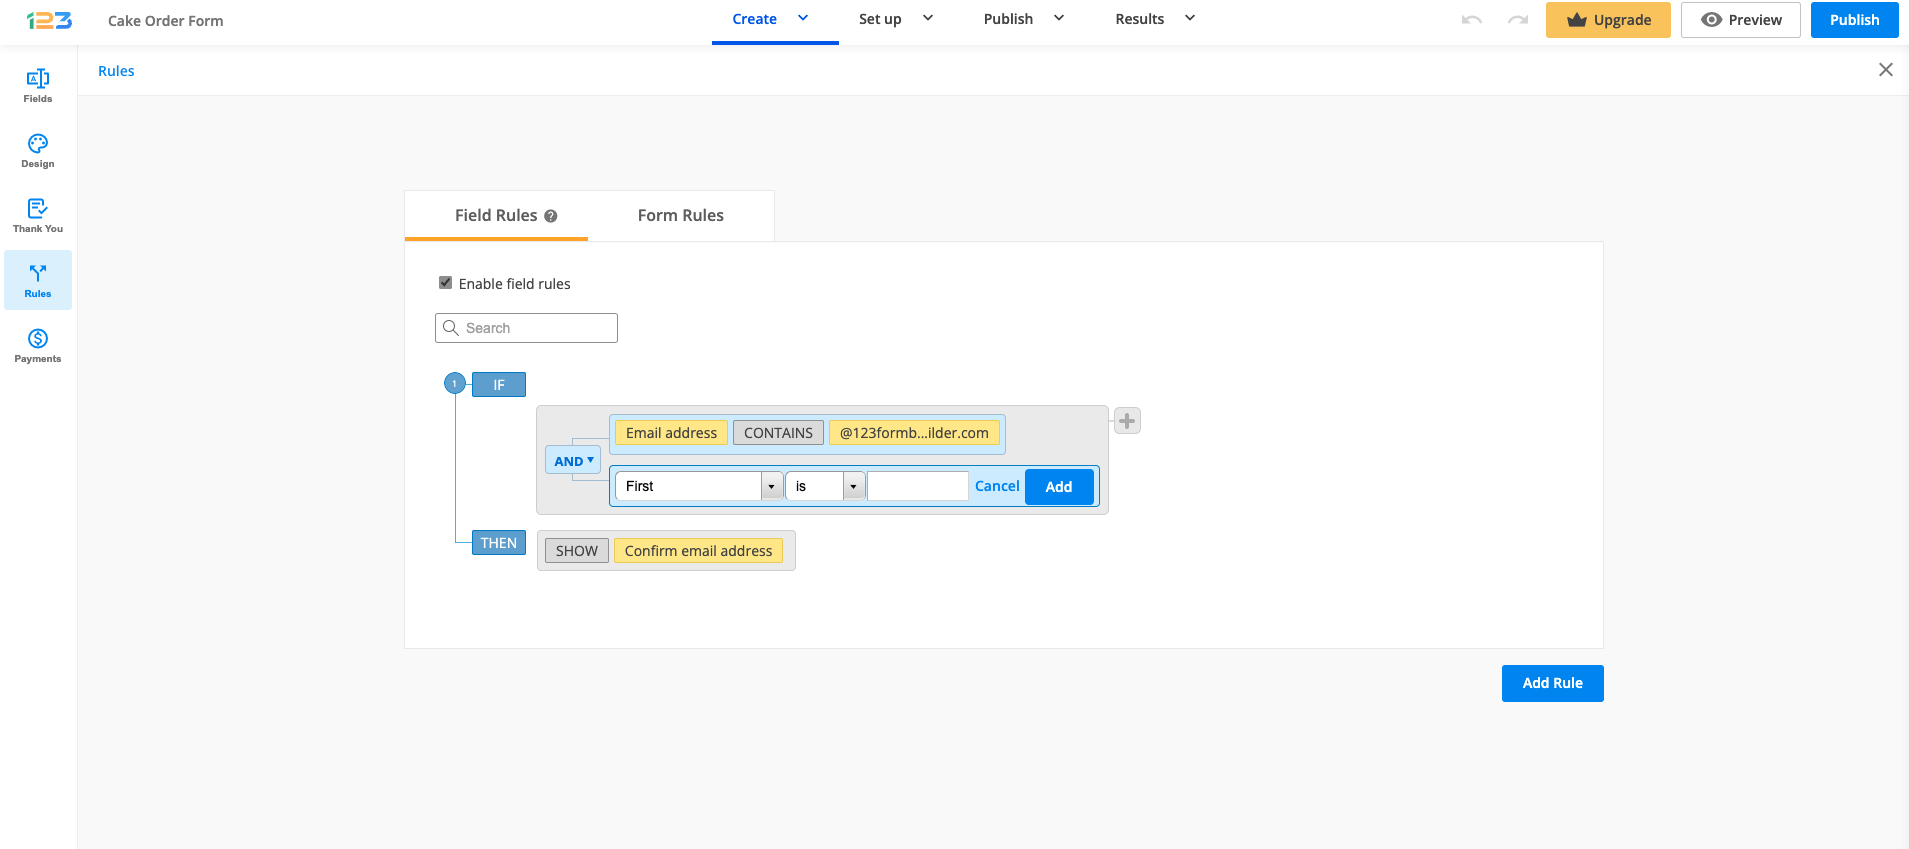
To create a rule, click on the Add Rule button. Use the first dropdown to select the field from the form and the last field to conclude the condition.
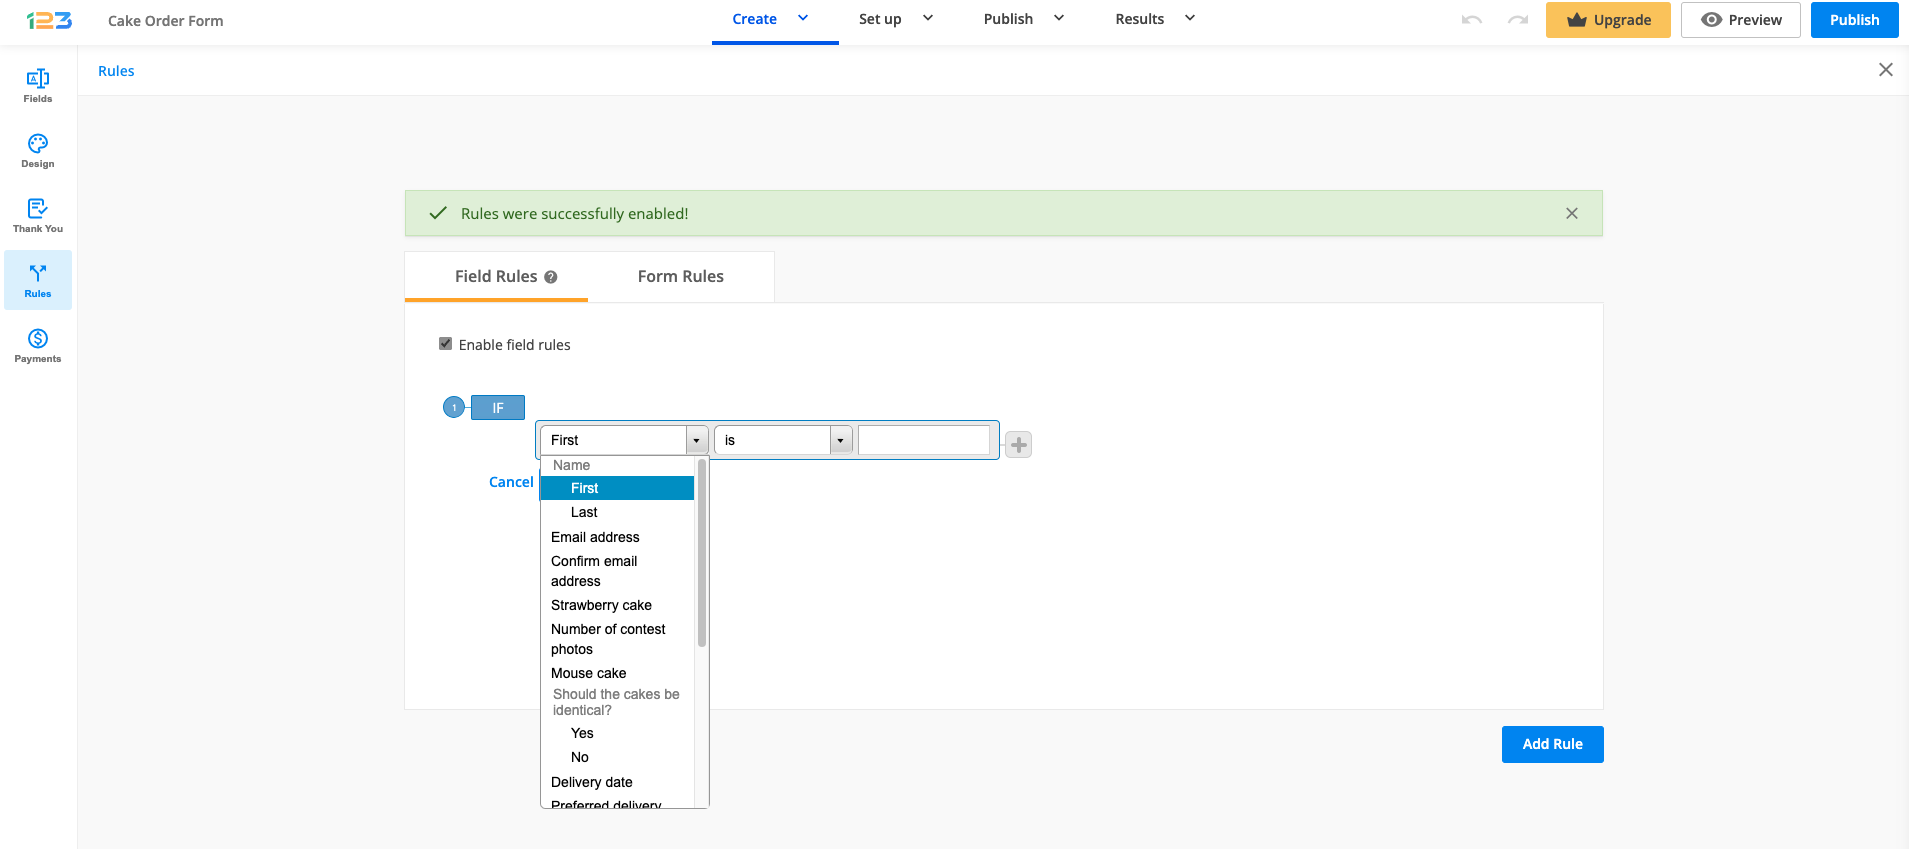
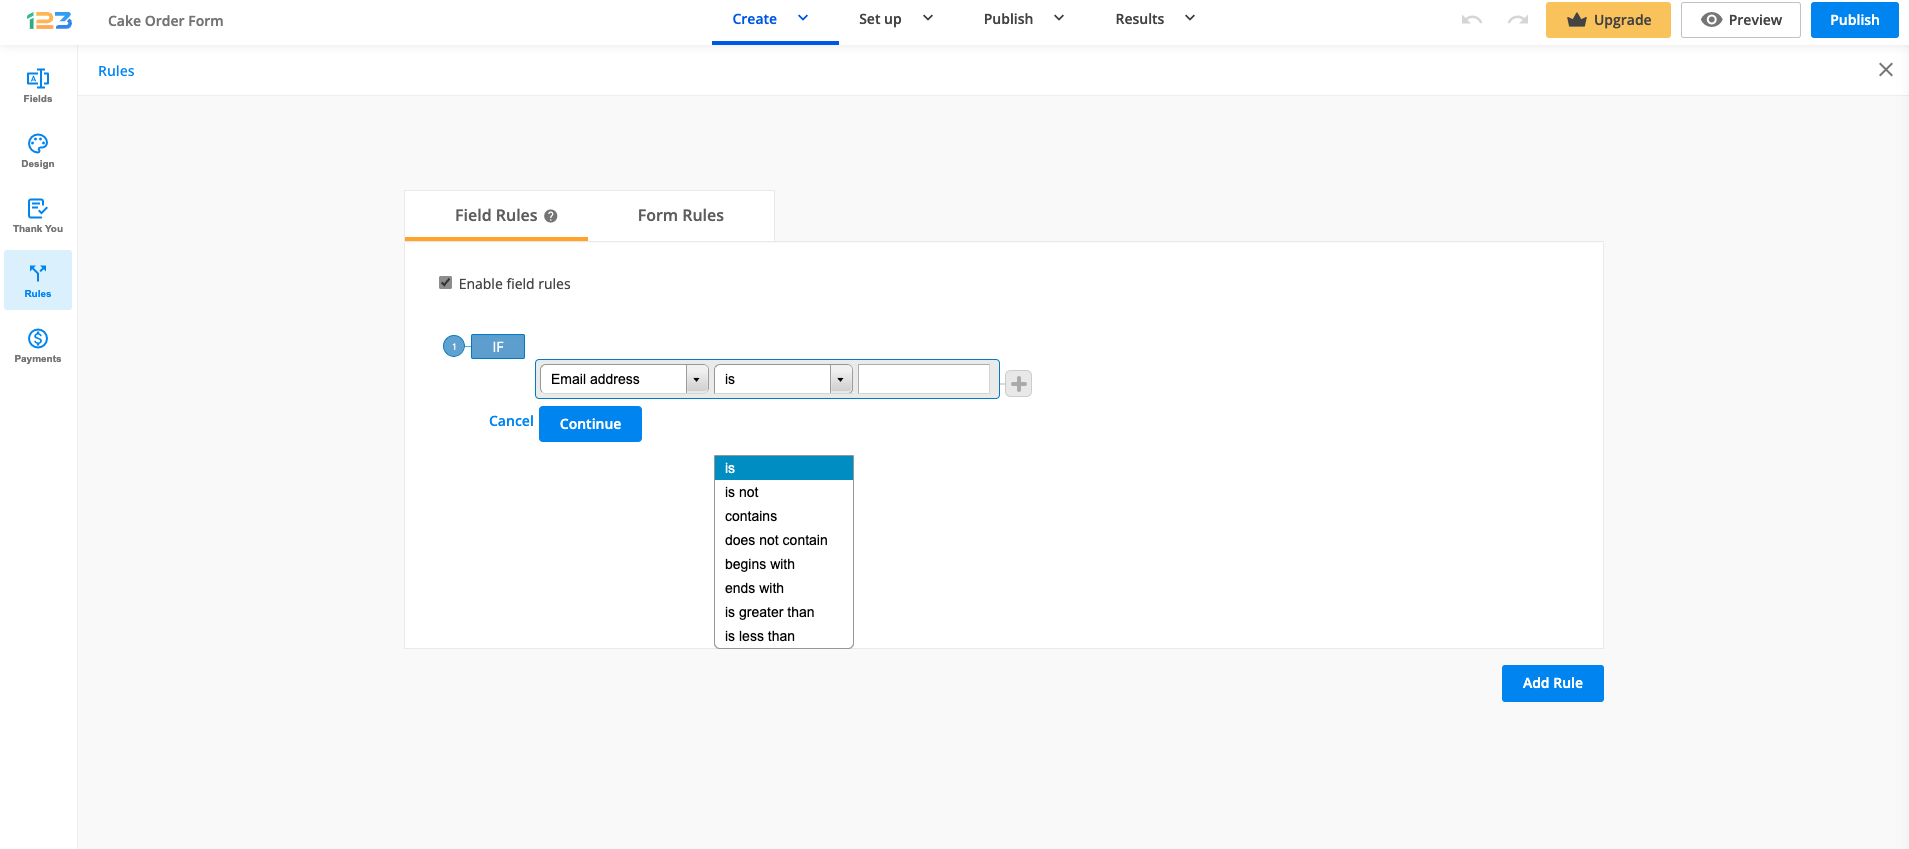
The second dropdown is used to select the operator. For choice fields such as Single choice or Multiple choice, you have a dropdown with the predefined values is checked and is not checked. For input fields, you need to type a value.
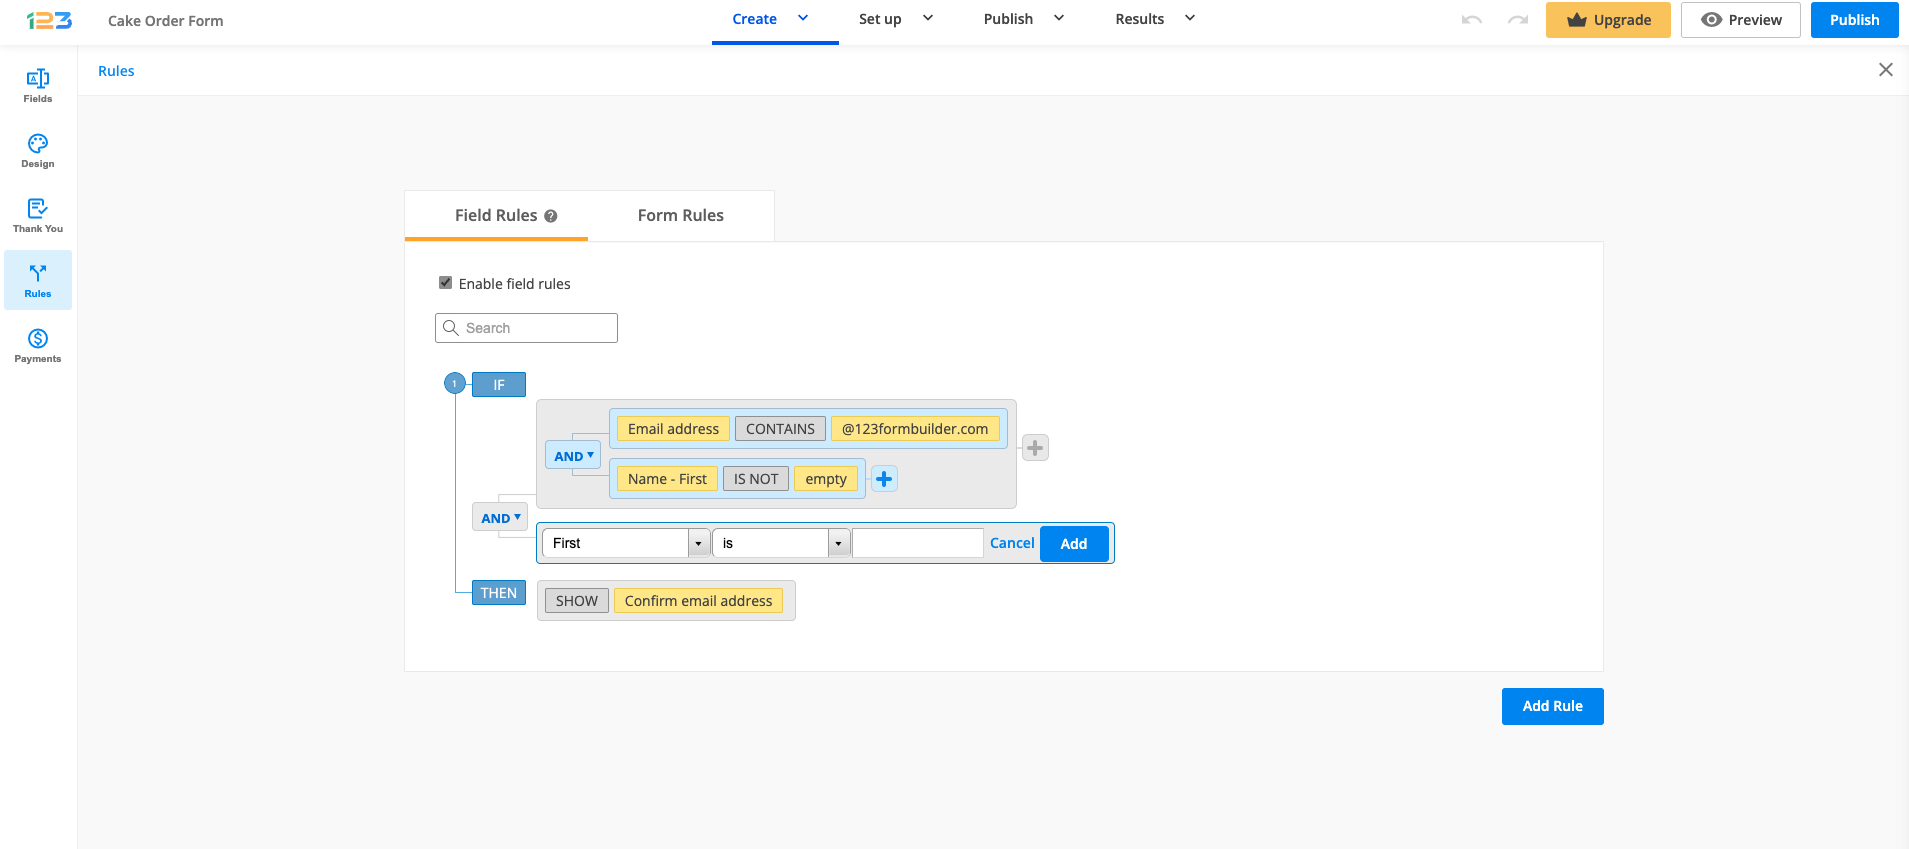
The plus button on the right creates a new condition linked to the previous one through connectors.
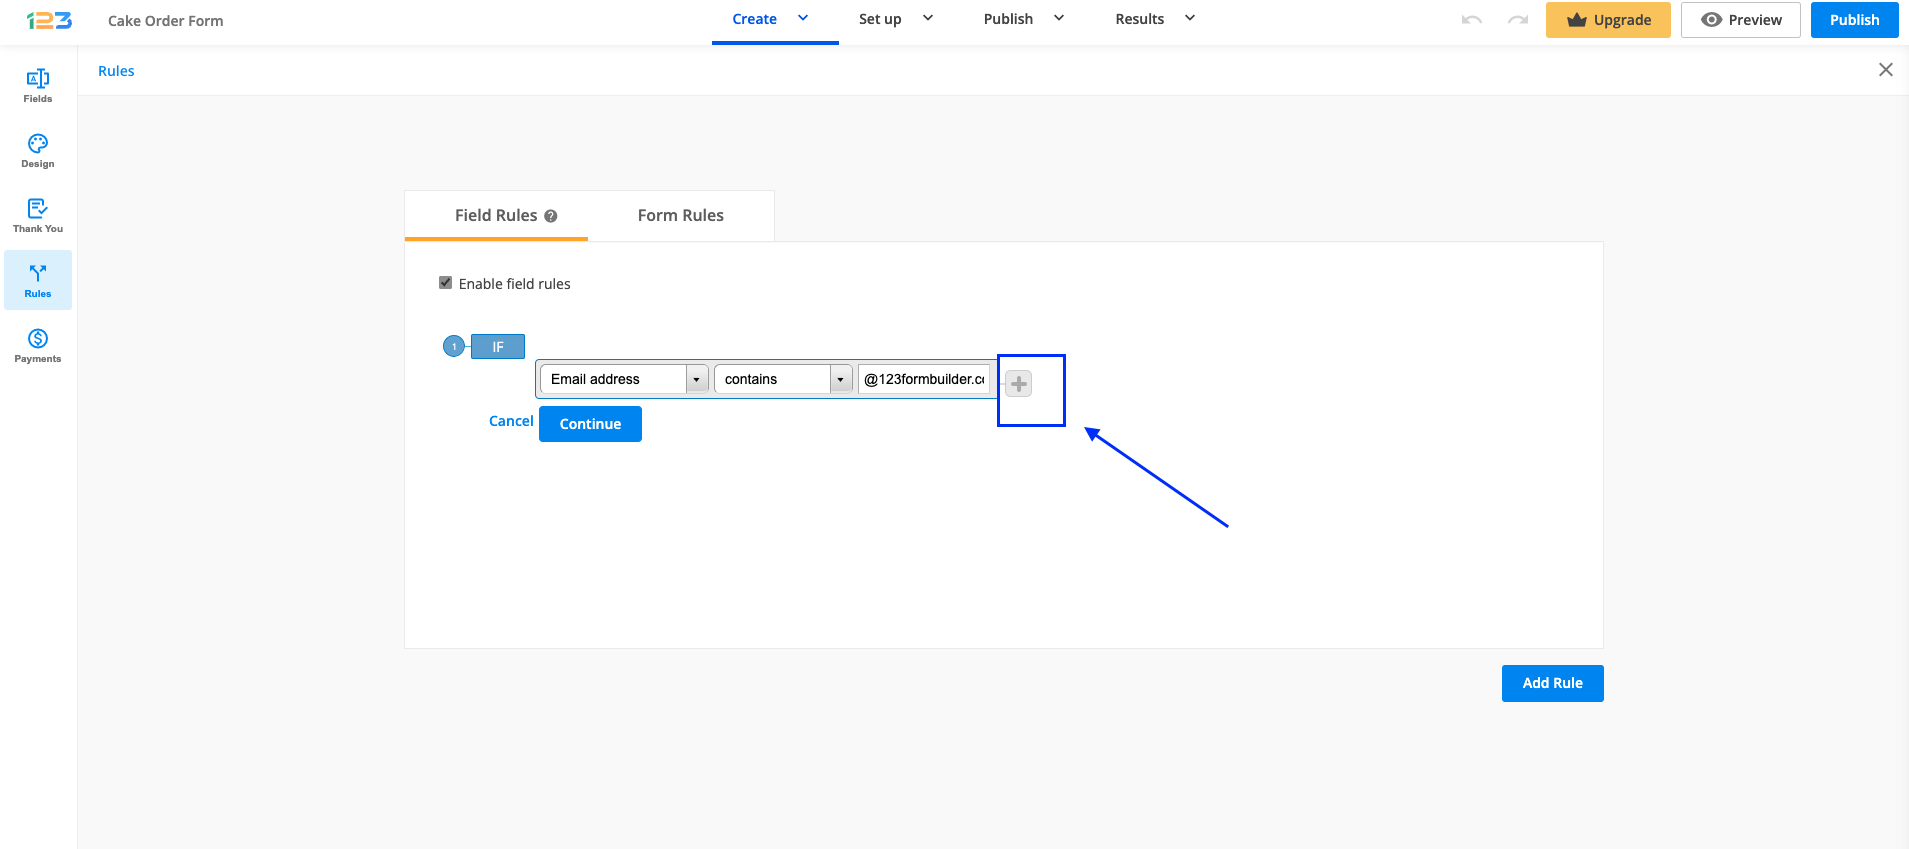
Conditions from the same rule are linked with the connector AND or OR. The plus button will appear next to the last condition of each rule or subrule.
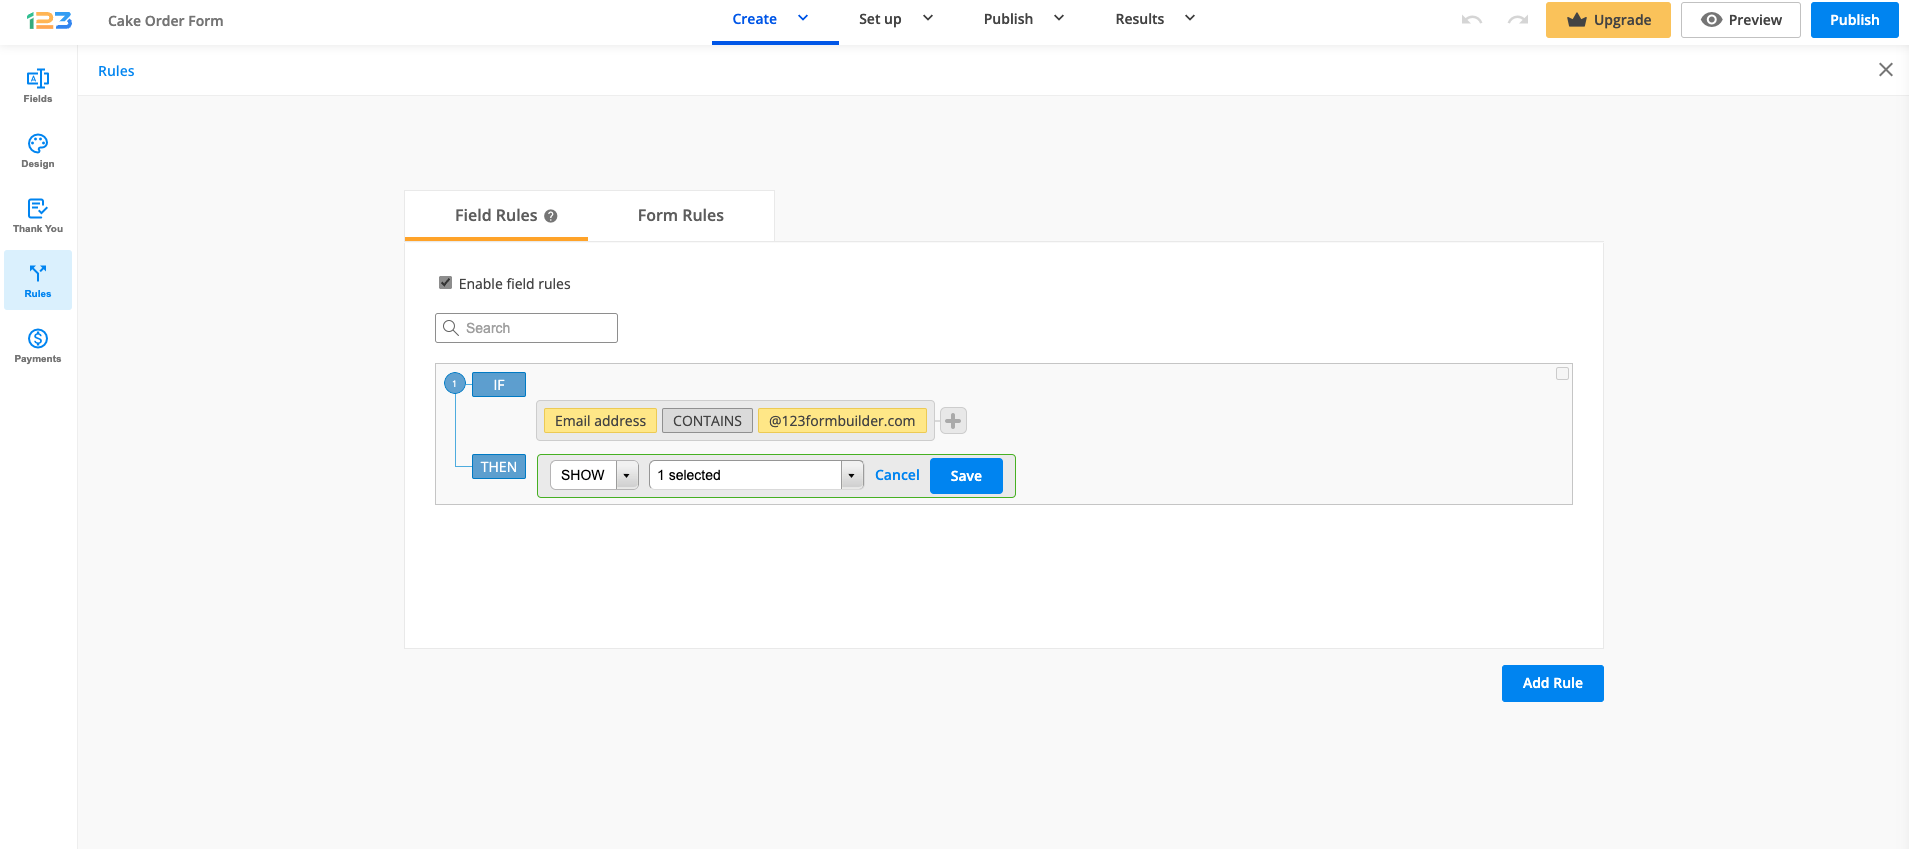
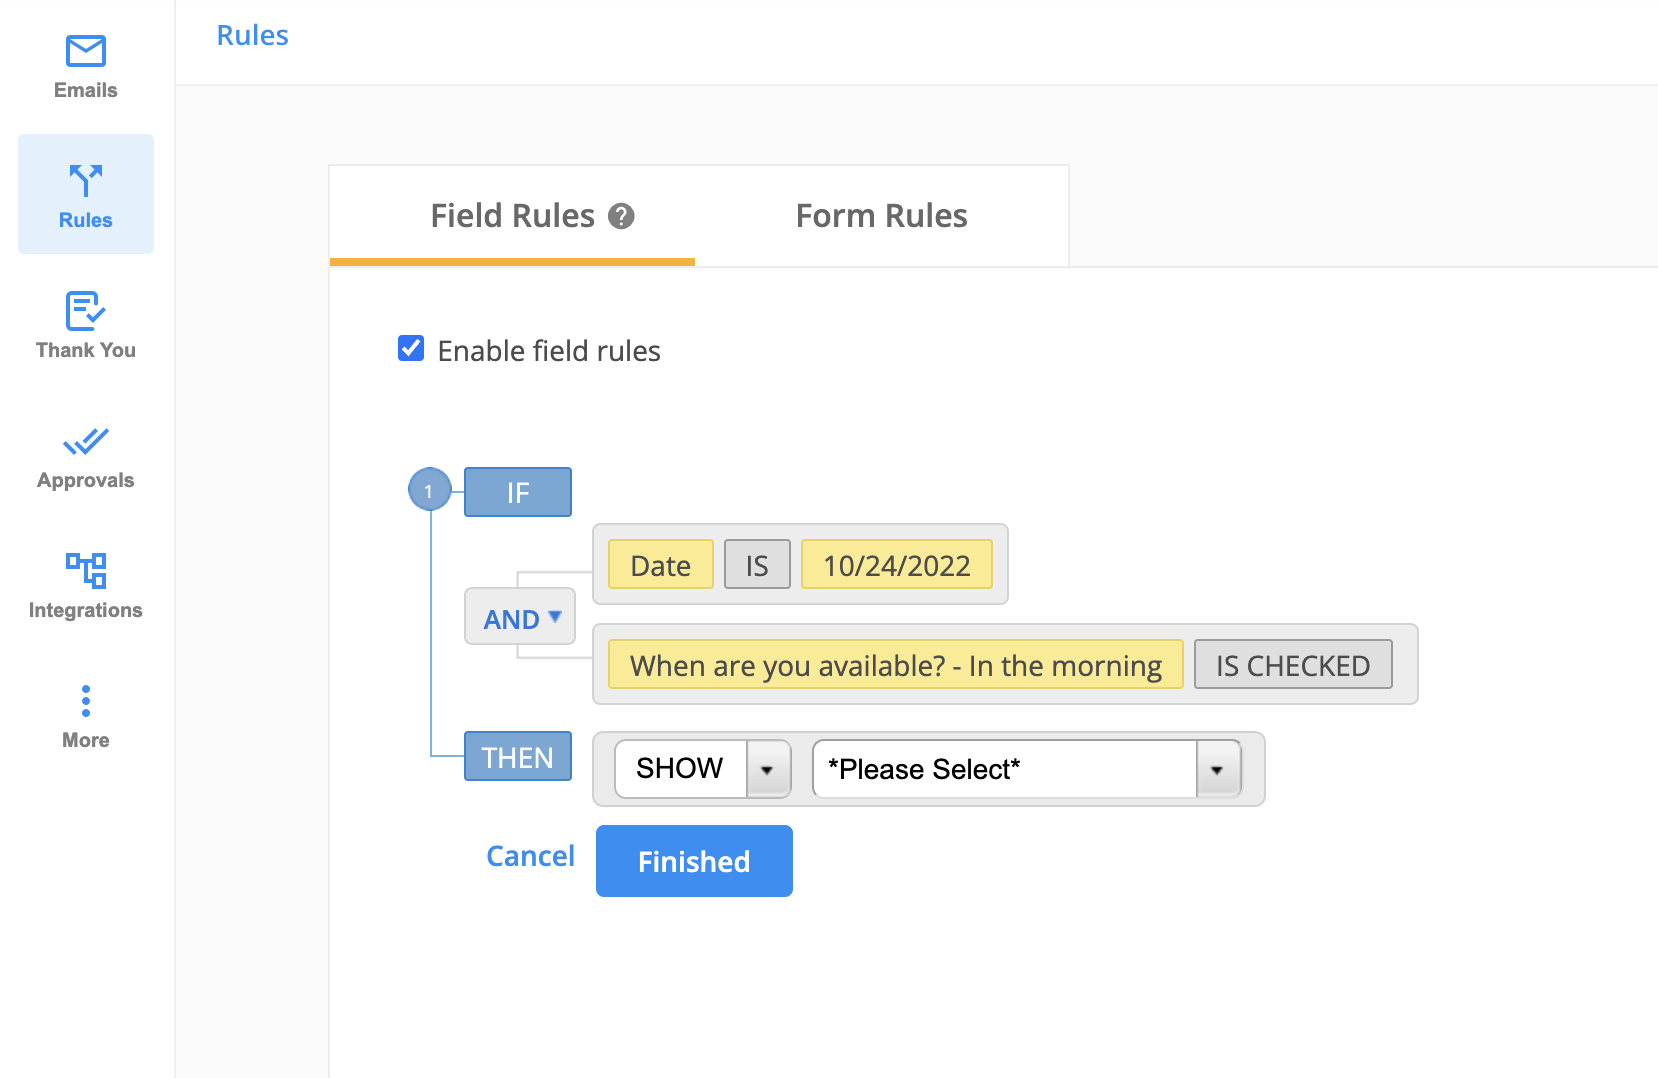
Next, hit Continue and select one of the two existing actions: Show or Hide. In the end, select the field or fields you want to show or hide after the condition has been met on the form.
If you wish to Show or Hide the Multiply field group field, please select the Multiply field group element and all the fields included in it. Otherwise, your rule will not work as expected.
When you need to edit a condition from your rule, hover over it and press the button Edit or Delete if you want to delete it completely.
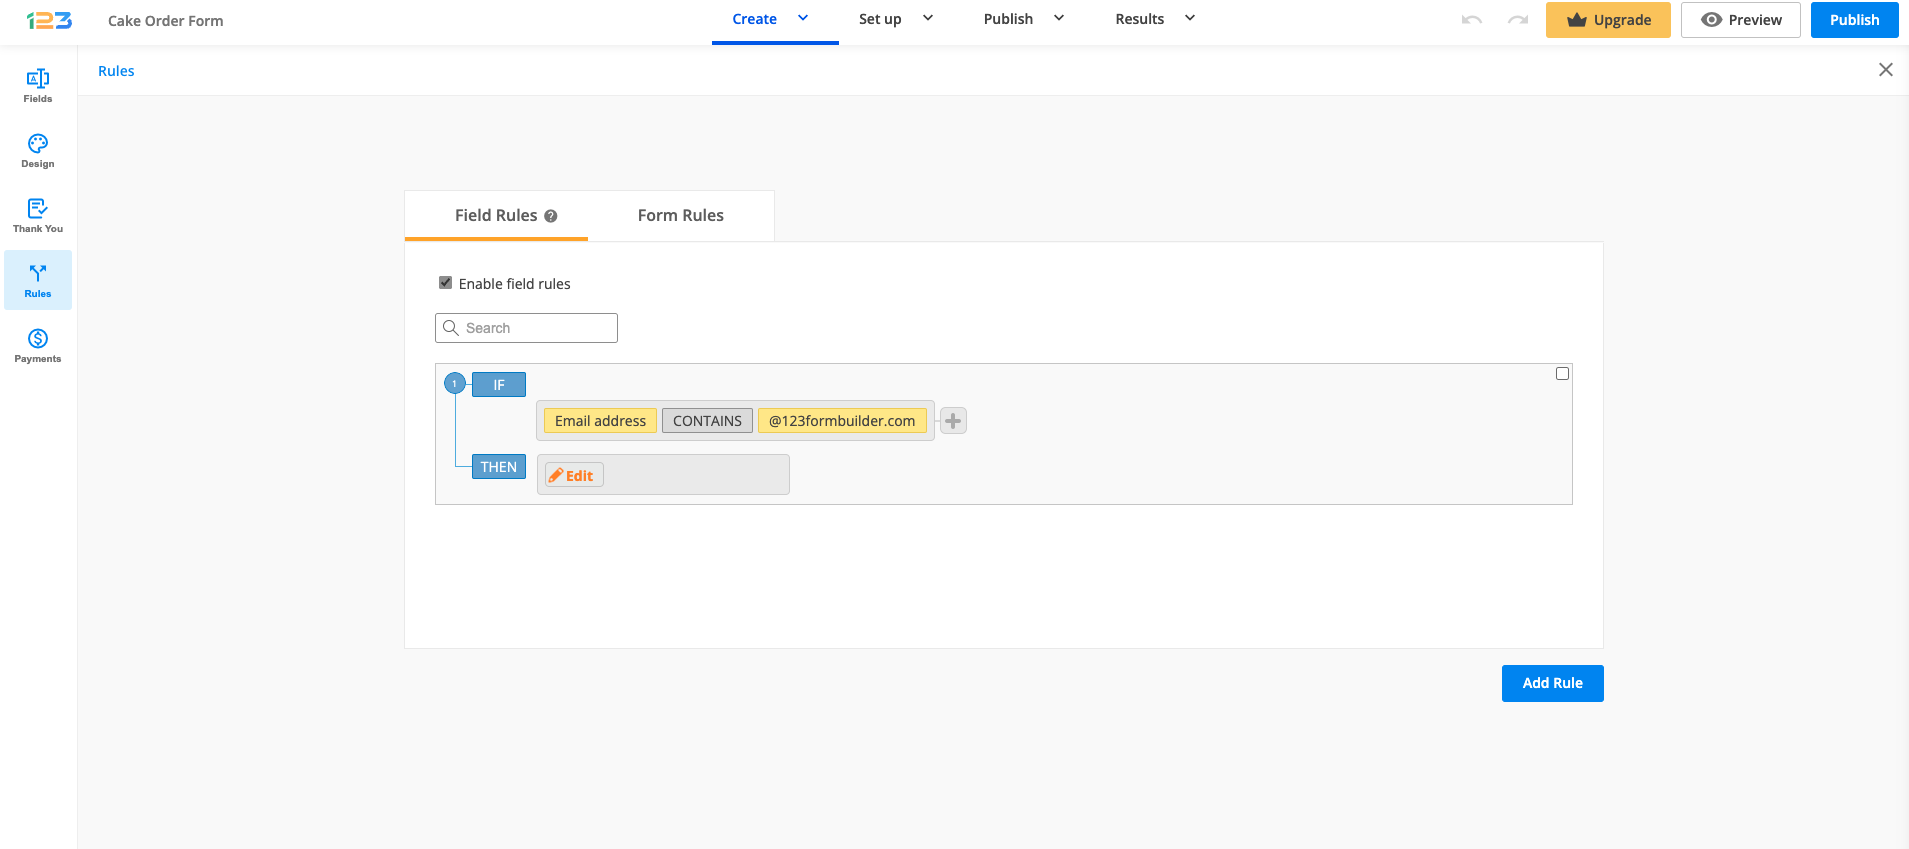
Next to these buttons, you’ll find the Subrule button that creates a subrule within the respective condition.
You can also delete an entire rule by hovering over it and ticking the checkbox on the top right corner. Press Delete on the bottom of the page to delete it or Duplicate to make a copy of the rule. You can select several rules and delete or duplicate them at the same time. Use the Clear selection option to uncheck all rules.
Use the search bar to find the rule you are after. Finally, click the Preview form button to see how conditional logic applies to your online form.
To see more details on how to add rules to your form, you can also check out our short video tutorial:
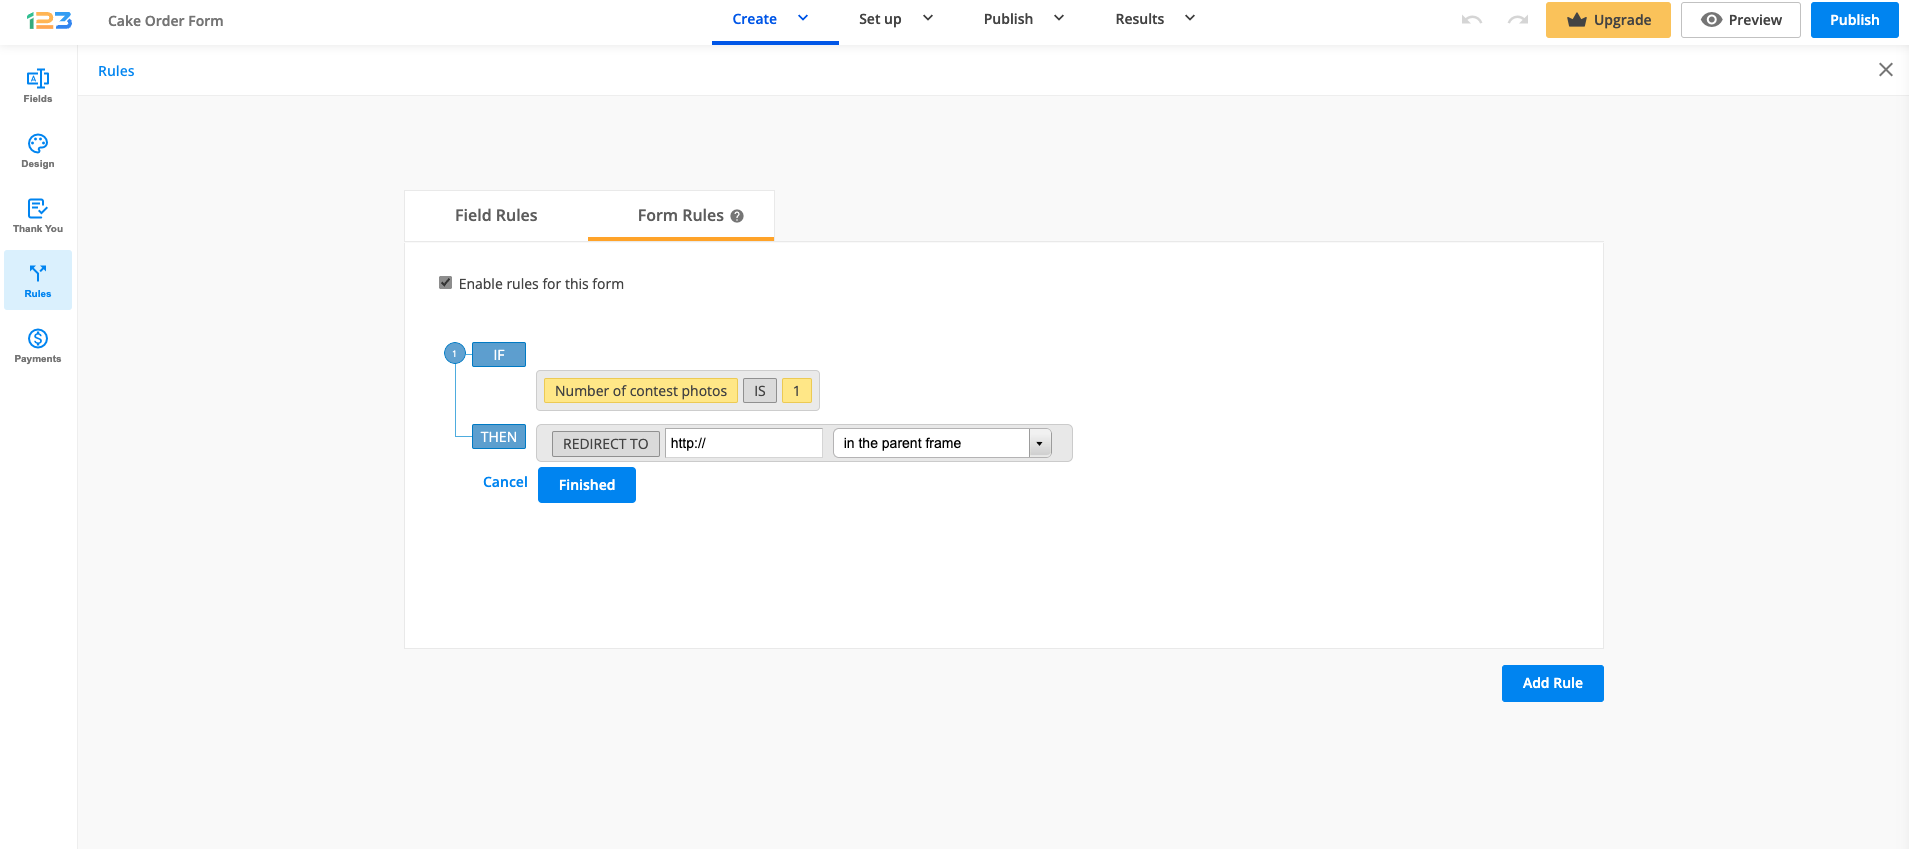
Form rules
Form rules are used if you want to redirect your respondents to a different web page based on their input.
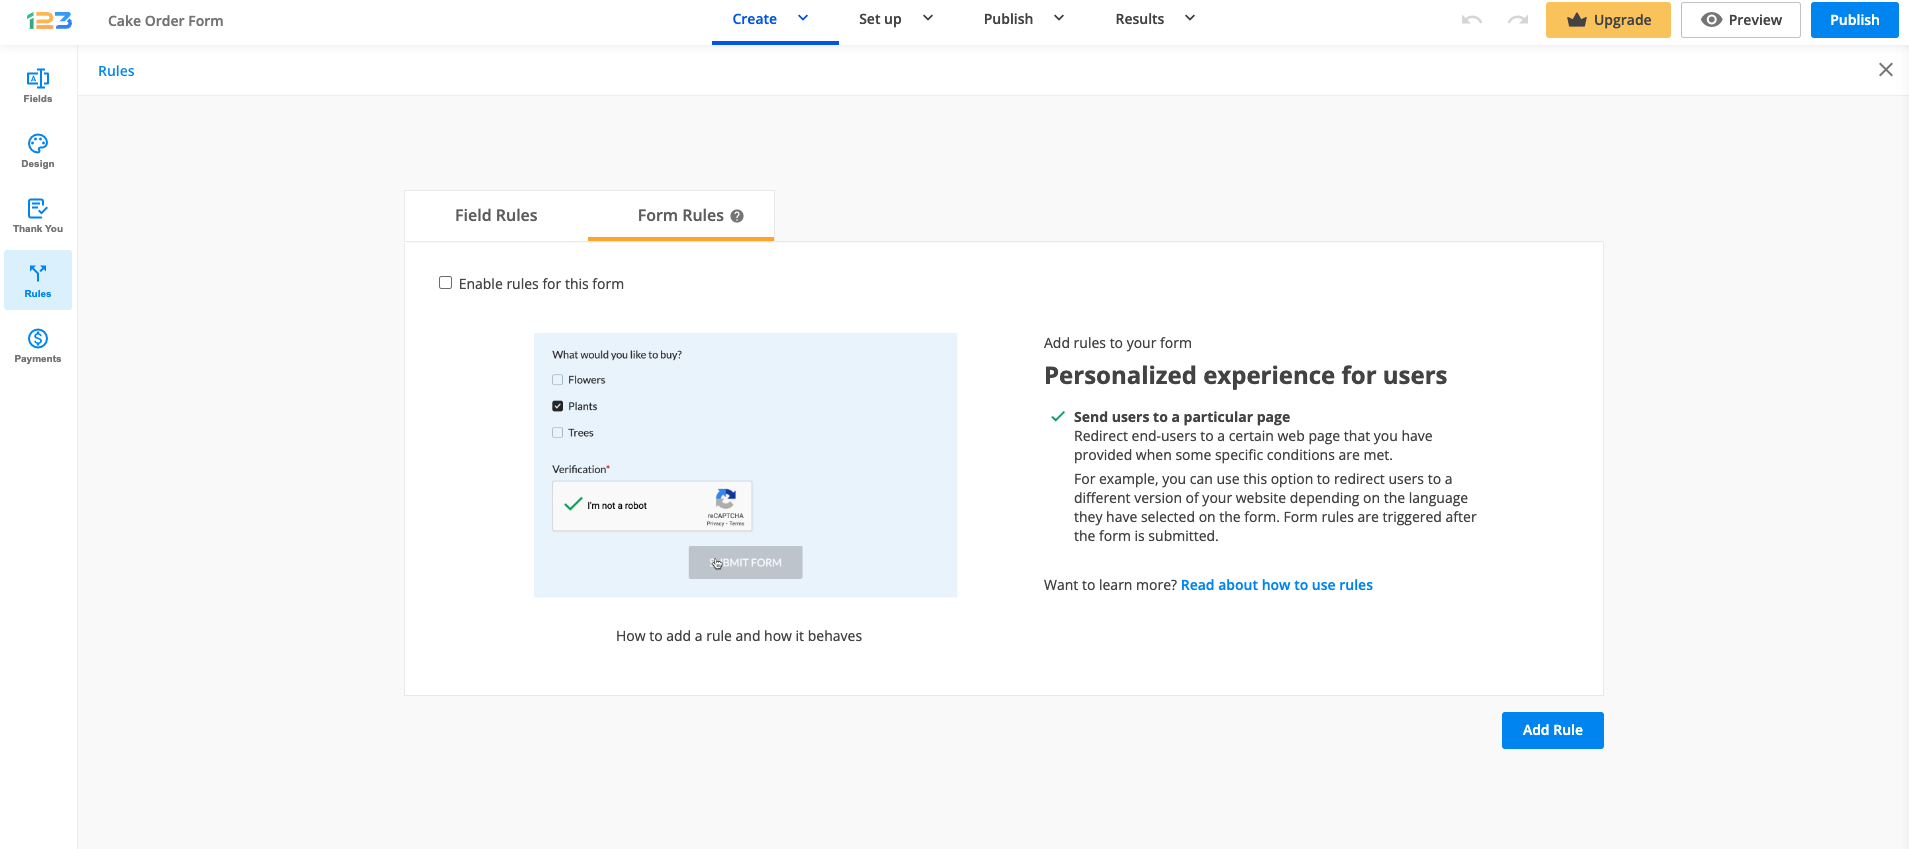
Similar to field rules, you will have to enable form rules, select the field you are interested in and then you have to provide the web page to which your respondents will be redirected after submit.
Related articles
Most Popular
Frequently Asked Questions
Here is a list of the most frequently asked questions. For more FAQs, please browse through the FAQs page.